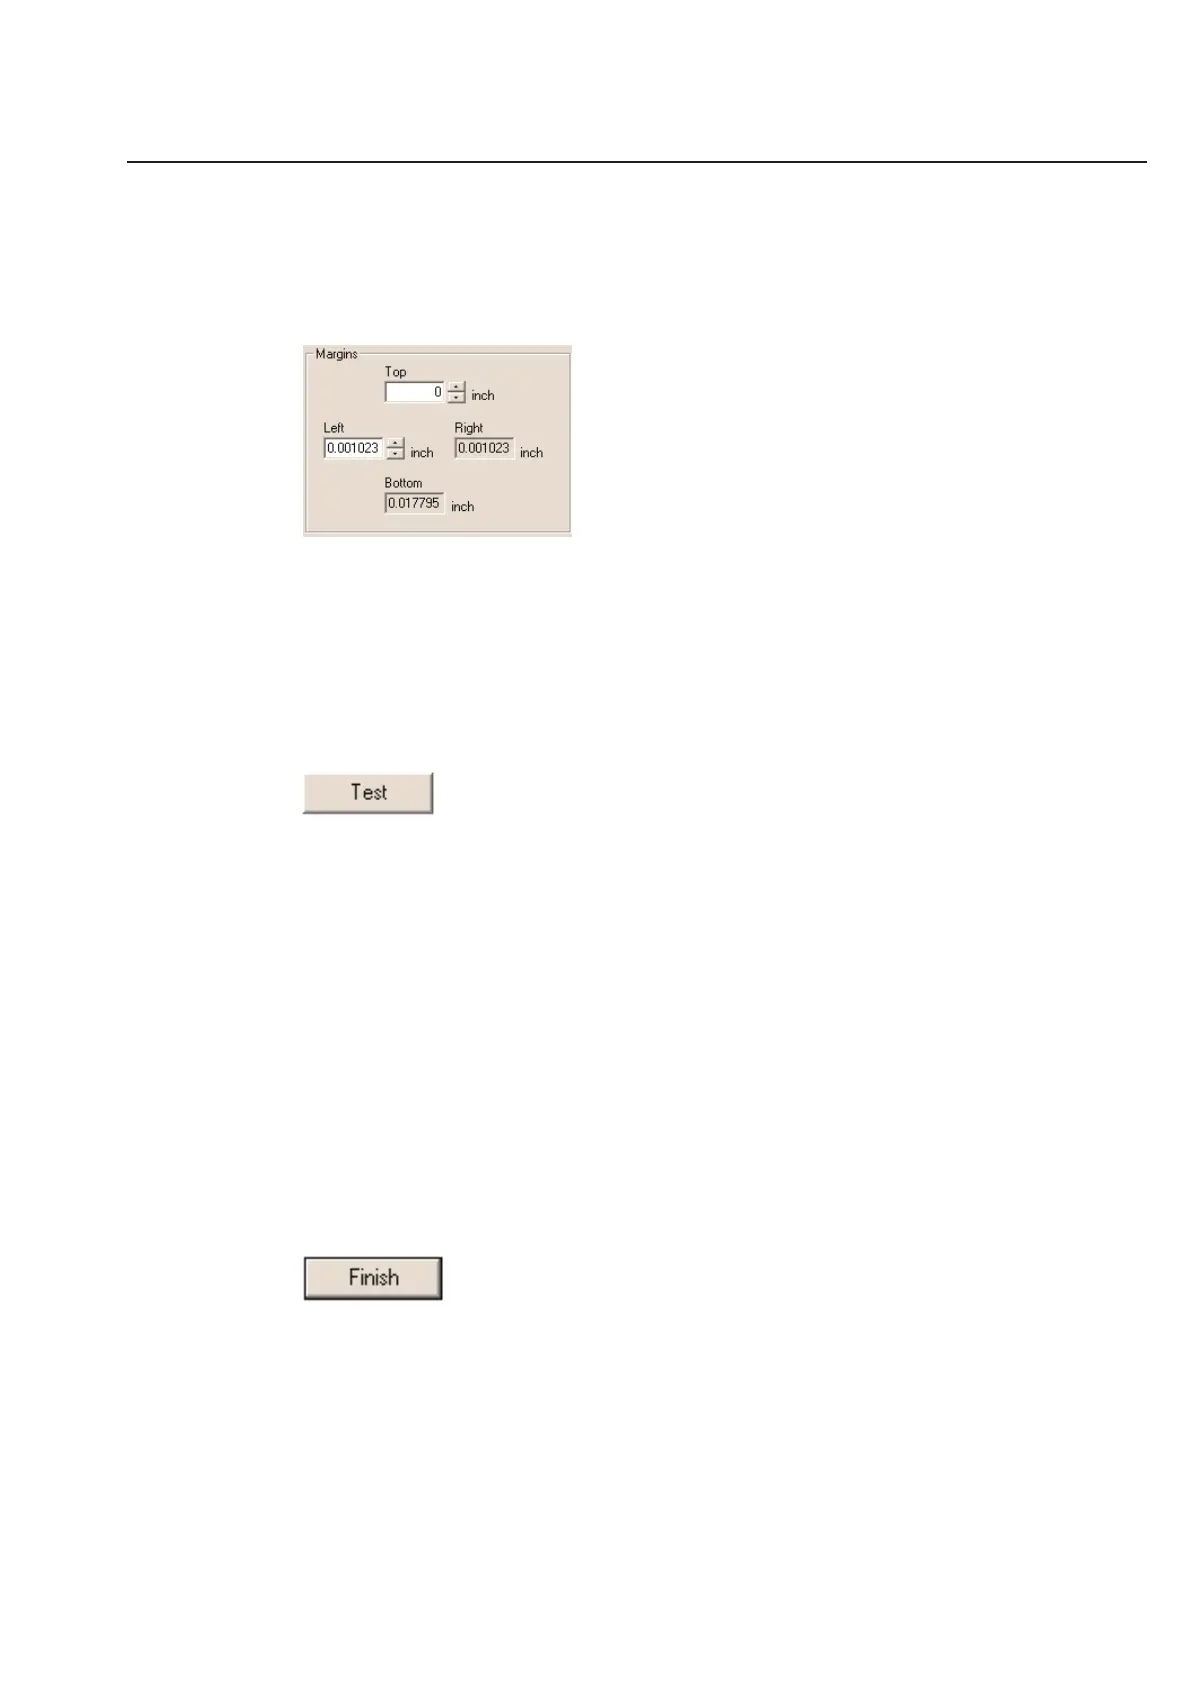
Margins
Margins are used to position labels on the sheet. TagPrint Pro allows you to adjust the Top and Left margins to any
value you would like to use. The Bottom and Right margins are automatically calculated based on the other label
definition information. The amount of Margin space allowed can be calculated by taking the defined page size and
subtracting the label size. You may need to print a number of test labels with different margins to customize the
software to your printer and your labels.
Top Margin - Enter the distance from the top edge of the paper to where the first label starts.
Left Margin - Enter the distance from the left edge of the paper to the left edge of the first label.
Bottom Margin - The bottom margin is automatically calculated based on what you have entered in the “Top
margin” and what you entered in the page size and label size.
Right Margin - The right margin is automatically calculated based on what you have entered in the “Left margin”
and what you entered in the page size and label size.
Testing Your Label Preferences
When you have finished entering all your label information into the Label Guide, you will want to print some test runs
to see if it prints correctly. TagPrint Pro has added the Test function just for this purpose.
Make sure your printer is connected and ready to print (see your printer’s manual for these instructions). When it is,
click Test to print one page.
Note: If you are printing with a dot matrix, laser, or ink jet printer, you may want to load plain paper for a test print
first. This will save you from wasting labels.
This function will print a thin line right at the border of your defined label. This will allow you to quickly and easily see
any errors in the label definition. If you are using a dot matrix, laser, or ink jet printer and you have printed the test on
plain paper, line the label page and your paper page up to one another. Next, hold the labels up to a light. You
should be able to see where the test border lines up with the label. If the test border does not print where you would
like it to, simply go back and change items in the label definition that will correct your problem.
When you are fairly sure your label preferences are close, you may want to try a sheet of labels to verify your settings.
Remember, you do not need to be exact. Your printer will likely vary from page to page anyway and most printing
applications do not require exact tolerances. You should be able to tune the software to within 1/16th of an inch
depending on your printer type.
Completing Your Label Definition
Once you have entered all your label information and printed test pages, you will be ready to finalize your label
definition. You will be able to go back and change your settings later.
Simply click Finish to finalize your settings and save them in the label database. Once you have done this, you will be
taken back to the label selection dialog box.
5-9
Chapter 5: Label Definitions