Chapter 11
11.5. Test Procedure
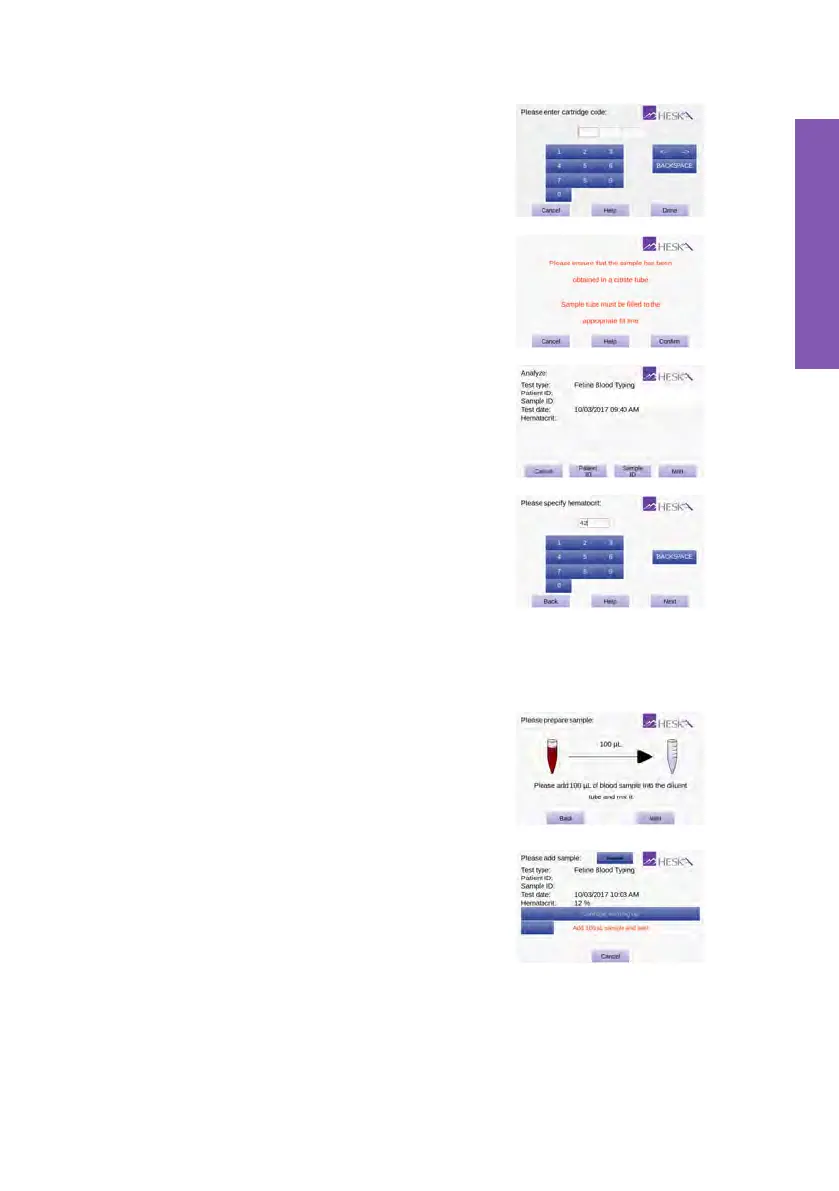
Step 7:
On the on-screen keyboard, enter the cartridge
code (printed on the cartridge pouch label) in
the entry field and touch Done
Step 8:
Touch
Confirm
to acknowledge that the blood
has been obtained in a EDTA test tube and that
the tube was appropriately filled.
Step 9:
Touch
Patient ID
and enter the necessary infor-
mation using the on-screen keyboard. Touch
Done
to confirm. Entering Sample ID is op-
tional but recommended to aid in finding the
result in the Analyzer’s database.
Step 10:
Enter the hematocrit value in percent using the
on-screen keyboard and touch
Next
. Based
on the specified hematocrit the Analyzer will
calculate the amount of blood needed to be
added to the diluent tube in order to obtain the
correct dilution of the sample for the test.
Step 11:
Ensure that no diluent is caught at the top of the pre-filled diluent tube by
tapping the tube on a hard surface prior to piercing the lid. Using the supplied
pipette tip, puncture the foil on the diluent tube.
Step 12:
Dilute the sample following the on-screen in-
structions. Add the amount of blood stated on
the screen into one of the supplied tubes and
mix it with the diluent using the
100 µL
fixed
volume pipette. Ensure proper mixing by aspi-
rating a couple of times using the pipette.
Step 13:
Touch
Next
to continue. The
Cartridge Warm-
ing Up screen opens.
It takes approximately 90 seconds for the An-
alyzer to warm up the test cartridge to
99 °F
or
37
◦
C
depending on the environment’s tem-
perature. Lower and higher temperatures may
change the warm up time.
93