Chapter 10
10.5. Test Procedure
Step 4:
Remove the cartridge and pipette tip from the pouch and the pre-filled tube
with diluent from the kit box.
Step 5:
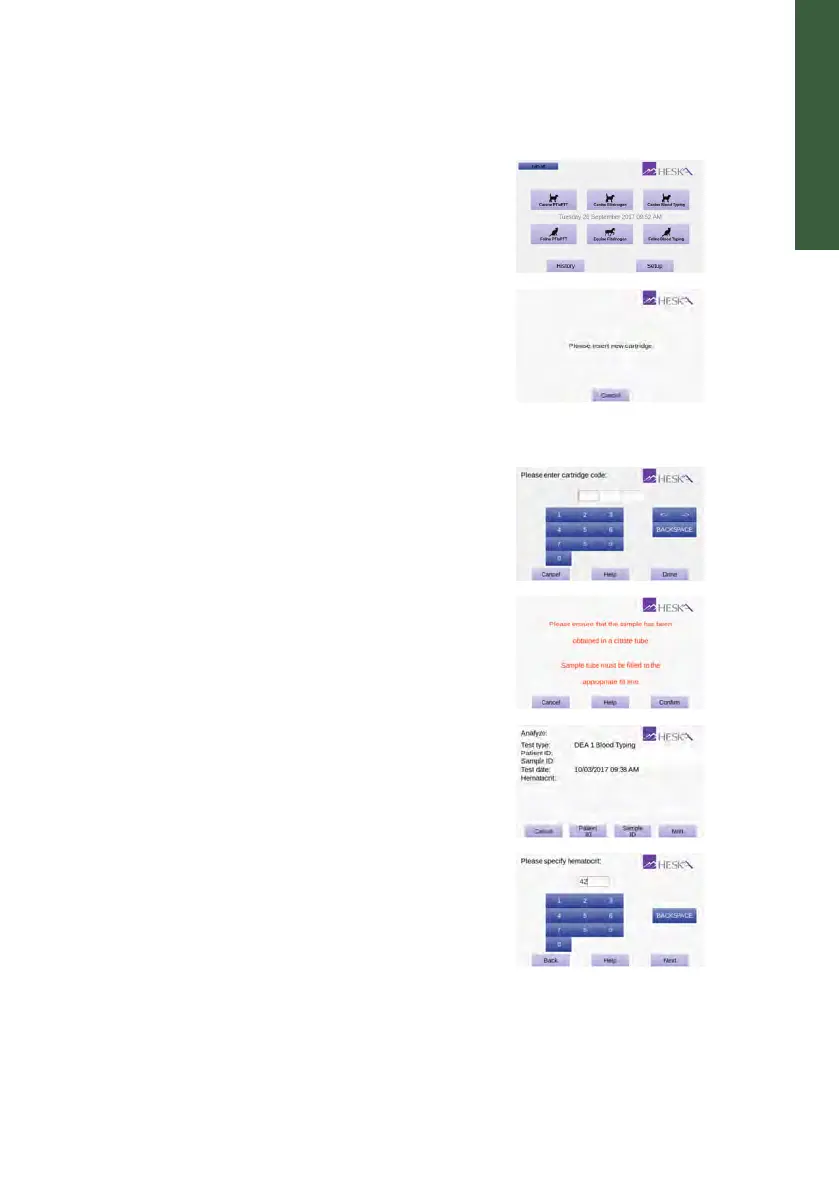
From the Home Screen, touch the
Canine
Blood Typing button to start the test.
Step 6:
When the message Please insert new cartridge
flashes on the screen, insert the test cartridge
completely into the cartridge slot on the front
of the Analyzer.
The cartridge must have the label facing up-
ward and the sample well sticking out of the
Analyzer.
Step 7:
On the on-screen keyboard, enter the cartridge
code (printed on the cartridge pouch label) in
the entry field and touch Done
Step 8:
Touch
Confirm
to acknowledge that the blood
has been obtained in a EDTA test tube and that
the tube was appropriately filled.
Step 9:
Touch
Patient ID
and enter the necessary infor-
mation using the on-screen keyboard. Touch
Done
to confirm. Entering Sample ID is op-
tional but recommended to aid in finding the
result in the Analyzer’s database.
Step 10:
Enter the previously measured hematocrit
value in percent using the on-screen keyboard.
Based on the specified hematocrit the Heska
Element COAG
™
Analyzer will calculate the
number of diluent drops needed for correct di-
lution of the sample.
Touch Next to continue.
83