WARNING:
·
Select a well-ventilated area free of
combustible materials.
·
Always let the exhaust system cool before
performing this operation.
·
Do not start the engine when removing the
tailpipe from the muffler.
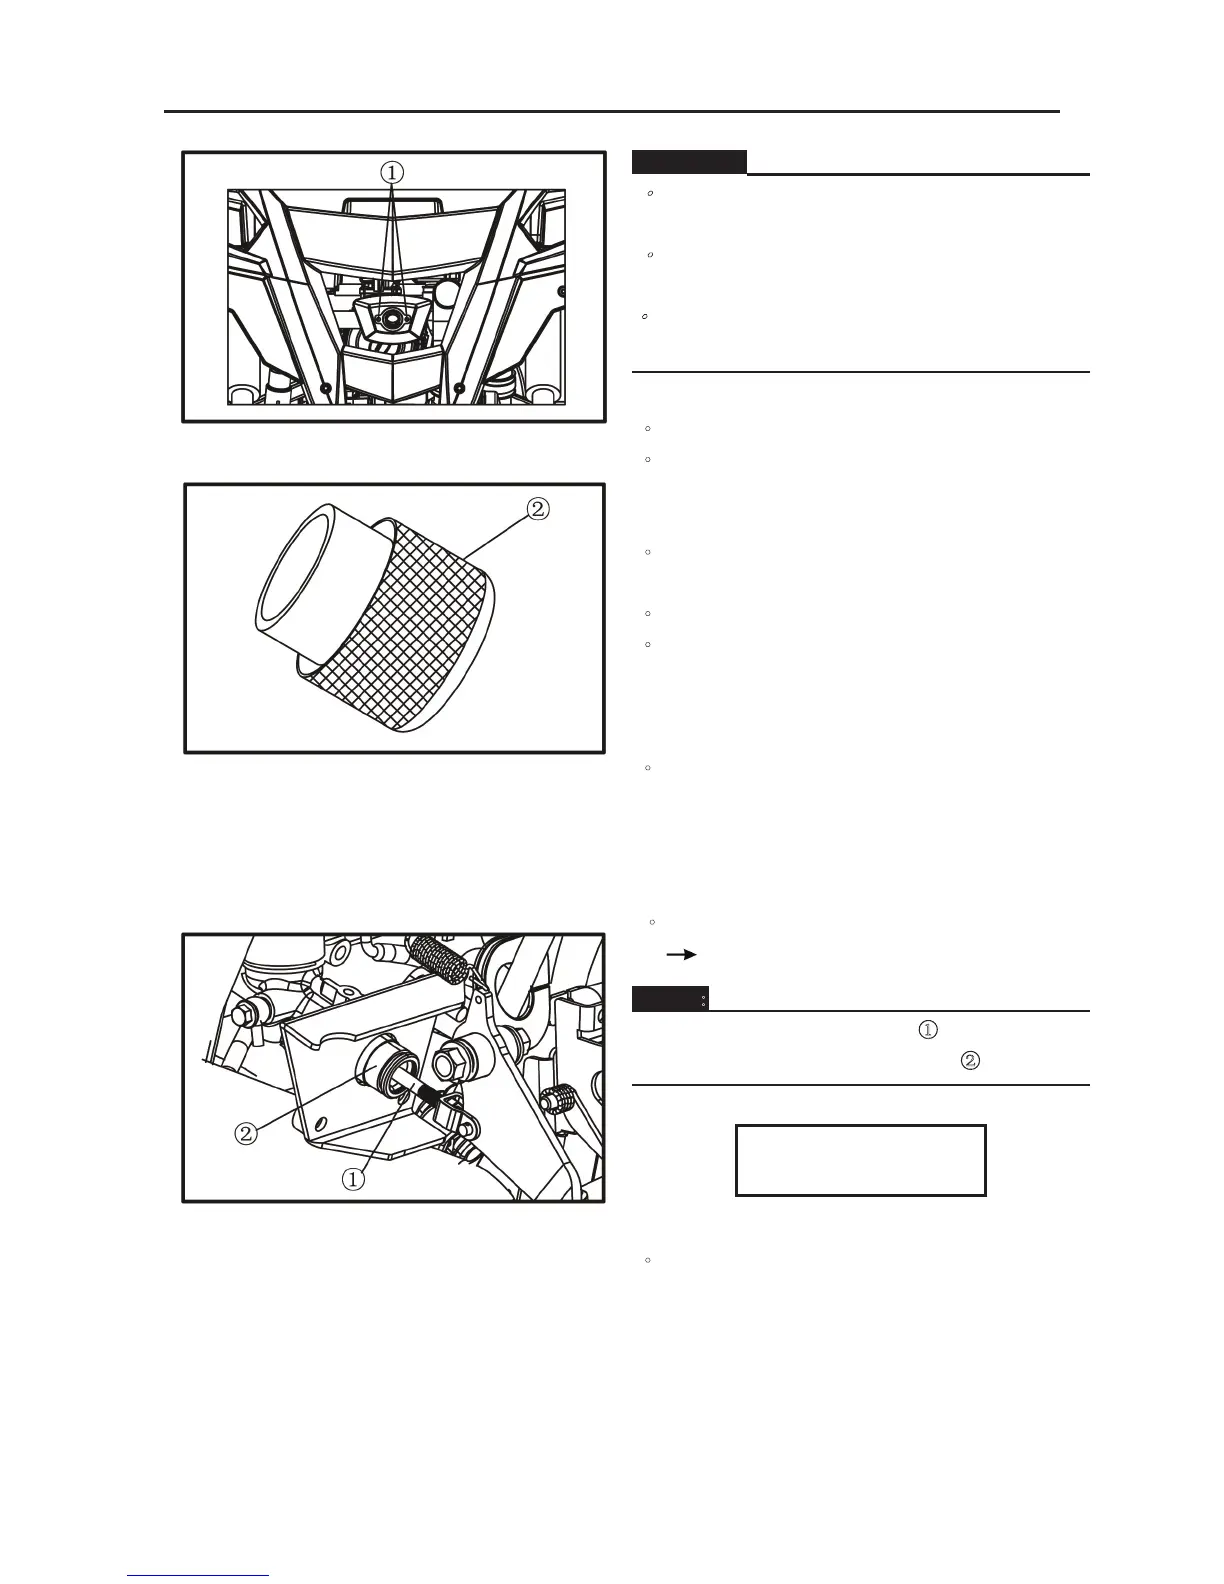
3. Remove:
·
Remove the bolts .①
·Remove the tailpipe ② by pulling it out of the
muffler.
4. Install:
·Insert the tailpipe into the muffler and align the ②
bolt holes.
·Insert the bolt 1 and tighten it.
·
Start the engine and rev it up approximately
twenty times while momentarily creating exhaust
system back pressure by blocking the end of the
muffler with a shop towel.
·Stop the engine and allow the exhaust pipe to
cool.
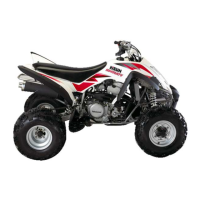
ADJUSTING THE BRAKE PEDAL
1. Check:
·brake pedal free play a Out of specification
adjust.
NOTE:
The end of the brake rod should lightly ①
contact the brake master cylinder ②
Brake pedal free play
0 mm (0.0 in)
3. Adjust:
·brake pedal free play
a. Loosen the locknut ③
MAINTENCE AND ADJUSTMENT OF THE UTV
- 101 -
b. Turn brake rod ① in or out until the correct free
play is obtained.
Turning in Free play is increased.
Turning out Free play is decreased.
c. Tighten the locknut to specification.
Locknut
17 Nm (1.7 m · kg, 12 ft · lb)
NOTE:
Make sure that there is no brake drag on the
front or rear wheels.
CHECKING THE BRAKE FLUID LEVEL
1. Place the vehicle on a level surface.
NOTE:
When checking the brake fluid level, make sure
that the top of the brake fluid reservoir top is
horizontal.
2. Lift the hood up.
3. Check:
·brake fluid level Fluid level is under “MIN” ①
line
Fill up.
NOTE:
Brake fluid may erode painted surfaces or
plastic parts. Always clean up spilled fluid
immediately.
WARNING
:
·
Use only the designed quality brake fluid:
otherwise, the rubber seals may deteriorate,
causing leakage and poor brake
performance.
·
Refill with the same type of brake fluid: mixing
fluids may result in a harmful chemical
reaction and lead to poor performance.
·
Be careful that water does not enter the master