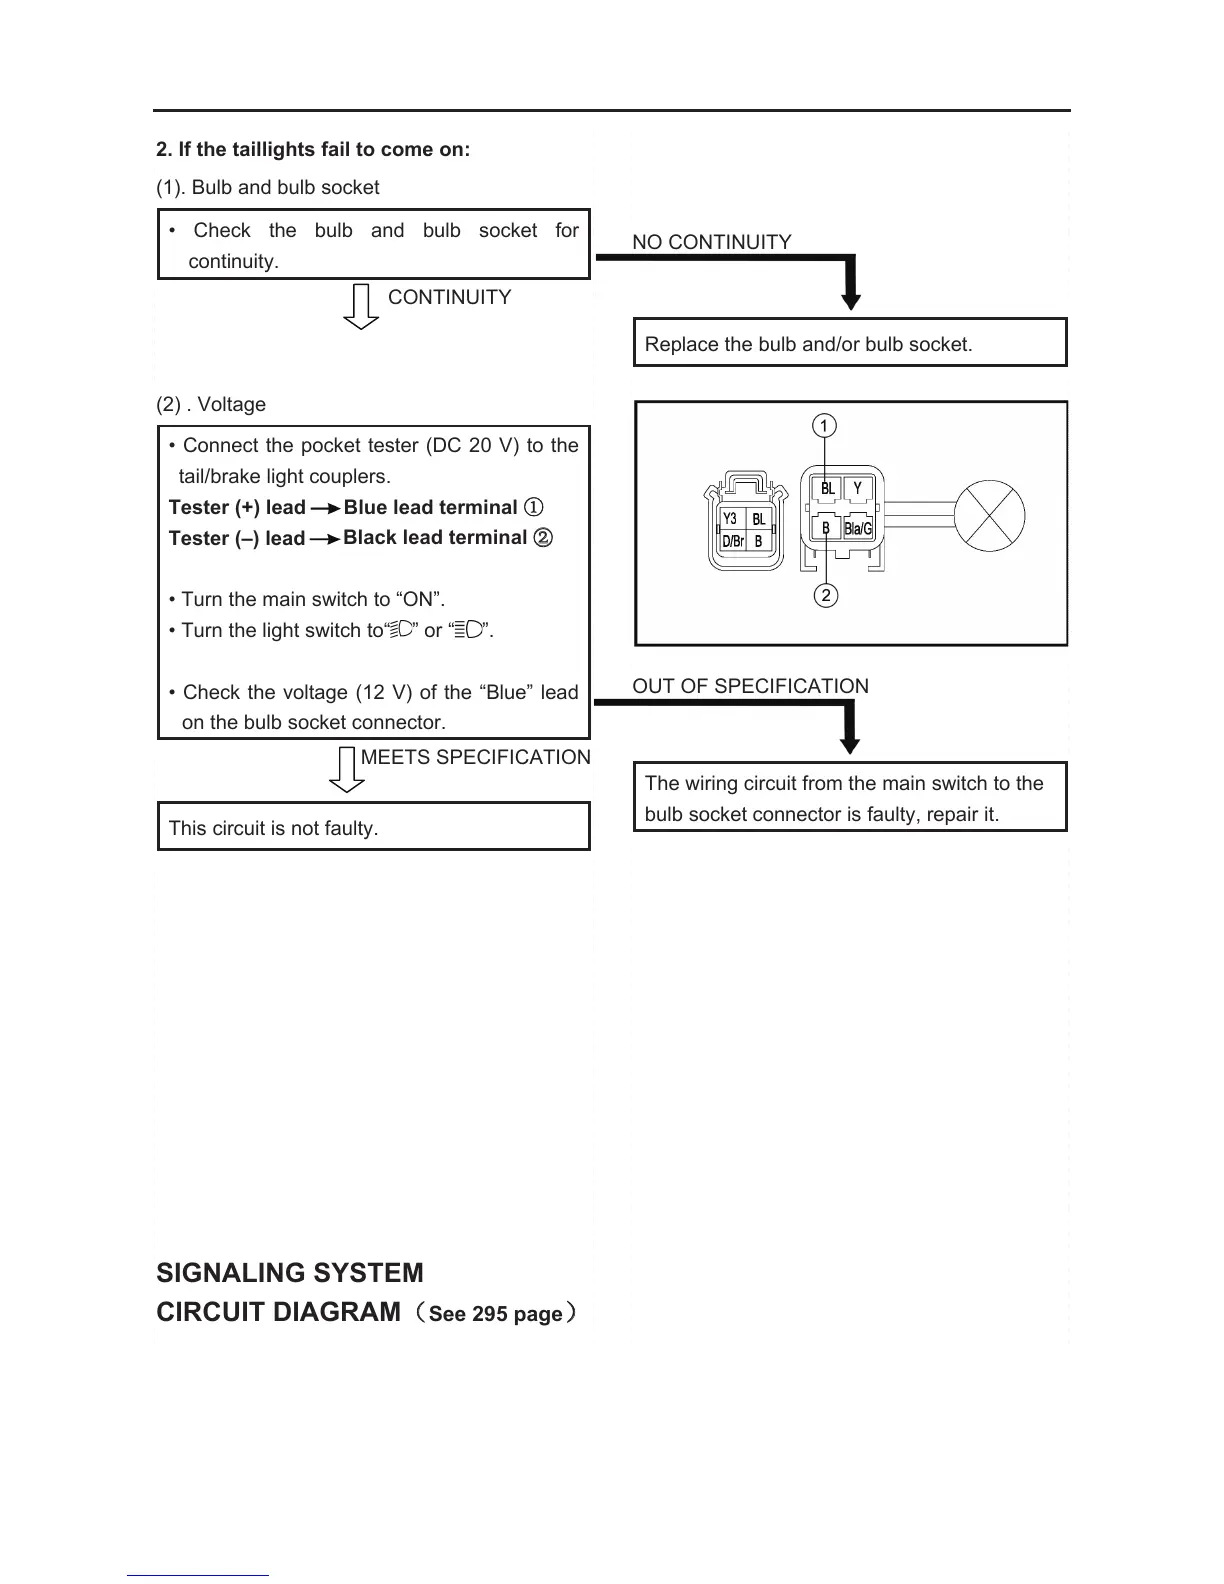
2. If the taillights fail to come on:
(1). Bulb and bulb socket
• Check the bulb and bulb socket for
continuity.
CONTINUITY
(2) . Voltage
• Connect the pocket tester (DC 20 V) to the
tail/brake light couplers.
Tester (+) lead
Blue lead terminal ①
Tester (–) lead
Black lead terminal ②
• Turn the main switch to “ON”.
• Turn the light switch to“
” or “ ”.
• Check the voltage (12 V) of the “Blue” lead
on the bulb socket connector.
MEETS SPECIFICATION
This circuit is not faulty.
SIGNALING SYSTEM
CIRCUIT DIAGRAM(
See 295 page)
NO CONTINUITY
Replace the bulb and/or bulb socket.
OUT OF SPECIFICATION
The wiring circuit from the main switch to the
bulb socket connector is faulty, repair it.
ELECTRICAL COMPONENTS
- 253 -
Procedure
Check:
1. Battery
2. Main switch
3. Wiring connections (the entire signal system)
1. Battery
• Check the battery condition. Refer to
“CHECKING AND CHARGING THE
BATTERY” in chapter 3.
Open-circuit voltage
12.8 V or more at 20 °C (68 °F)
CORRECT
2.Main switch
Refer to “CHECKING THE SWITCH”.
CORRECT
3. Wiring connections
• Check the connections of the entire signal
system. Refer to “CIRCUIT DIAGRAM”.
CORRECT
Check the condition of each of the signal
system’s circuits. Refer to “CHECKING THE
SIGNAL SYSTEM”.
NOTE:
• Remove the following part(s) before
troubleshooting:
1. Console
2. Front frame
3. Front pedal
• Use special tool(s) for troubleshooting.
INCORRECT
• Clean the battery terminals.
• Recharge or replace the battery.
INCORRECT
Replace the main switch
POOR CONNECTION
Properly connect the signal system.
TROUBLESHOOTING
IF A BRAKE LIGHT, AN INDICATOR LIGHT, OR THE WARNING LIGHT FAILS TO COME ON: