MX8000 Installation and Operation Guide
5–26
5.4.5.3 Set the Event Release Time
Used to define the maximum amount of time (in seconds) that the receiver will hold an event in memory
prior to sending it to automation, VFD, and printer. The time begins at the beginning of the call or on an
acknowledgement.
Notes:
•
If the Event Release setting is "greater" than the Call Hang-Up setting (see page5–49), the receiver will not
disconnect the line (panel) until the Event Release time has expired.
•
The actual amount of time before the receiver disconnects a line may at times be greater than the actual
programmed value for Call Hang-Up Time. An event in progress (Event Release) has to complete before the
call hang-up takes affect.
1. Enter program mode. (See Section 5.1.)
2. Press
1
for general options.
3. Press
5
for message queue options.
4. Press
until the display flashes on the Event Release field.
5. Enter the event release time (001 or 020 to 120) in seconds.
6. Press
ENTER
MENU
.
To Exit:
Press
until you return to the main menu.
5.4.6 Slave List
Through the slave list menu, you can add a slave receiver, view a
slave, or delete a slave.
Notes:
•
For this menu to be available, the receiver being programmed
must be a master receiver as detailed in Section 5.4.4.2.
•
The slave ID number must be different than the master
receiver ID number and also must be different than any other
slave receiver ID number that is reporting to the master
receiver.
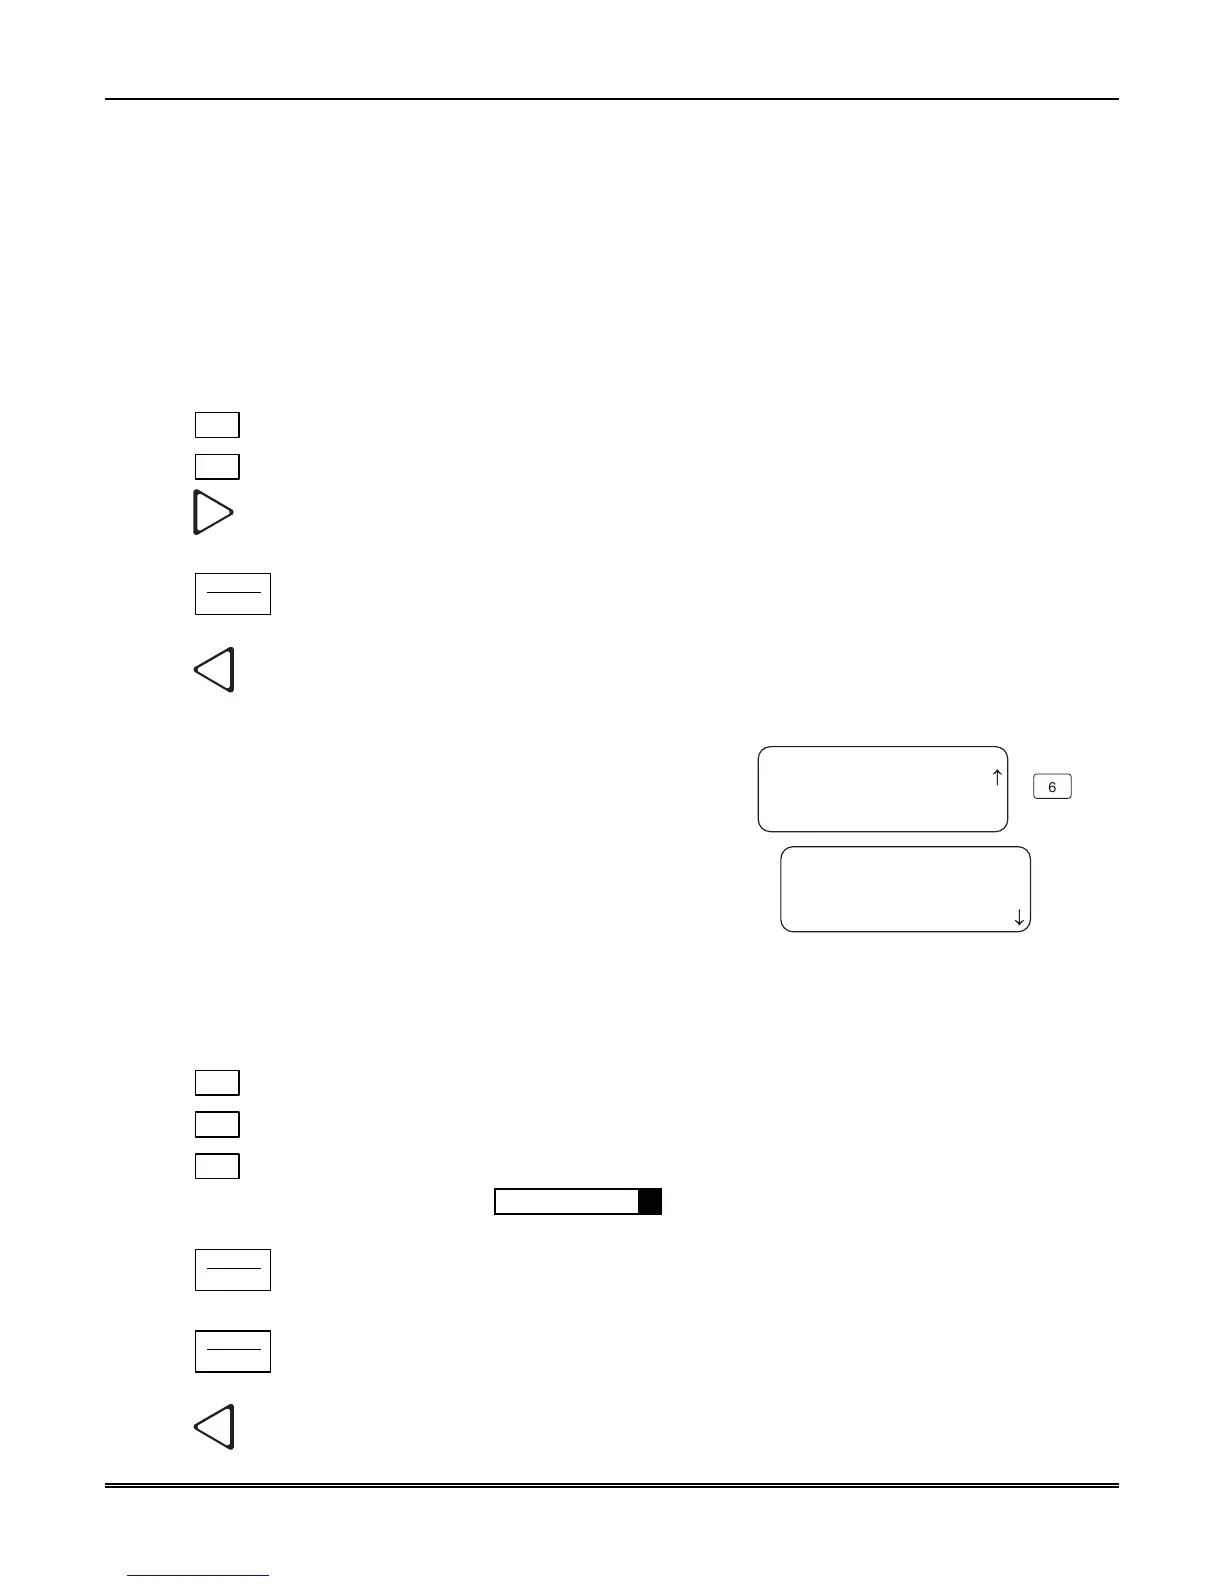
<General Options>
<Slave ID's>
1=Add SLave
2 View Slave
3 Delete Slave
6
6=Slave List
7 Virtual Receiver
¯
< Exit Menu
Figure 5–10: Slave List Display
5.4.6.1 Add Slave
To add a slave to a master receiver:
1. Enter program mode. (See Section 5.1.)
2. Press
1
for general options.
3. Press
6
for slave list options.
4. Press
1
to select add slave.
5. The receiver will display the message: Enter Slave #: 00
6. Enter a 2-digit slave ID number.
7. Press
ENTER
MENU
.
8. To define a second slave receiver, enter second 2-digit slave ID number.
9. Press
ENTER
MENU
.
To Exit:
Press
until you return to the main menu.