Section 4 – Operation
4–13
2. Press the
ENTER
MENU
button to view the main menu items.
3. Press
6
for the printer menu. (See Figure 4–12.)
4. Press
1
for print report menu. (See Figure 4–13.)
5. Press
2
to print the system history.
6. Press
to exit menu.
How to Print System Configuration
Follow these steps to print the system configuration:
1. Log on to the receiver (see Section 4.4.4 for log on
procedure).
2. Press the
ENTER
MENU
button to view the main menu
items.
3. Press
6
for the printer menu. (See Figure 4–
12.)
4. Press
1
for print report menu. (See Figure 4–
13.)
5. Press
3
to view system configuration options.
See Figure 4–15.
6. Press the
or button to move through
the system configuration print choices.
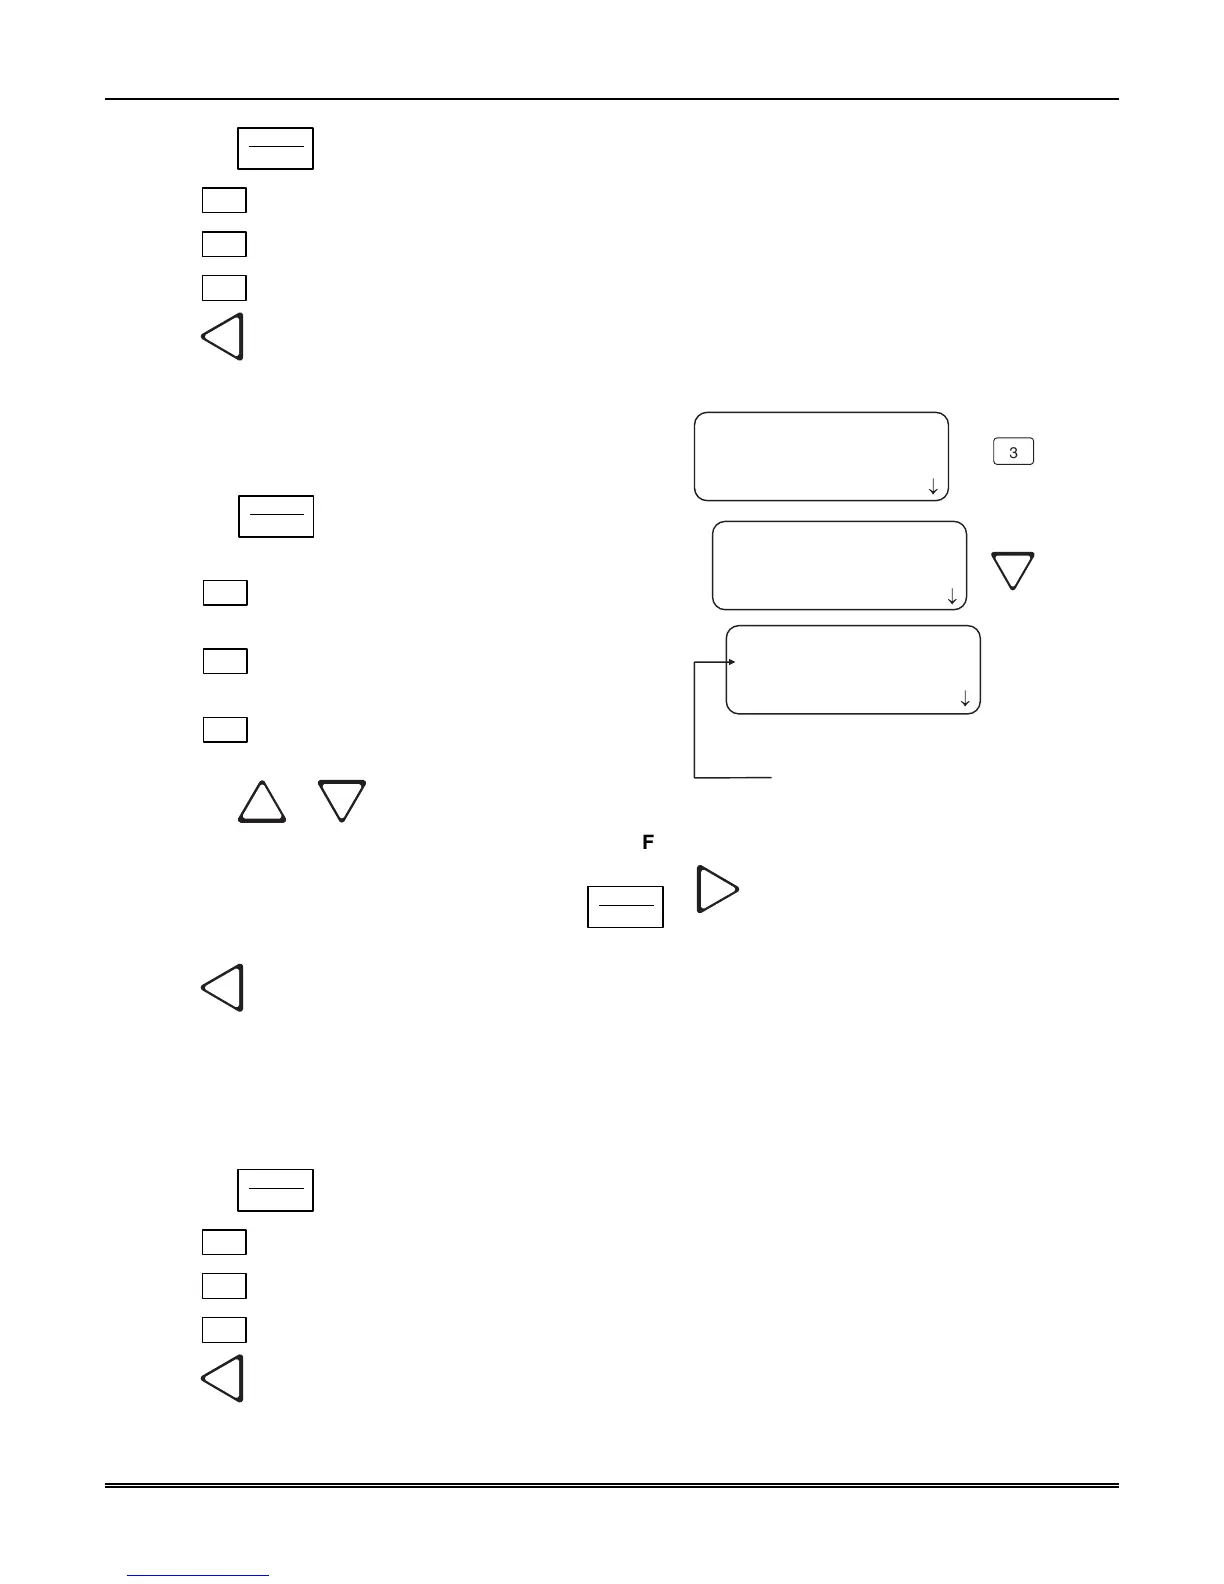
<Print Report>
3=System Config
4 Test Page
5 LC Statistics
<System Config>
04=Line Card # 1[N]
05 Line Card # 2[N]
06 Line Card # 3[N]
<System Config>
01=Print All [N]
02 Program Data [N]
03 Users List [N]
From item 04 down is
a list of existing Line Card
numbers.
¯
¯
¯
3
Figure 4–15: System Configuration Print Items
7. When the equal sign highlights an option press
ENTER
MENU
or to toggle the setting between Y (yes
print) or N (don’t print).
8. Press
to print the data and exit menu.
Note: These choices are not saved to flash memory and will have to be chosen each time that print system
configuration is entered.
How to Print a Test Page
Follow these steps to print a test page:
1. Log on to the receiver (see Section 4.4.4 for log on procedure).
2. Press the
ENTER
MENU
button to view the main menu items.
3. Press
6
for the printer menu. (See Figure 4–12.)
4. Press
1
for print report menu. (See Figure 4–13.)
5. Press
4
to print a test page.
6. Press
to exit menu.