Section 3 – Installation
3–11
Larger
Slotted
Hole
Ground
Hole
Smaller
Slotted
Hole
A
C
B
Figure 3–13: Outlet Voltage Measurement Points
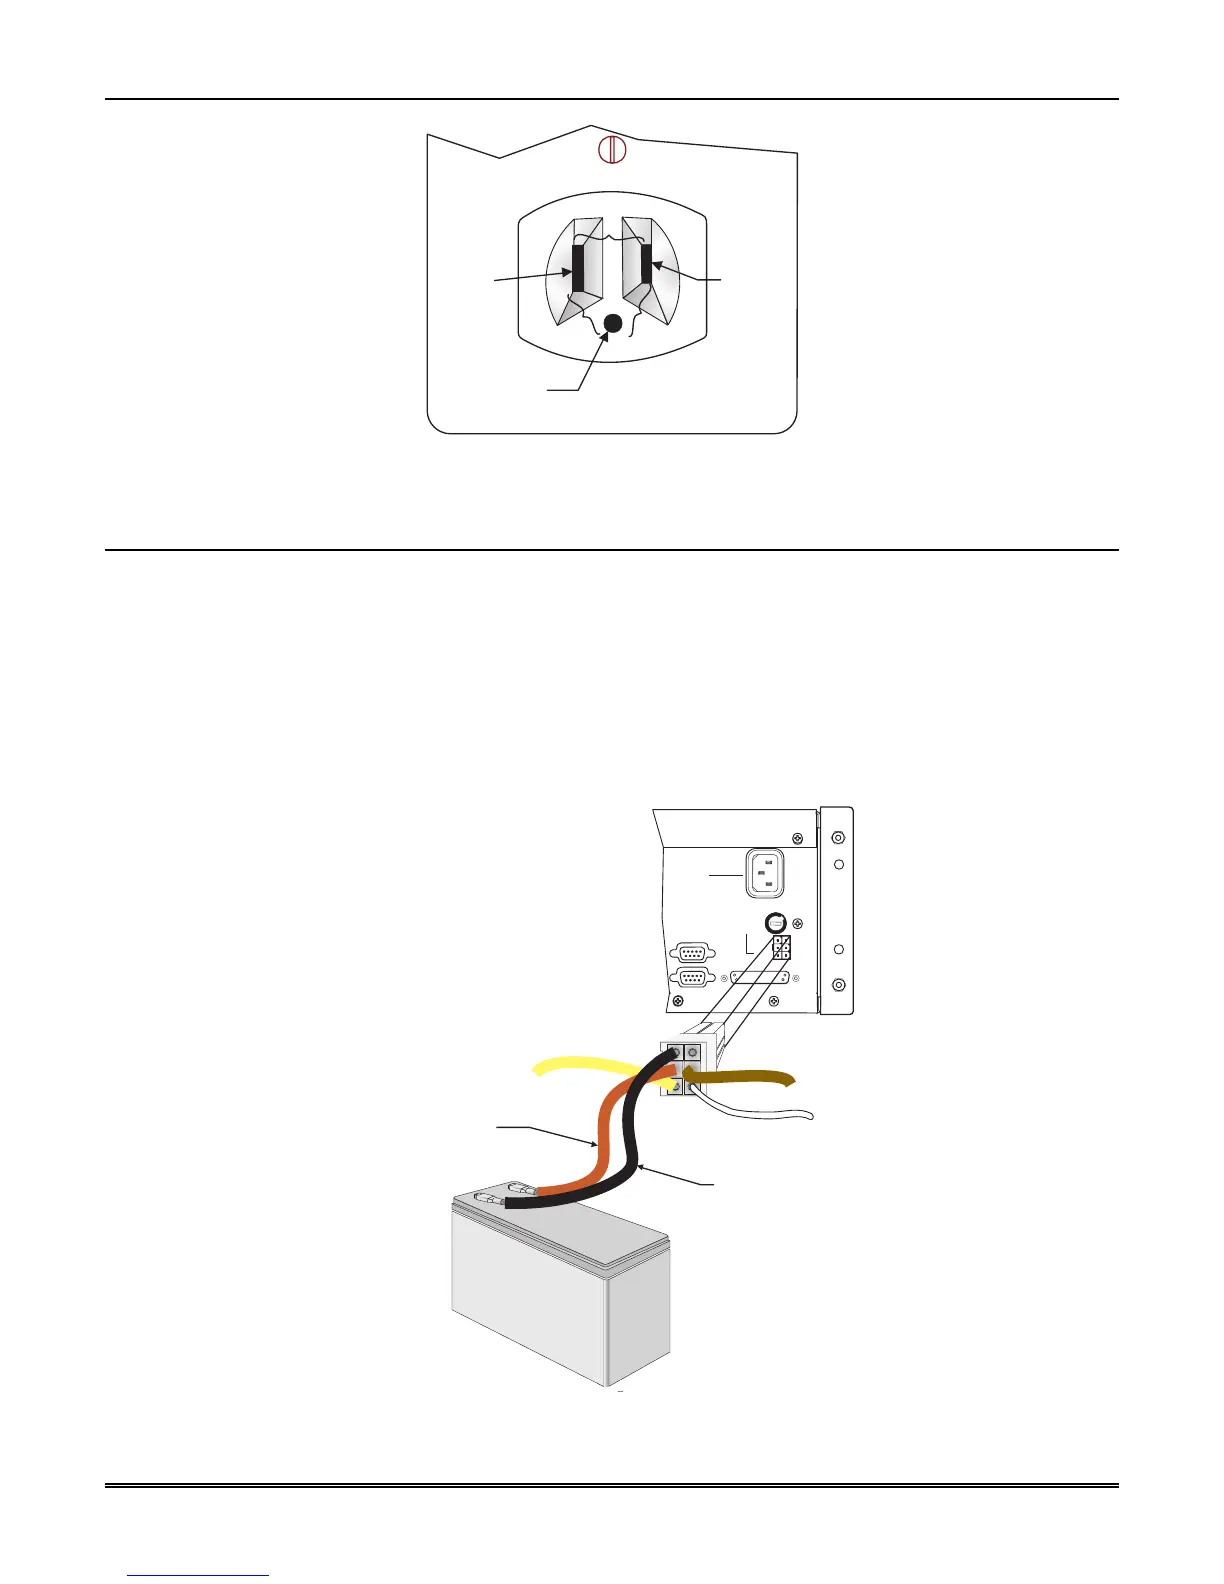
3.12 Battery Connection
To install the backup battery, follow these steps:
Note: A UL approved 12VDC 7AH battery (such as a Powersonic 1270) will provide a minimum of 4 hours of
battery backup power. (See 2.4.2 for UL requirements.)
1. Plug the Battery/Relay wiring harness onto the connector on the back of the MX8000 receiver. (See
Figure 3–14.)
2. Connect the RED terminal to the positive (+) side of the battery.
3. Connect the BLACK terminal to the negative (-) side of the battery.
Note: Incorrect polarity can damage the battery and the MX8000.
Black: Battery Negative
Red: Battery Positive
Backup Battery
+
-
COM 1
PARALLEL
100 VA
120 VAC ± 10%
240 VAC ± 10%
50-60 Hz
WARNING!
HIGH VOLTAGE PRESENT
DISCONNECT AC LINE AND
ALL OTHER CONNECTORS
PROIR TO SERVICING
FUSE
2.5A
SLOW BLOW
REPLACE ONLY
WITH A FUSE
OF SAME TYPE
UNUSED
RLY NO
RLY COM
BATT-
BATT+
RLY NC
COM 2
RELAY RATING
2.5A 48VAC/VDC
Replace Battery
Every 5 Years
Figure 3–14: Battery Connections
 Loading...