Align the Glitch Displayed by the Oscilloscope and
Analyzer
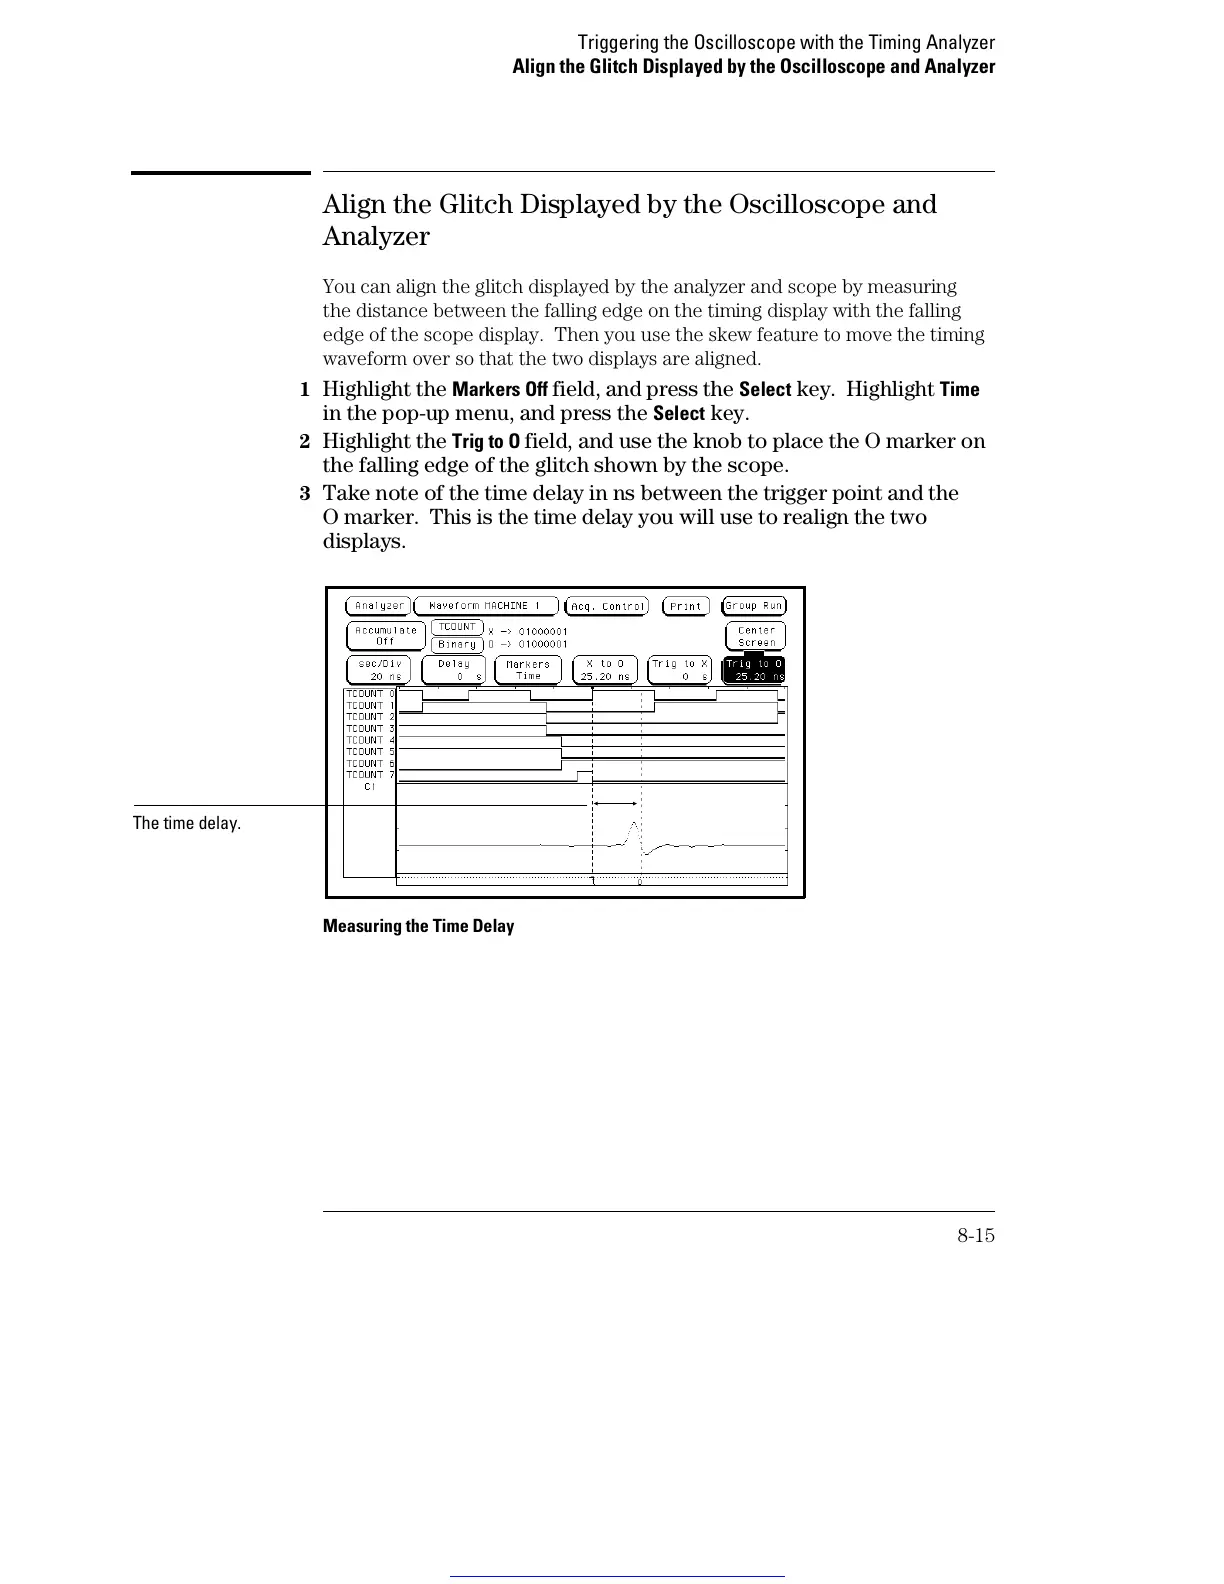
You can align the glitch displayed by the analyzer and scope by measuring
the distance between the falling edge on the timing display with the falling
edge of the scope display. Then you use the skew feature to move the timing
waveform over so that the two displays are aligned.
1
Highlight the Markers Off field, and press the Select key. Highlight Time
in the pop-up menu, and press the Select key.
2 Highlight the Trig to O field, and use the knob to place the O marker on
the falling edge of the glitch shown by the scope.
3 Take note of the time delay in ns between the trigger point and the
O marker. This is the time delay you will use to realign the two
displays.
Measuring the Time Delay
The time delay.
Triggering the Oscilloscope with the Timing Analyzer
Align the Glitch Displayed by the Oscilloscope and Analyzer
8-15
Get other manuals https://www.bkmanuals.com

 Loading...