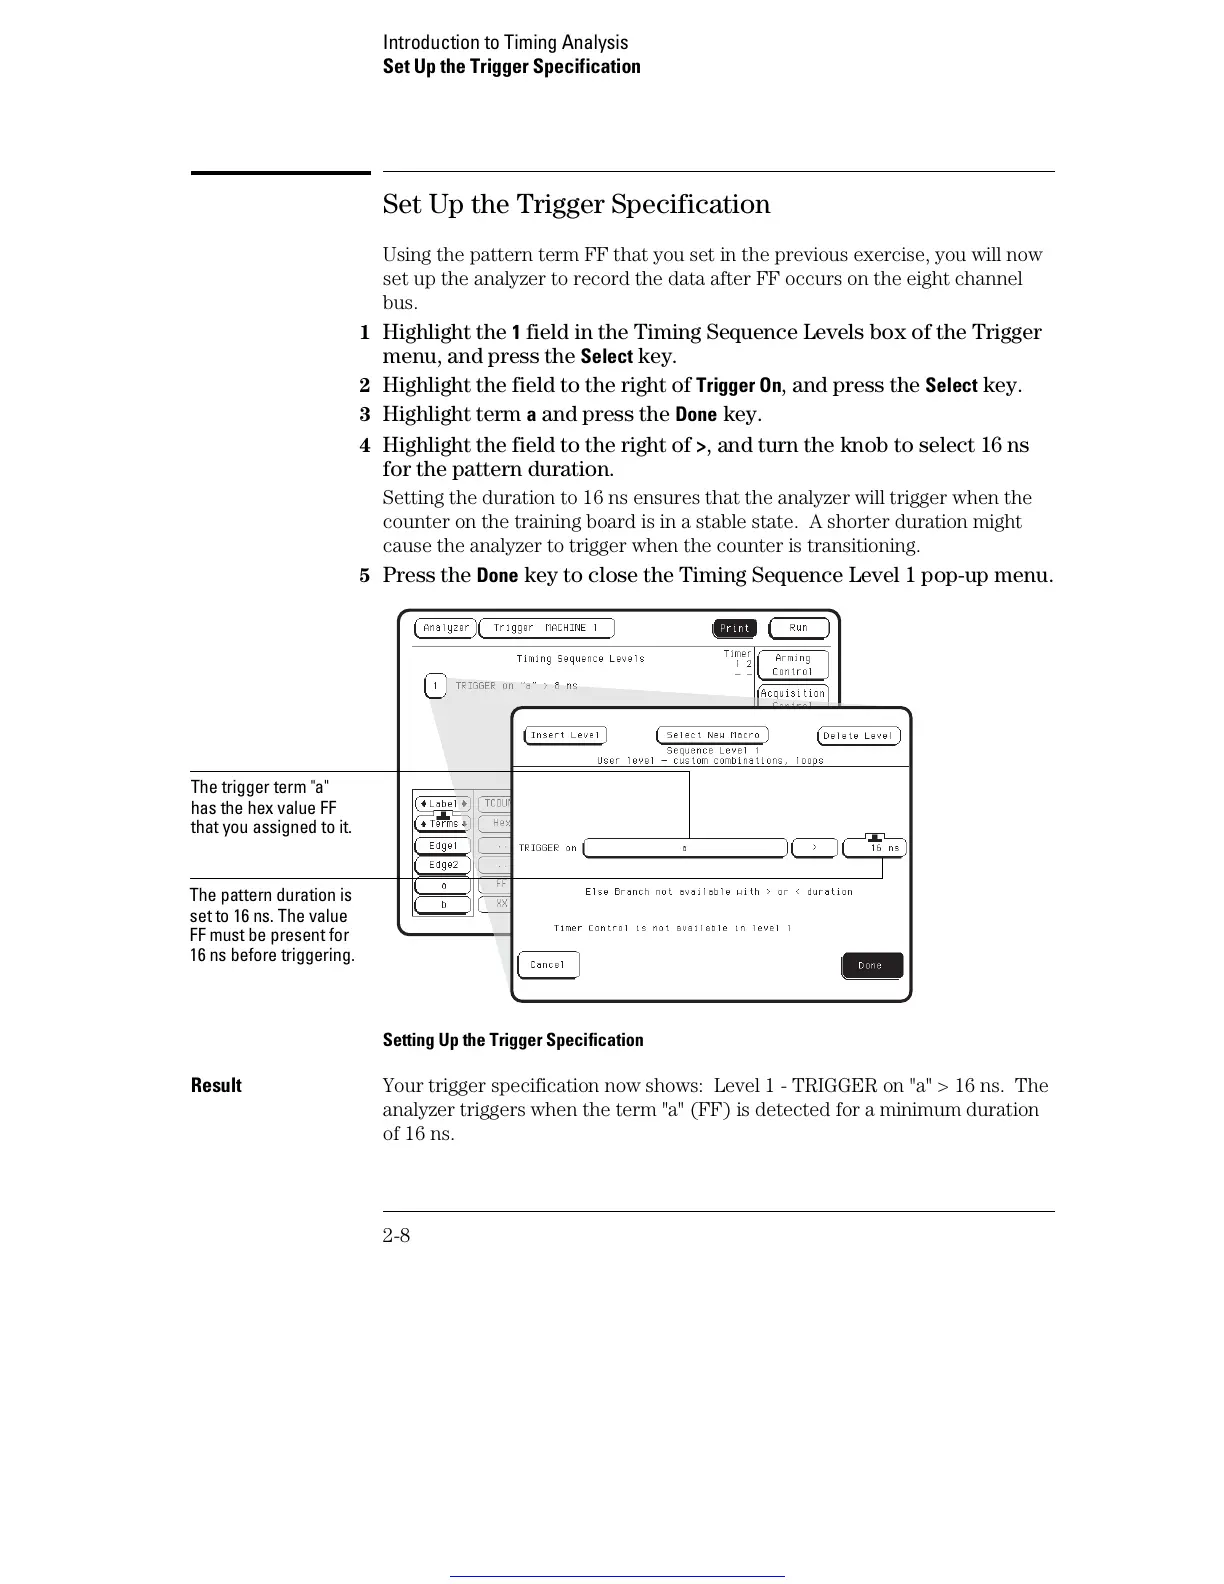
Set Up the Trigger Specification
Using the pattern term FF that you set in the previous exercise, you will now
set up the analyzer to record the data after FF occurs on the eight channel
bus.
1
Highlight the 1 field in the Timing Sequence Levels box of the Trigger
menu, and press the
Select key.
2 Highlight the field to the right of Trigger On, and press the Select key.
3 Highlight term a and press the Done key.
4 Highlight the field to the right of >, and turn the knob to select 16 ns
for the pattern duration.
Setting the duration to 16 ns ensures that the analyzer will trigger when the
counter on the training board is in a stable state. A shorter duration might
cause the analyzer to trigger when the counter is transitioning.
5
Press the Done key to close the Timing Sequence Level 1 pop-up menu.
Setting Up the Trigger Specification
Result Your trigger specification now shows: Level 1 - TRIGGER on "a" > 16 ns. The
analyzer triggers when the term "a" (FF) is detected for a minimum duration
of 16 ns.
The trigger term "a"
has the hex value FF
that you assigned to it.
The pattern duration is
set to 16 ns. The value
FF must be present for
16 ns before triggering.
Introduction to Timing Analysis
Set Up the Trigger Specification
2-8
Get other manuals https://www.bkmanuals.com

 Loading...