9Ć5 Product History and Service NotesC3187Ć90000
A) How/Where to Measure the Distance
a) Power off the unit.
b) Ensure that the pinchĆarm lever is in the UP position.
c) Open the window and remove the bail.
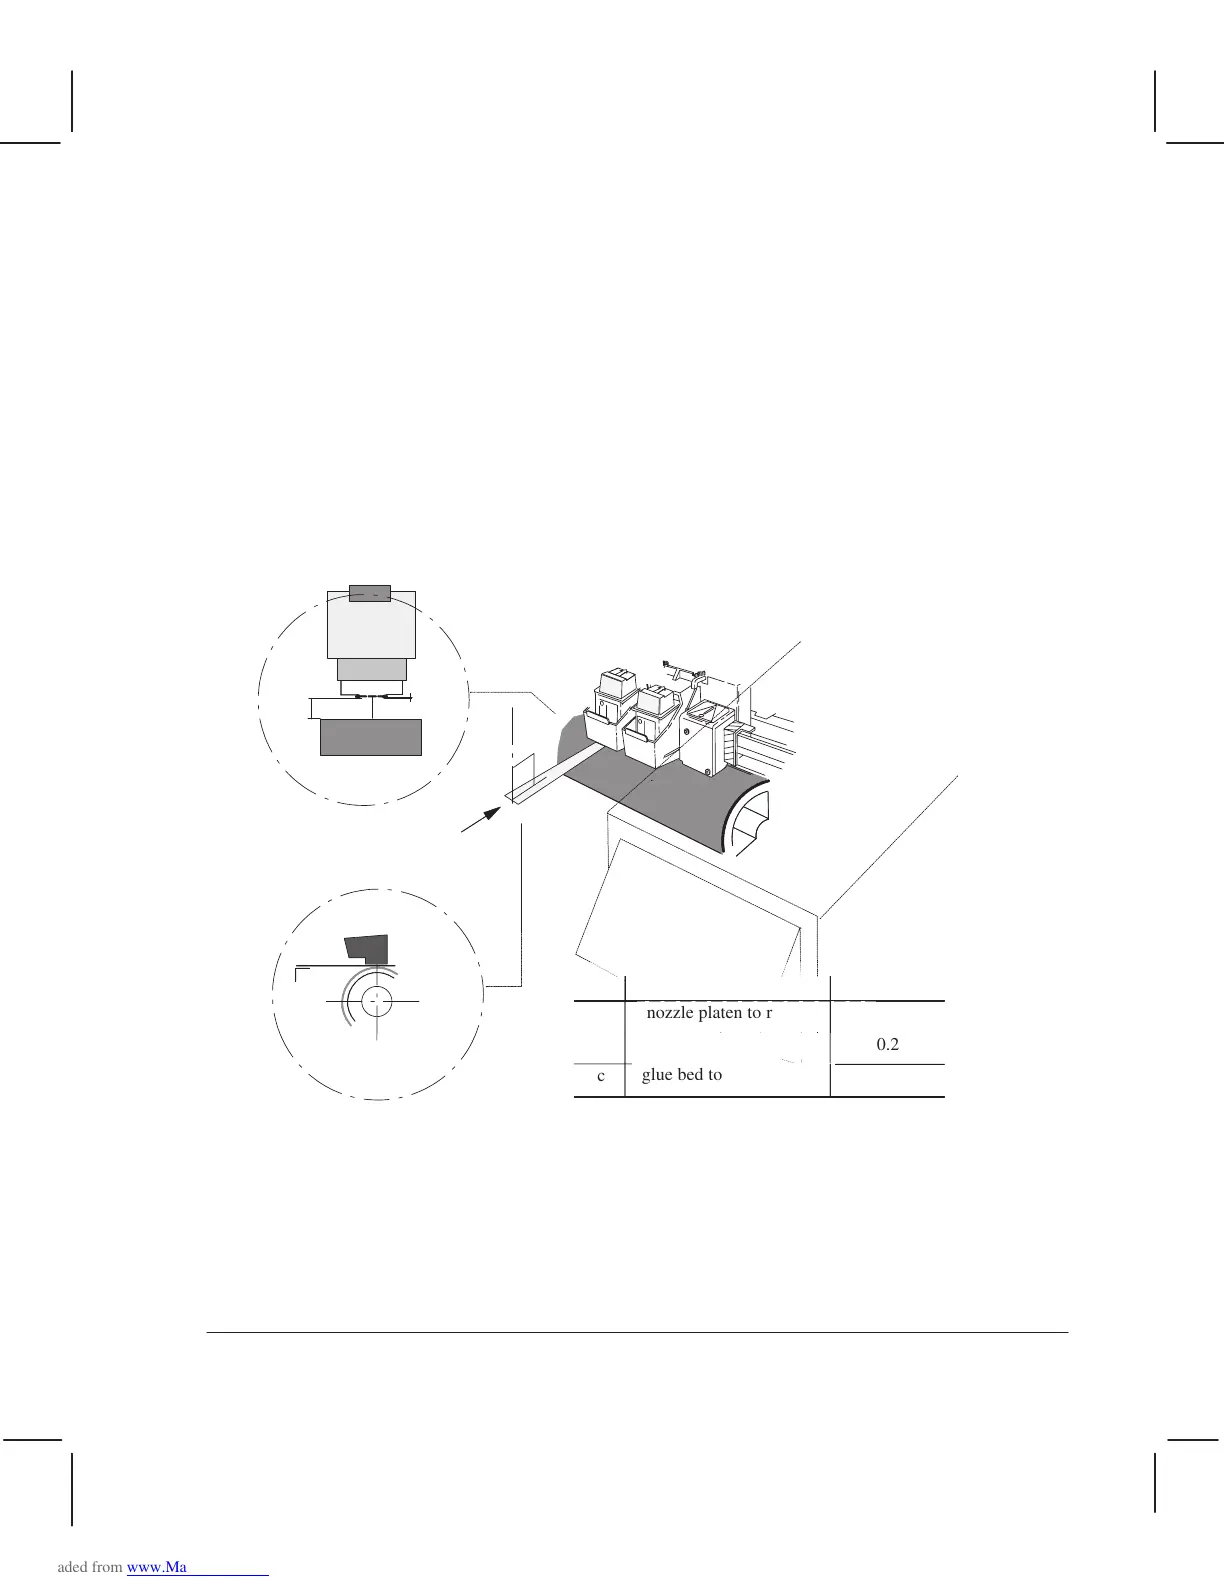
d) Slide the carriage (with both cartridges loaded) to the right until the right black and
yellow strip of the carriage is above the right sideplate (see figure 1.c).
e) Carefully try to insert, one at a time, the following gauges below the left cartridge,
(figure 1.b):
* 0.6 mm (0.025 in) - gauge should enter without any effort
* 0.7 mm (0.027 in) - gauge rubs slightly
* 0.8 mm (0.031 in) - gauge may enter but the carriage is lifted when you insert the
gauge.
If the results are as described above, the distance is within specifications
b
Figure 1
90
d
Right Side Cover
Cartridge
Front View
Cartridge
Chute
a
b
c
Drive Roller
Surface
a)
Insert the gauges centered
below the left (fixed) cartridge.
Gauge
Carriage
side-view
90
d
Drive Roller
side-view
b)
c)
Ref. Description specs (mm)
a
nozzle platen to roller
0.9 to 1.3
glue bed to platen
0.2
c
glue bed to roller
0.7 to 1.1