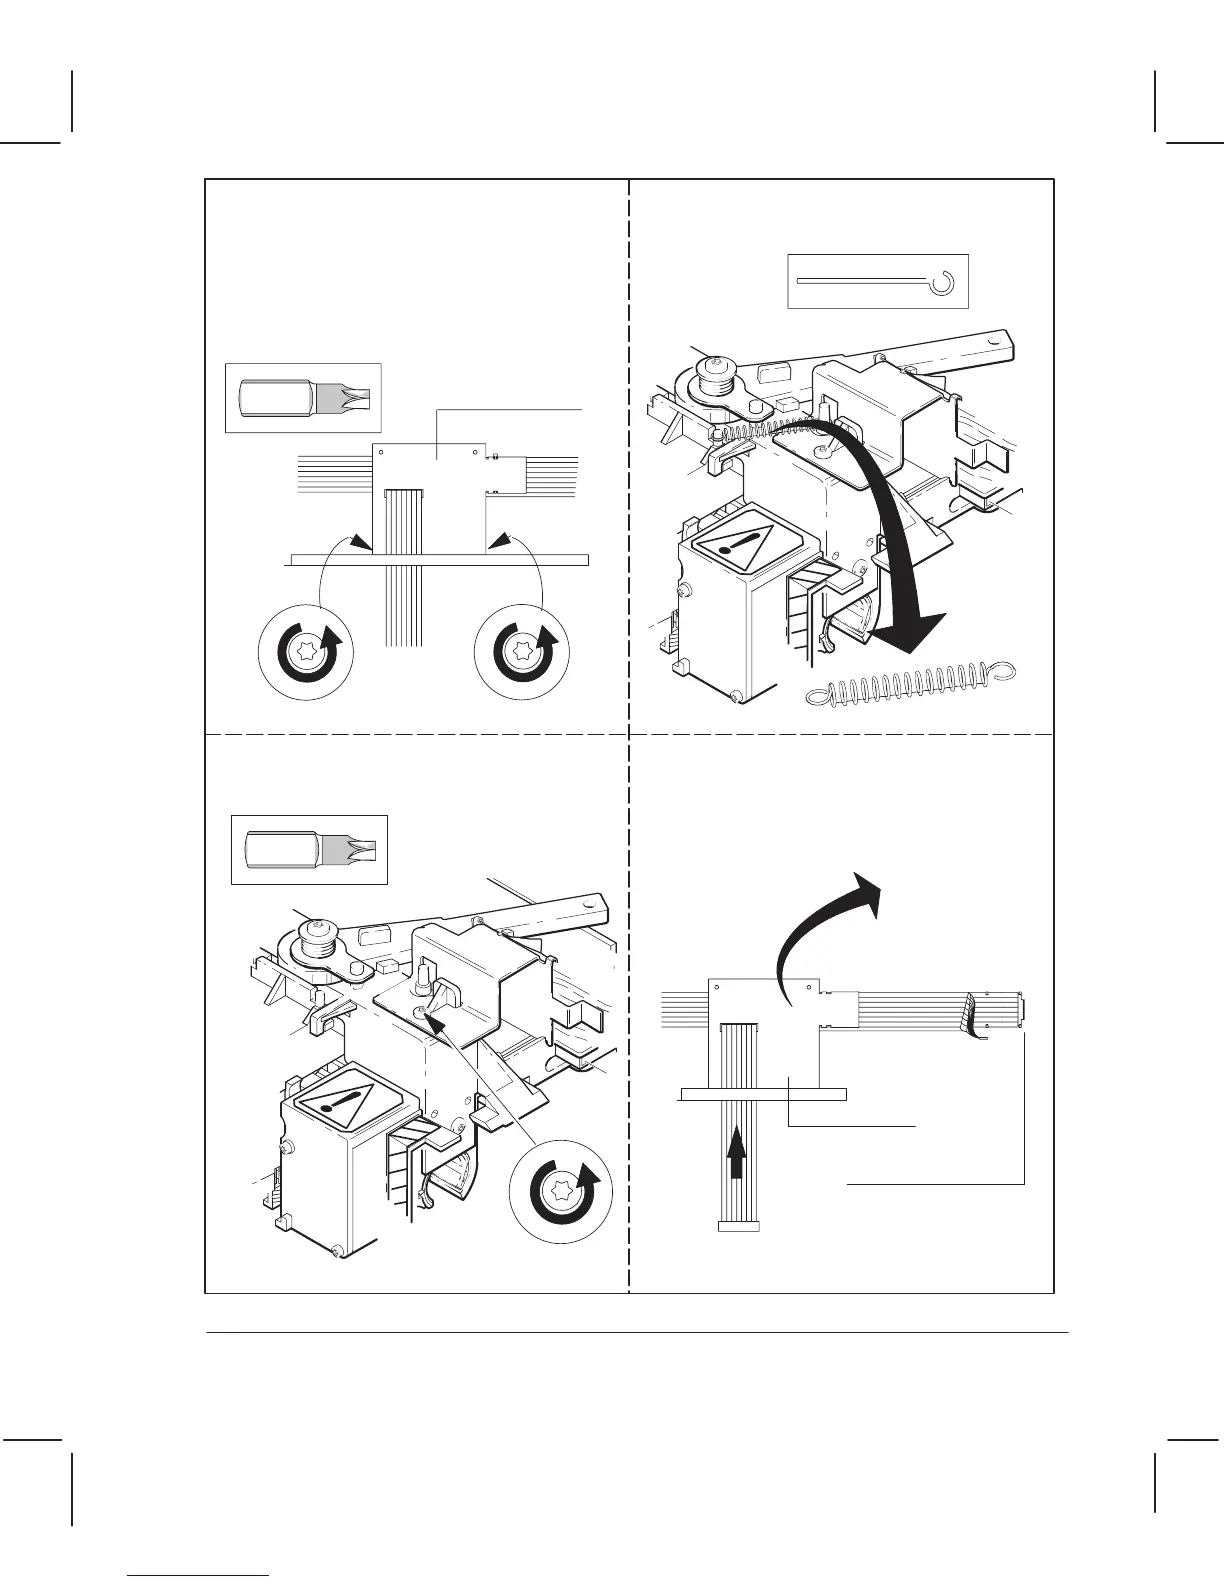
If you don't need to change the trailing
cable, but do need to remove it to access
other parts:
Remove the two screws that attach the
trailingĆcable rear tray to the top of the
electronics enclosure.
Carefully remove the rightĆhand
cartridge spring from the cartridge
carriage.
Remove the trailingĆcableĆbracket
screw from the cartridge carriage.
Pull the trailing cable up through the
slot at the top of the electronics
enclosure assembly and lift it, with rear
tray and bracket, from the plotter.
Rear tray
Rear tray
Bracket
Torx-20
Torx-10
6Ć31 Removal and ReplacementC3187Ć90000