• TPM module
• System board
NOTE: The server blade must be removed from the enclosure to access the internal components;
therefore, no internal devices are hot-swappable or hot-pluggable in the server blade.
Removing and Replacing DIMMs
There are 12 DIMM slots located on the system board. The following procedures describe how to
remove and replace memory DIMMs in the server blade.
Removing a DIMM
To remove a failed DIMM from the server blade:
1. Power off the server blade and remove it from the server blade enclosure.
See “Preparing the Server Blade for Servicing” (page 110).
2. Remove the access panel.
See “Removing the Server Blade Access Panel” (page 112).
NOTE: The server blade ships with at least two DIMMs installed in slots 0A and 0B.
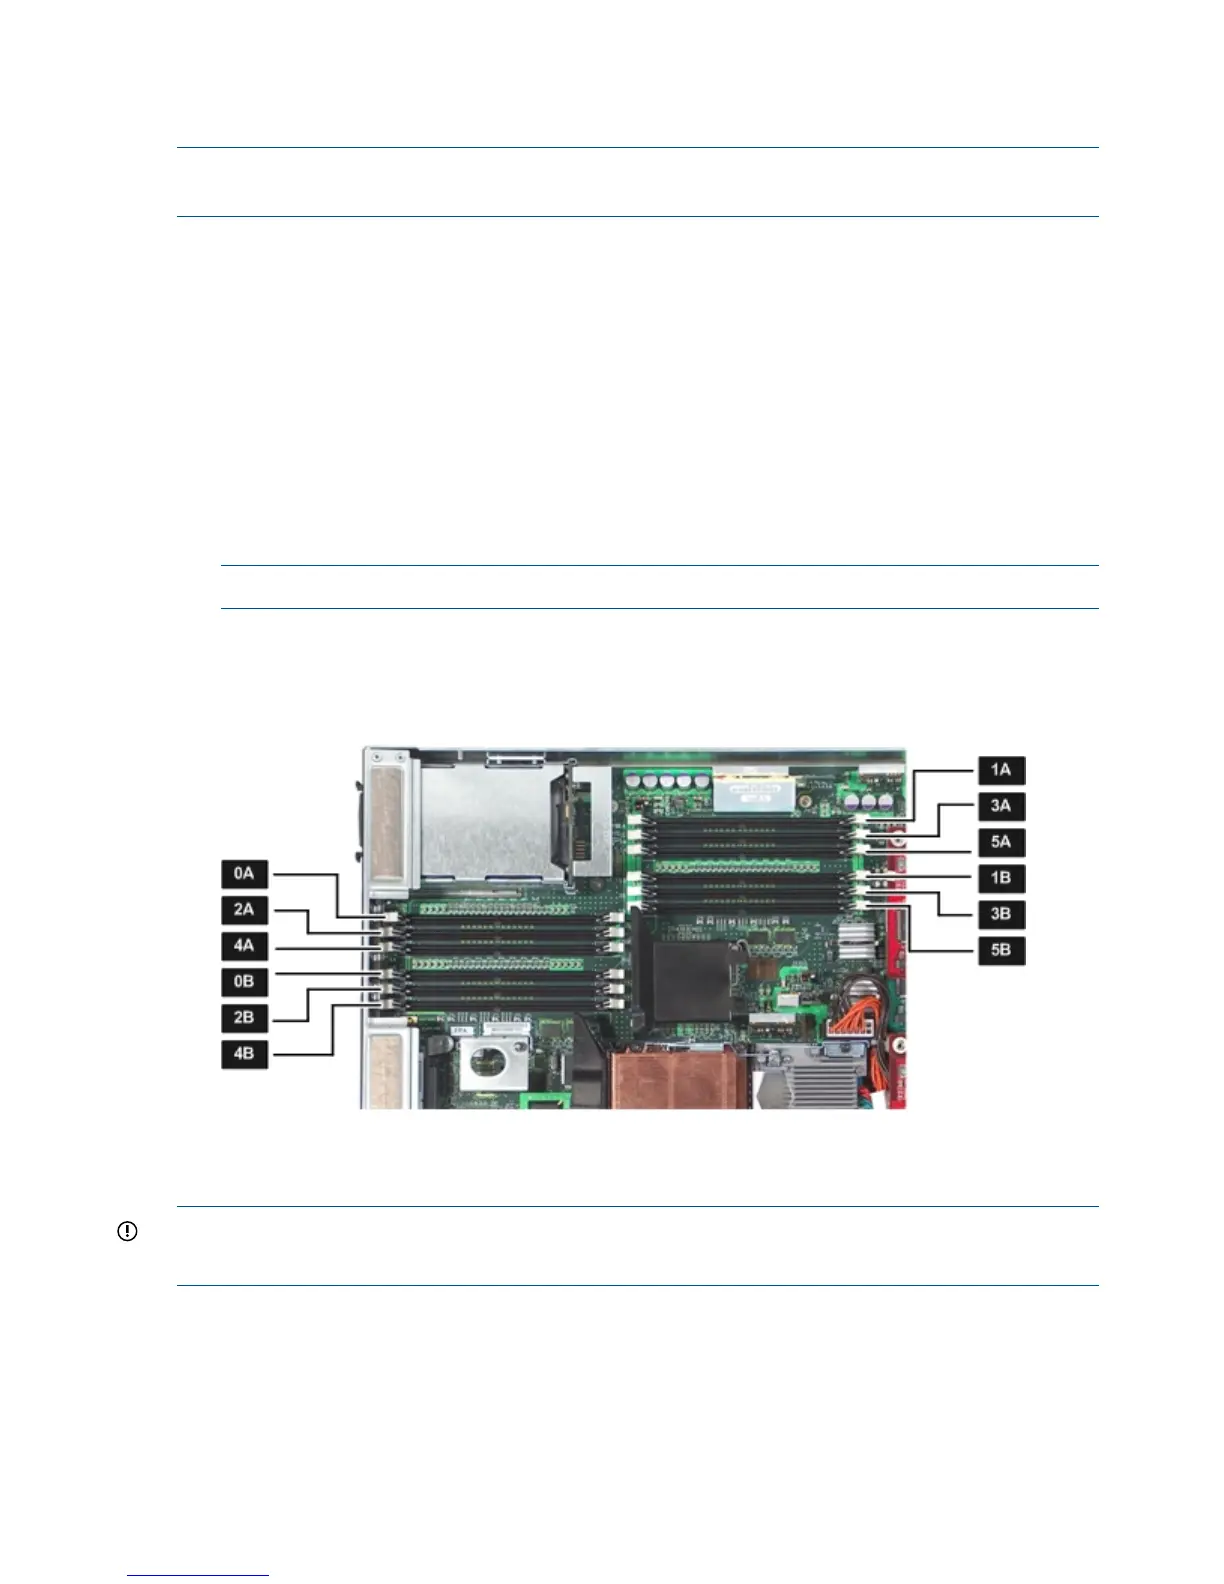
3. Locate the DIMM slots on the server blade system board.
See Figure 40.
Figure 40 DIMM Slot Locations
4. Open the DIMM slot latches for the DIMM you are removing.
5. Remove the DIMM from the slot.
IMPORTANT: DIMMs must be installed in identical pairs.
DIMMs do not seat fully if turned the wrong way.
DIMM Installation Order
The DIMM installation order is as follows:
1. Slots DIMM 0A and DIMM 0B
2. Slots DIMM 1A and DIMM 1B
3. Slots DIMM 2A and DIMM 2B
4. Slots DIMM 3A and DIMM 3B
114 Removing and Replacing Components