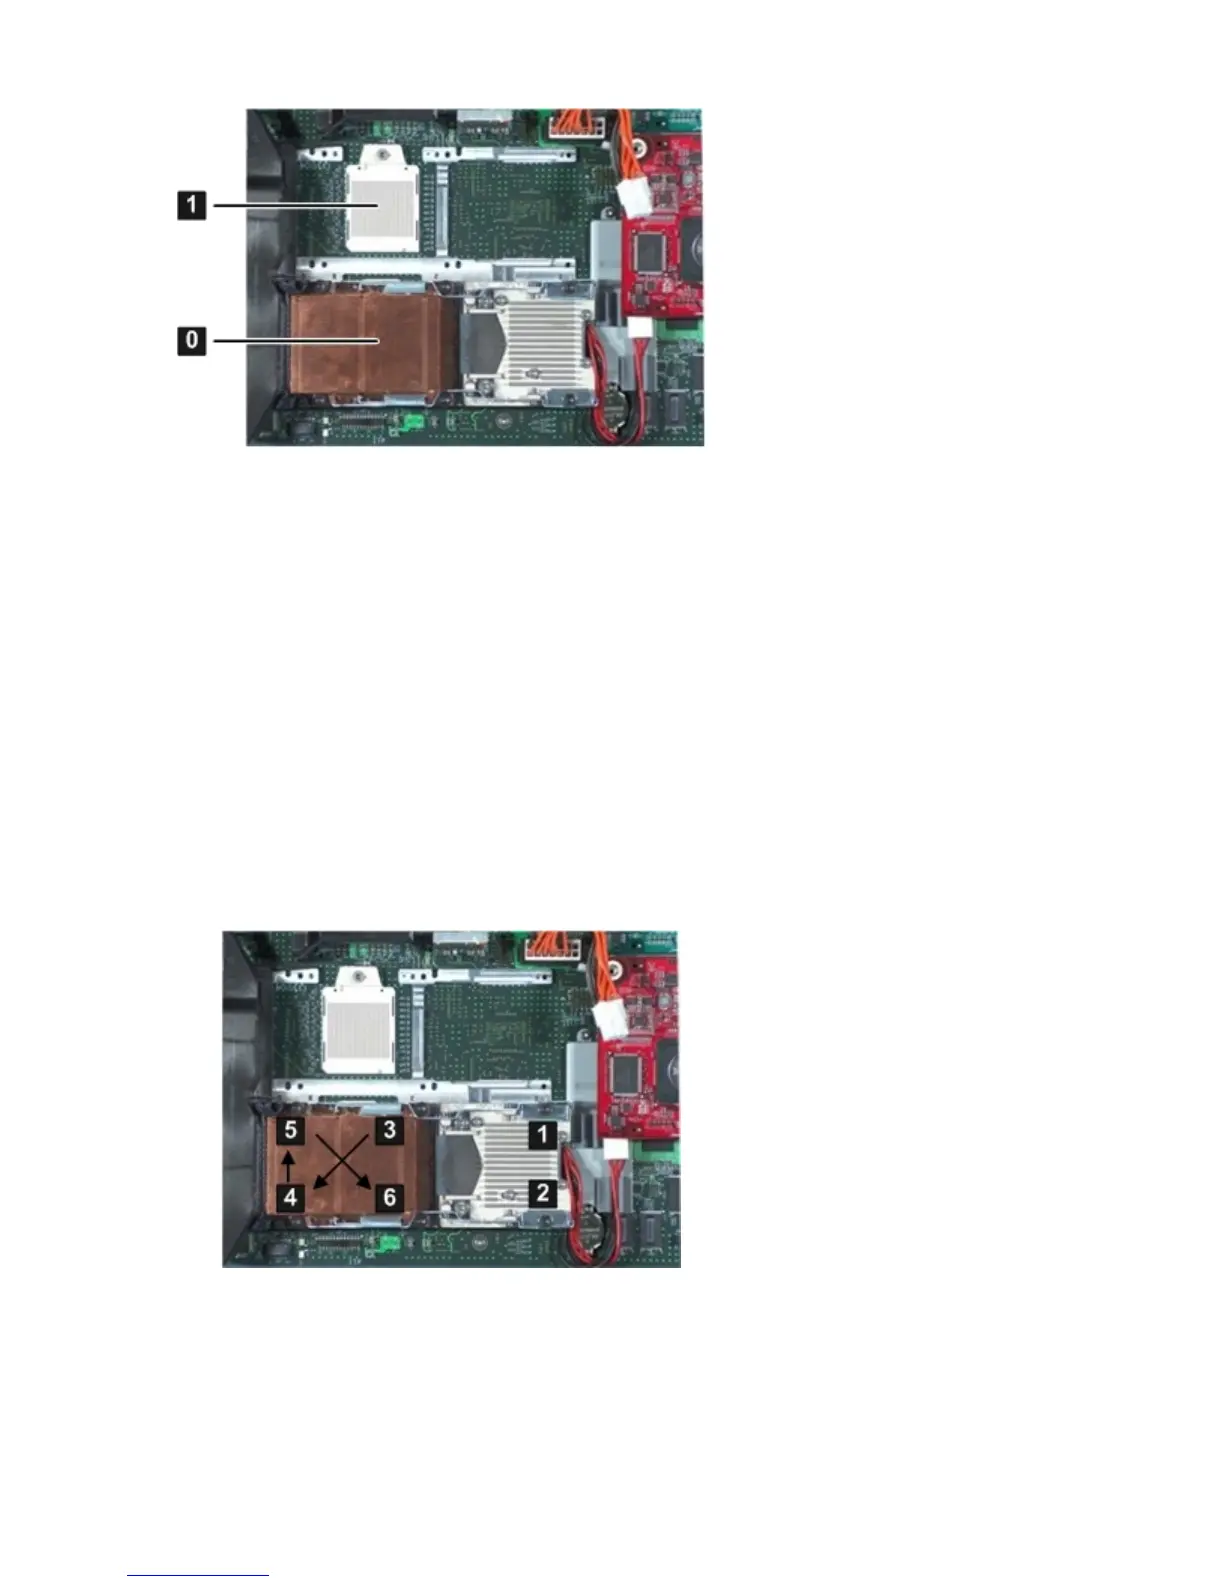
Figure 41 Processor Slot Locations on the System Board
Removing a Processor
To remove a processor:
Removing processor 0 is shown in this procedure.
If you are only adding a processor, remove the dust cover from the processor socket, and proceed
to “Installing a Processor” (page 117).
1. Power off the server, and remove it from the enclosure.
See “Preparing the Server Blade for Servicing” (page 110).
2. Remove the access panel.
See “Removing the Server Blade Access Panel” (page 112).
3. Disconnect the power cable from the processor you are removing.
4. Loosen the captive screws (1 - 2) on the processor with the Torx T-15 screwdriver.
See Figure 42 (page 116).
Figure 42 Removing the Processor Module on the Server Blade Board
5. Loosen the captive shoulder screws (3 - 6) on the processor heat sink in the order shown in
Figure 42 with the Torx T-15 screwdriver.
6. Slide the processor sequencer to the right, and hold it in place to uncover the ZIF socket (1).
7. Unlock the ZIF socket by turning the socket 180 degrees counter clockwise (2).
See Figure 43.
116 Removing and Replacing Components