Figure 43 ZIF Socket on the Processor
8. Carefully remove the processor module by lifting it straight up from the system board.
9. Place the processor module in an antistatic bag.
Installing a Processor
To install the processor:
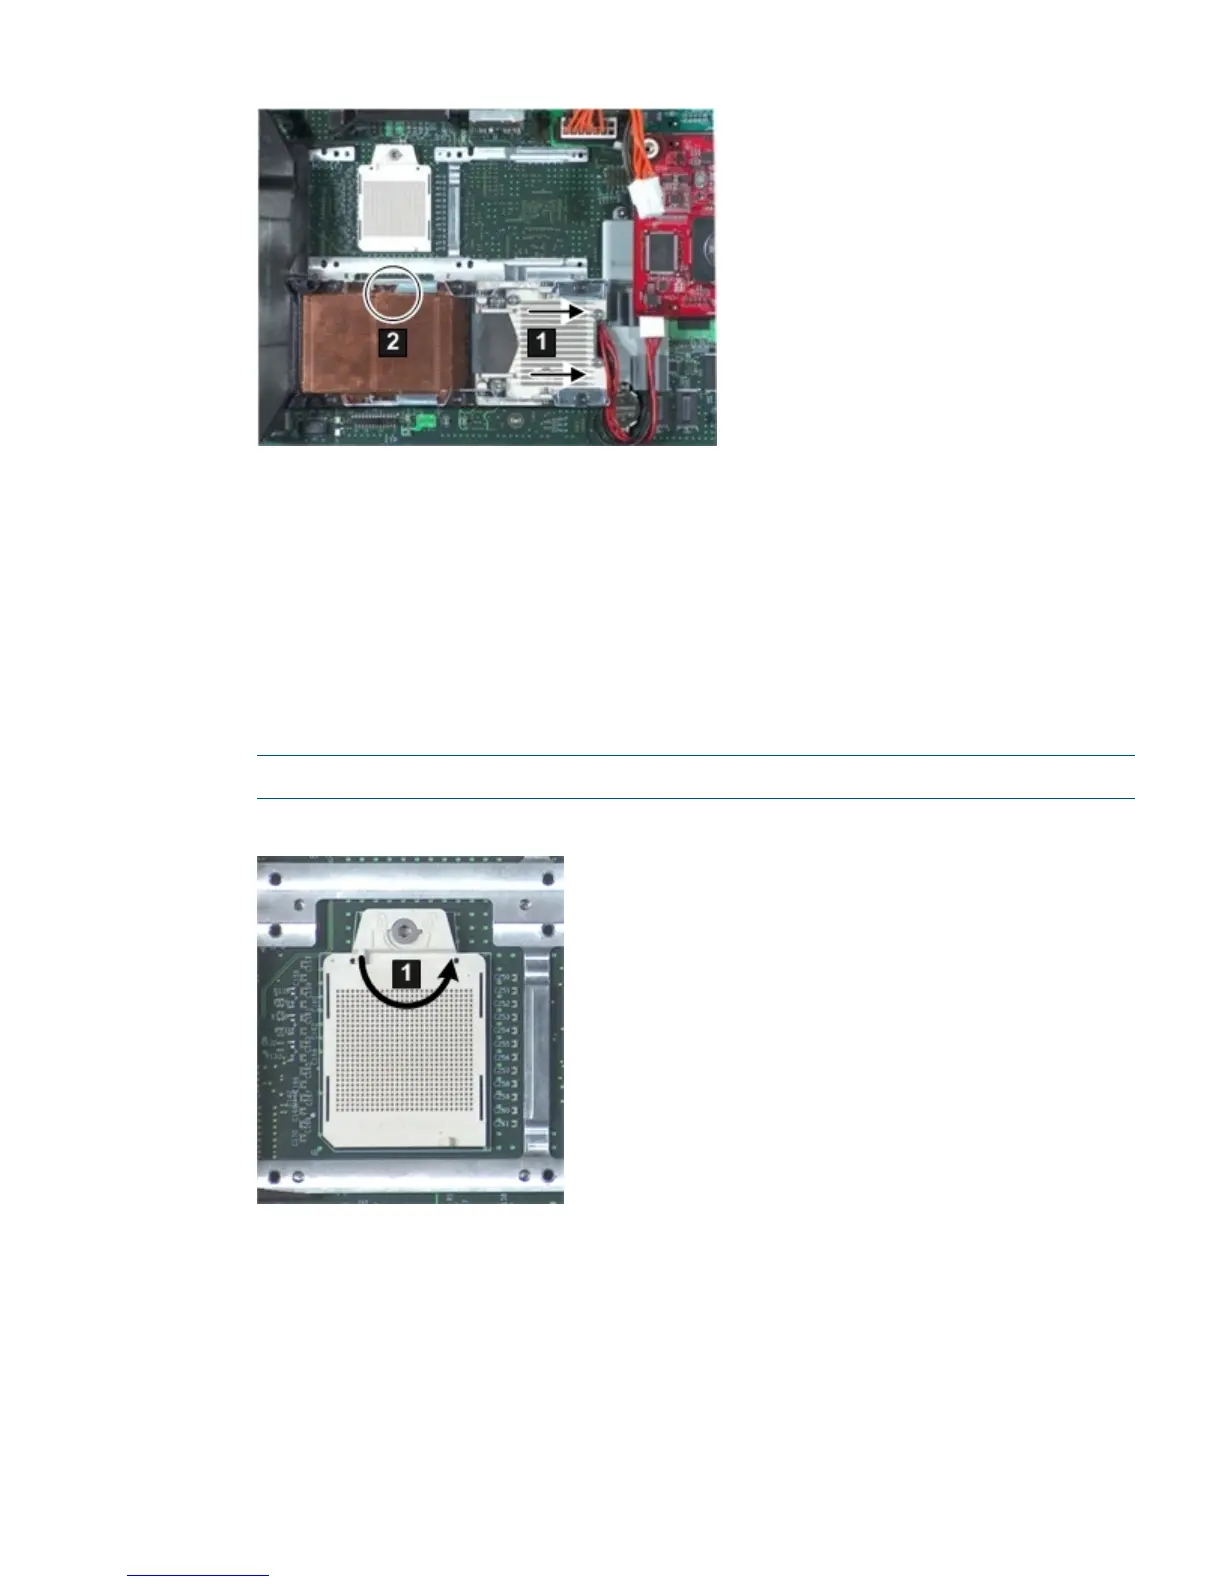
1. Ensure the ZIF socket for the processor you are installing is open.
Insert the 2.5 mm hex end of the Torx T-15 screwdriver into the ZIF socket and gently try to
rotate the socket 180 degrees counter clockwise. If the socket doesn’t turn, the socket is open.
See Figure 44 (page 117).
NOTE: If you have just removed a processor, the ZIF socket is unlocked.
Figure 44 ZIF Socket Unlocked
2. Carefully insert the processor module into the empty processor slot (processor slot 0 is shown)
on the server blade system board; then line up the guide pins on the processor to the alignment
holes in the processor slot to seat the processor.
See Figure 45 for the alignment hole locations for processor slot 0.
Removing and Replacing a Processor 117