EasyManuals Logo

HP ZBook Power G10 User Manual

HP ZBook Power G10
178 pages
To Next Page IconTo Next Page
To Previous Page IconTo Previous Page
Page #50 background imageLoading...
Page #50 background image
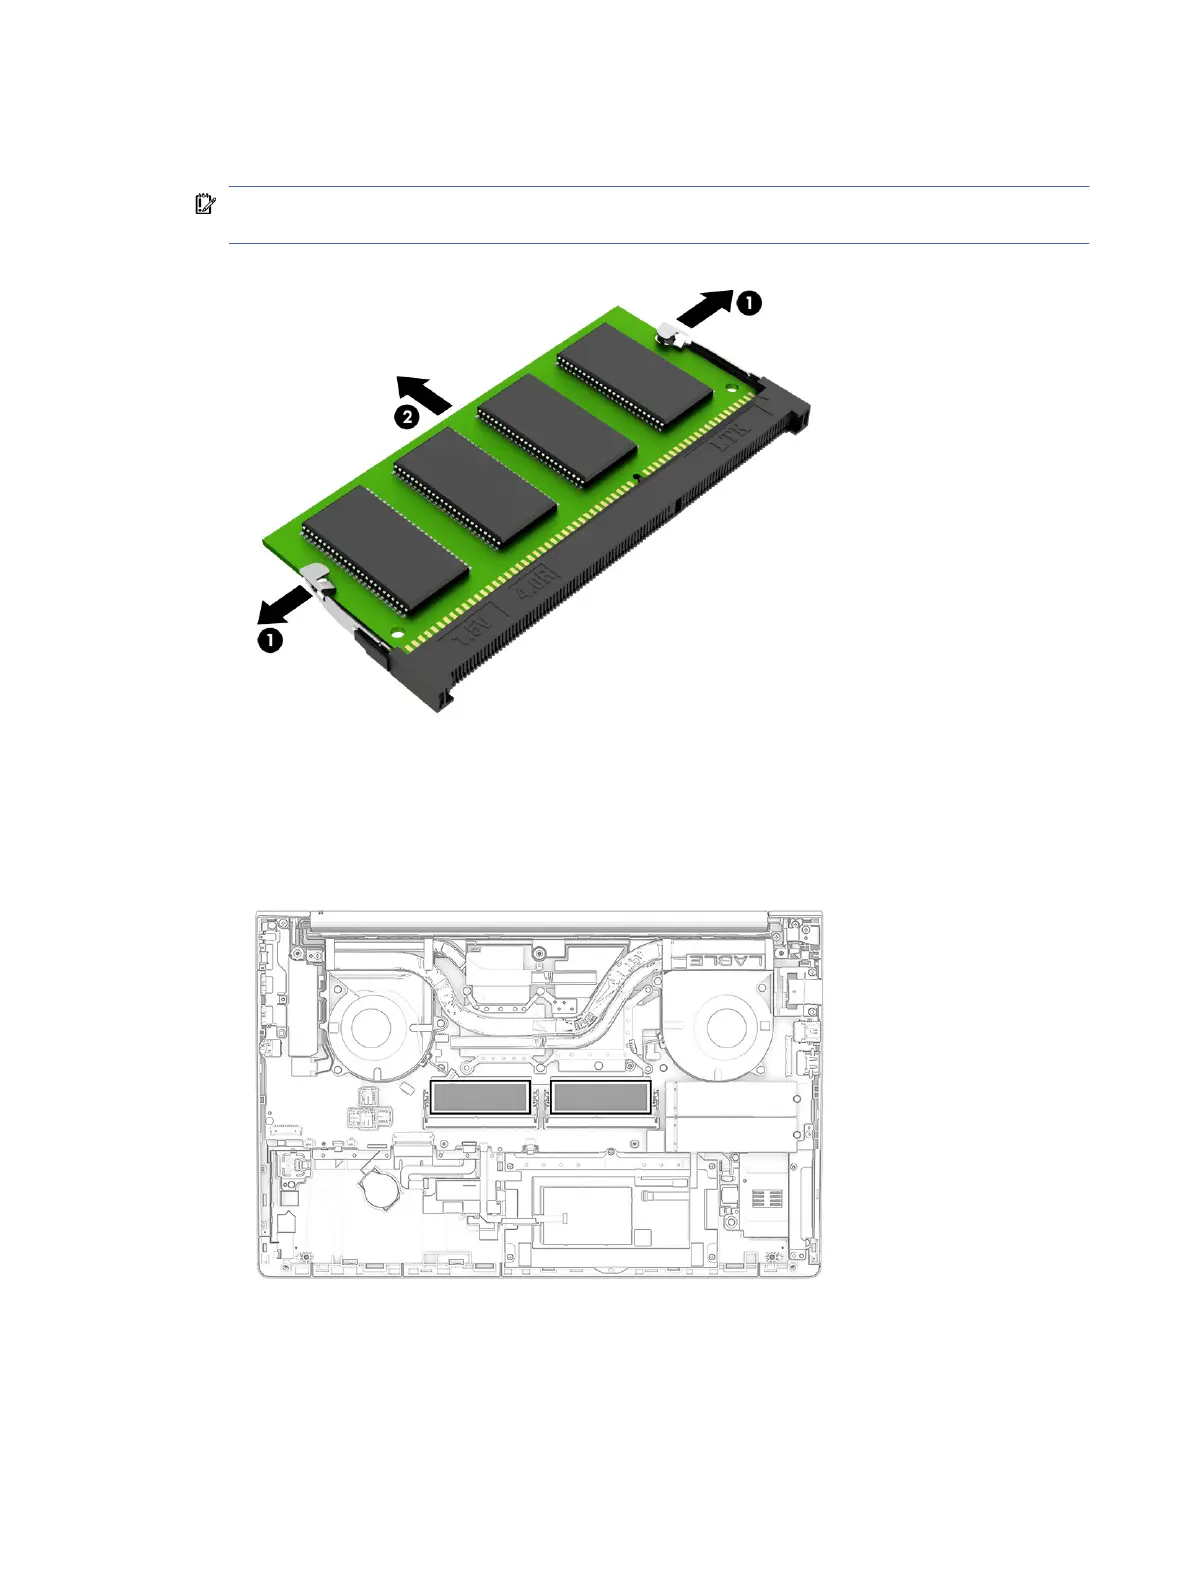
Spread the two retention clips outward (1) until the memory module tilts up at a 45° angle, and then
remove the module (2). Use the same procedure to remove all memory modules.
IMPORTANT: To prevent damage to the memory module, hold the memory module by the edges
only. Do not touch the components on the memory module.
To protect a memory module after removal, place it in an electrostatic-safe container.
To install a memory module:
1. Before installing memory modules, be sure thermal pads are installed underneath the modules in
the locations shown in the following illustration.
2. Align the notched edge of the module with the tab in the slot (1), and then press the module into the
slot at an angle until it is seated (2).
Memory modules
41

Table of Contents

Questions and Answers:

Question and Answer IconNeed help?

Do you have a question about the HP ZBook Power G10 and is the answer not in the manual?

HP ZBook Power G10 Specifications

General IconGeneral
Operating SystemWindows 11 Pro
ProcessorUp to Intel Core i9-13900H
GraphicsNVIDIA RTX A2000 Laptop GPU
Display15.6" diagonal, FHD (1920 x 1080) or UHD (3840 x 2160), IPS, anti-glare
MemoryUp to 64 GB DDR5
StorageUp to 2 TB PCIe NVMe SSD
Battery83 Wh Li-ion polymer
Portsheadphone/microphone combo
WirelessIntel Wi-Fi 6E AX211 (2x2) and Bluetooth 5.3

Related product manuals