Page 12 Manual
Table of Pictures
Picture 1: Minimum distances .......................................................................................... 18
Picture 2: Transport box .................................................................................................. 20
Picture 3: Scanner covered cushion foils ......................................................................... 20
Picture 4: WideTEK 25-600in transport box, cover removed ........................................... 21
Picture 5: Transportation locks at bottom side ................................................................. 23
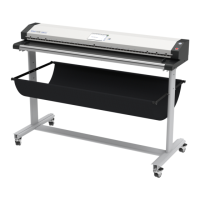
Picture 6: WideTEK 25-600 front view ............................................................................. 25
Picture 7: Connectors on the WideTEK 25-600 backside ................................................ 25
Picture 8: Start screen after start-up ................................................................................ 28
Picture 9: Viewer&Job Control screen ............................................................................. 29
Picture 10: Document Source screen, part 1 ................................................................... 31
Picture 11: Document Source screen, part 2 ................................................................... 31
Picture 12: Selector for Format settings ........................................................................... 32
Picture 13: Format mode Maximum ................................................................................. 32
Picture 14: Format mode Auto ......................................................................................... 33
Picture 15: Format mode Crop and Deskew .................................................................... 33
Picture 16: Format mode DIN .......................................................................................... 34
Picture 17: Format mode ANSI ........................................................................................ 34
Picture 18: Splitting Image ............................................................................................... 35
Picture 19: Selecting the „Splitting Start Page“ ................................................................ 35
Picture 20: Exposure Modes ........................................................................................... 36
Picture 21: Numeric key pad to set threshold value ......................................................... 36
Picture 22: Selecting Bidirectional Scan .......................................................................... 37
Picture 23: List of Resolutions ......................................................................................... 38
Picture 24: Available Scan Modes ................................................................................... 38
Picture 25: Controller for Auto Density ............................................................................. 39
Picture 26: List of stitching methods ................................................................................ 40
Picture 27: List of predefined color spaces ...................................................................... 41
Picture 28: Image Quality, screen 1 ................................................................................. 42
Picture 29: Image Quality, screen 2 ................................................................................. 42
Picture 30: List of Color Modes ........................................................................................ 43