iPECS-MG
Hardware Description and Installation Manual Issue 1.1
40
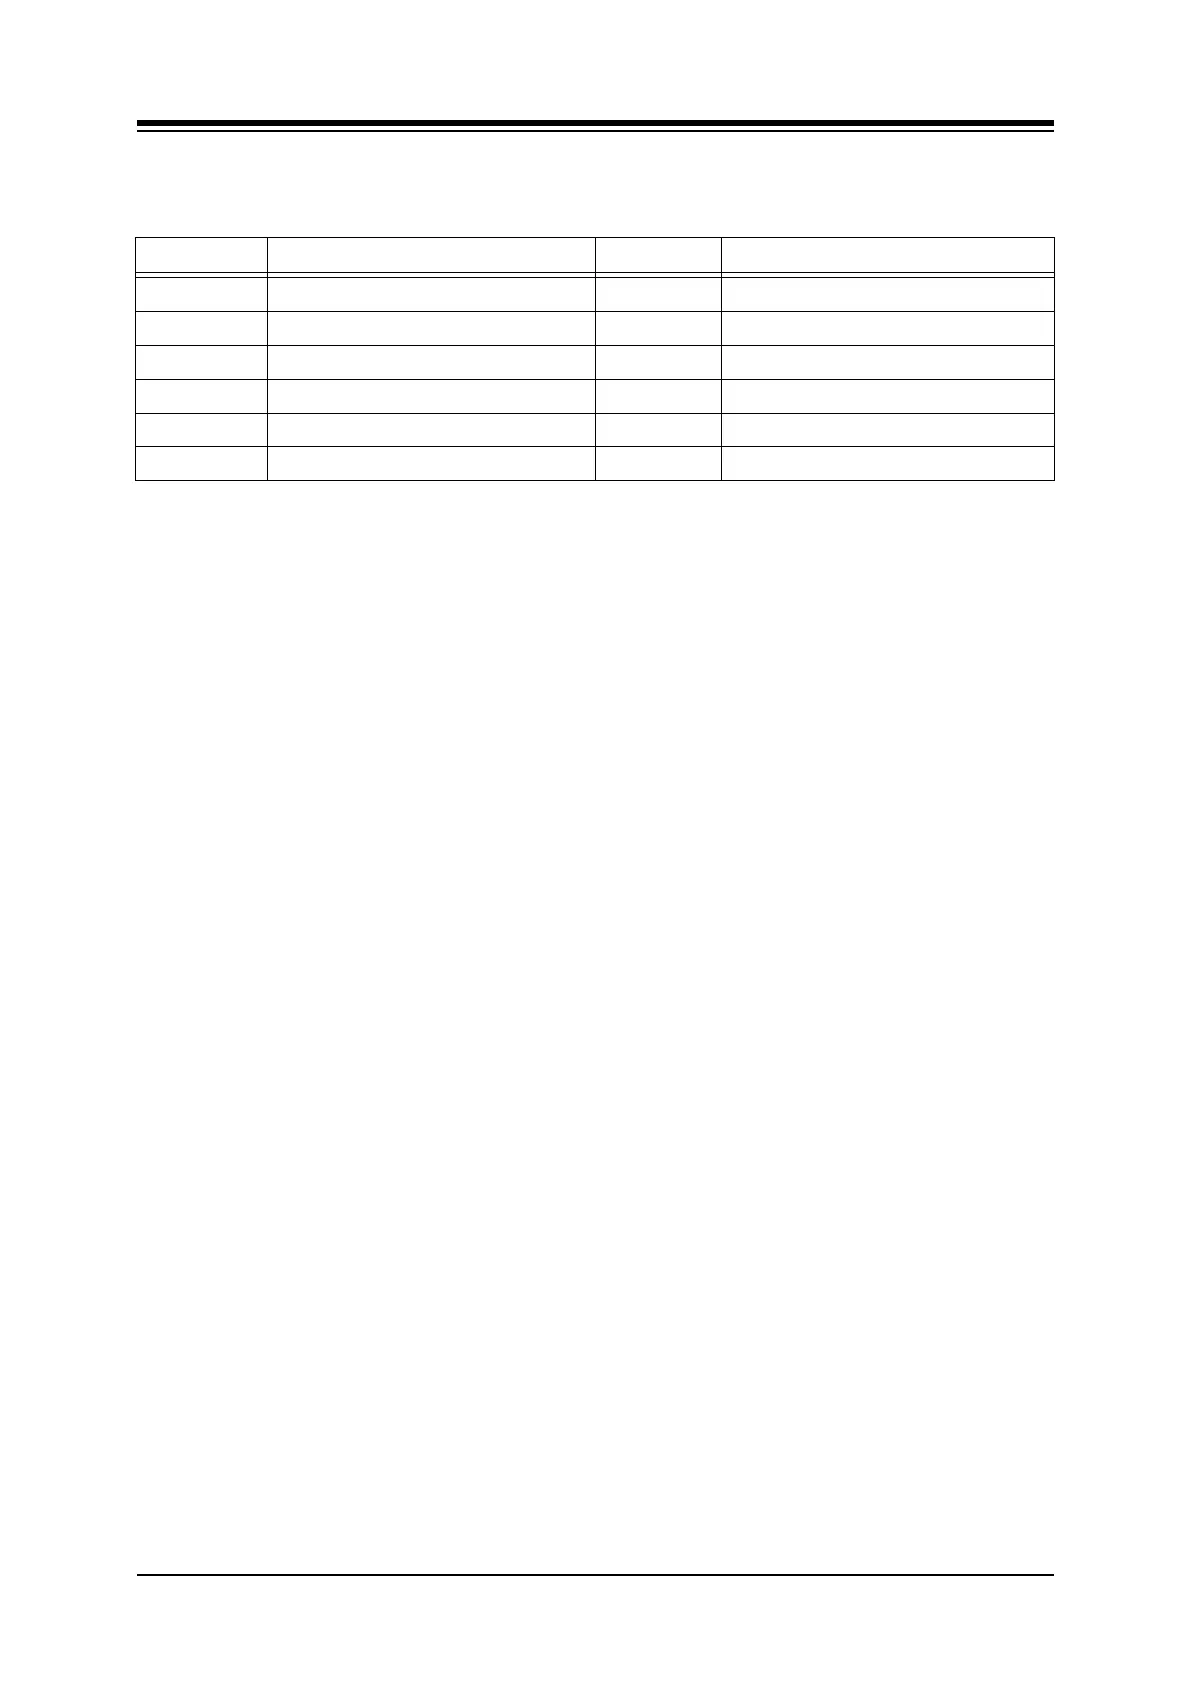
Table 5.3.1-2 LED Indications
LED DESCRIPTION LED DESCRIPTION
LD1 1
st
port - ON, In use ; OFF, Idle LD7 7
th
port - ON, In use ; OFF, Idle
LD2 2
nd
port - ON, In use ; OFF, Idle LD8 8
th
port - ON, In use ; OFF, Idle
LD3 3
rd
port - ON, In use ; OFF, Idle LD9 9
th
port - ON, In use ; OFF, Idle
LD4 4
th
port - ON, In use ; OFF, Idle LD10 10
th
port - ON, In use ; OFF, Idle
LD5 5
th
port - ON, In use ; OFF, Idle LD11 11
th
port - ON, In use ; OFF, Idle
LD6 6
th
port - ON, In use ; OFF, Idle LD12 12
th
port - ON, In use ; OFF, Idle
5.3.1.1 CMU (Call Metering Unit) Installation
An optional CMU4 board, which supports four (4) LCOB ports each, is required to support call-
metering service (50Hz, 12 kHz, and 16 kHz). For additional information on CMU, see the
iPECS-MG Feature Manual.
Install a CMU4 on connector pairs CN1 and 2, CN3 and 4, and CN5 and 6 on the LCOB to
support CO Line ports 1 and 12, as shown in Figure 5.3.1 1. Use care to align pins of the
connector with the CN1 and CN2 connectors on the CMU and press firmly in place.
5.3.1.2 LCOB Installation
Before installation of the LCOB, make sure CMU4s are installed, if required. The LCOB board
can be installed in any universal slot of any KSU; the 1st slot of the BKSU is for the MPB only.
Assure Power is OFF
Slide the LCOB in the guide rails of the desired slot.
Tighten thumbscrews to hold the board firmly in place.