2
7. Click “Open”
a. A command terminal will then open
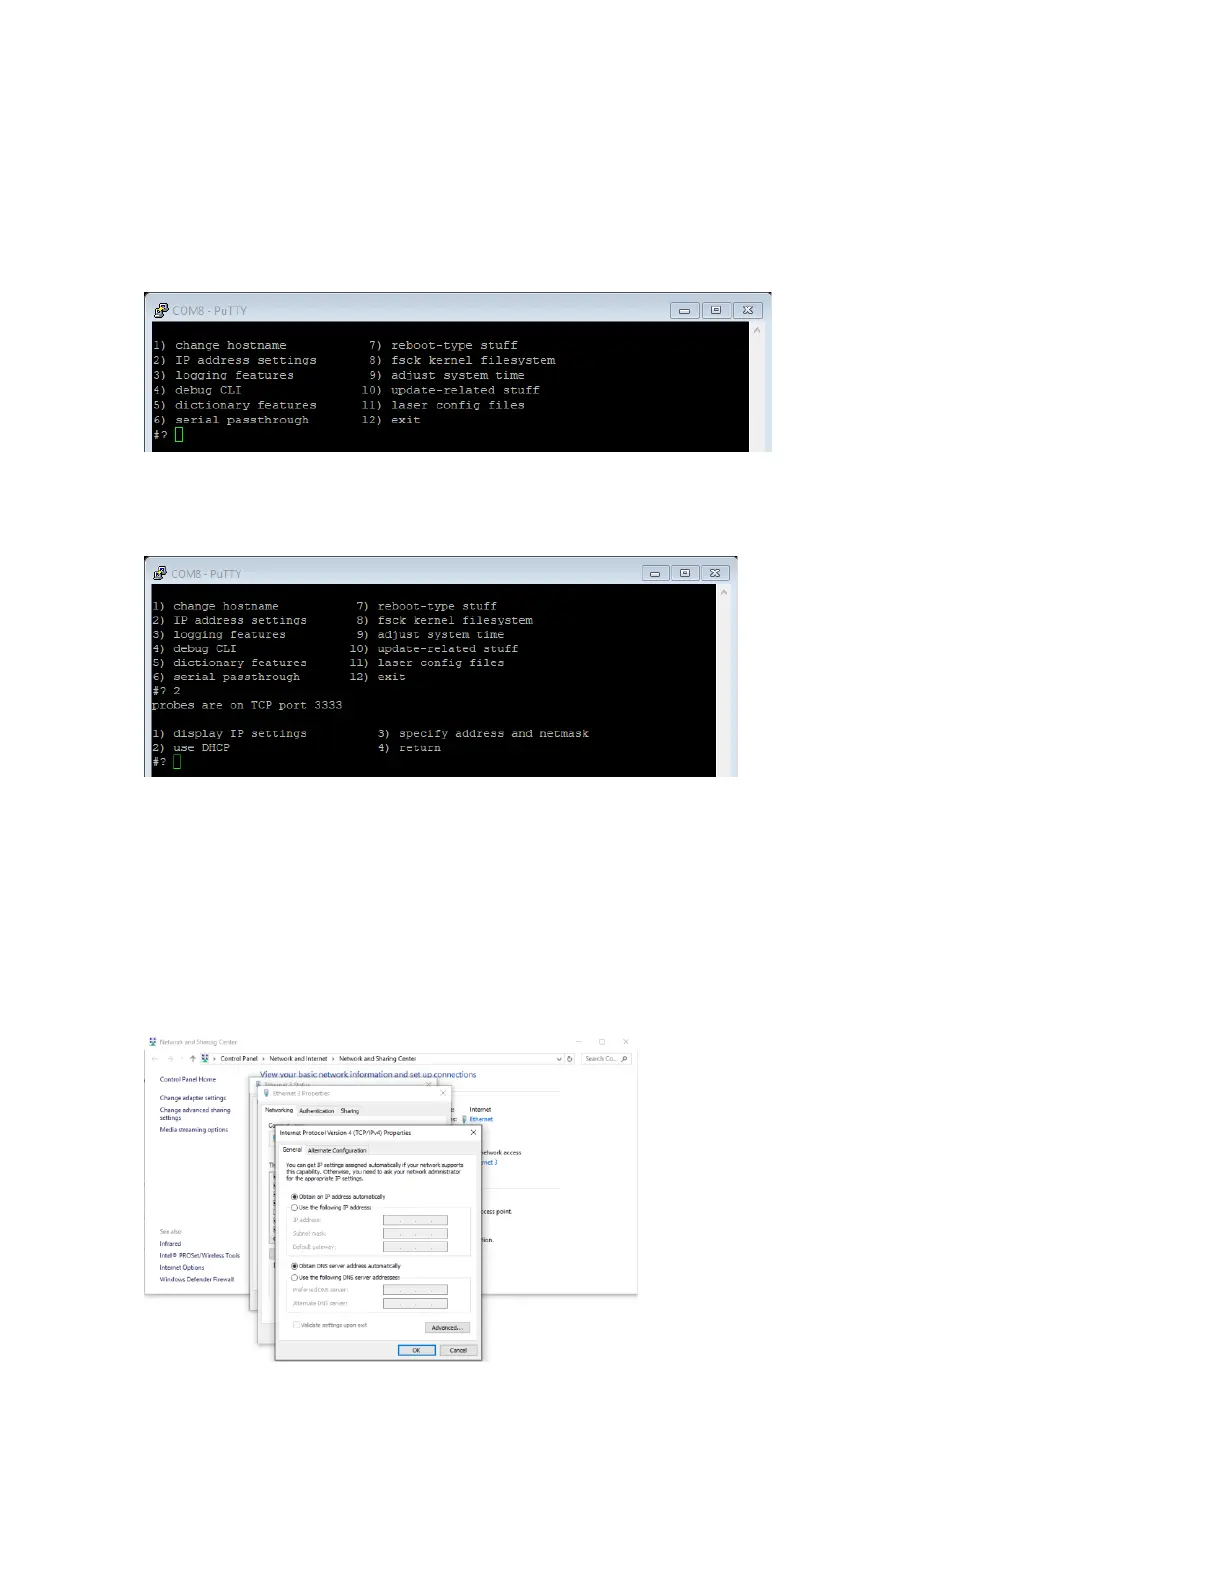
8. Hit enter in the command terminal to display a list of commands (Figure A-3)
Figure A-3 List of Available Commands
9. Type 2 and hit enter to display a list of commands for IP address settings (Figure A-4)
Figure A-4 IP Address Setting Commands
10. Type 2 and hit enter to set the Scan Controller back to DHCP
a. Please be patient as the Scan Controller reboots. The user will see data stream in the
command terminal as the Scan Controller reboots. This process can take up to 5
minutes.
11. Once the Scan Controller has rebooted, set the appropriate local area connection for the
Scanner back to “Obtain an IP address automatically” (Figure A-5)
Figure A-5 Setting the Network Connection
12. It should now be possible to reconnect to the Scan Controller in the Scan Controller Utility or
IPGScan