4
5. Click “OK.”
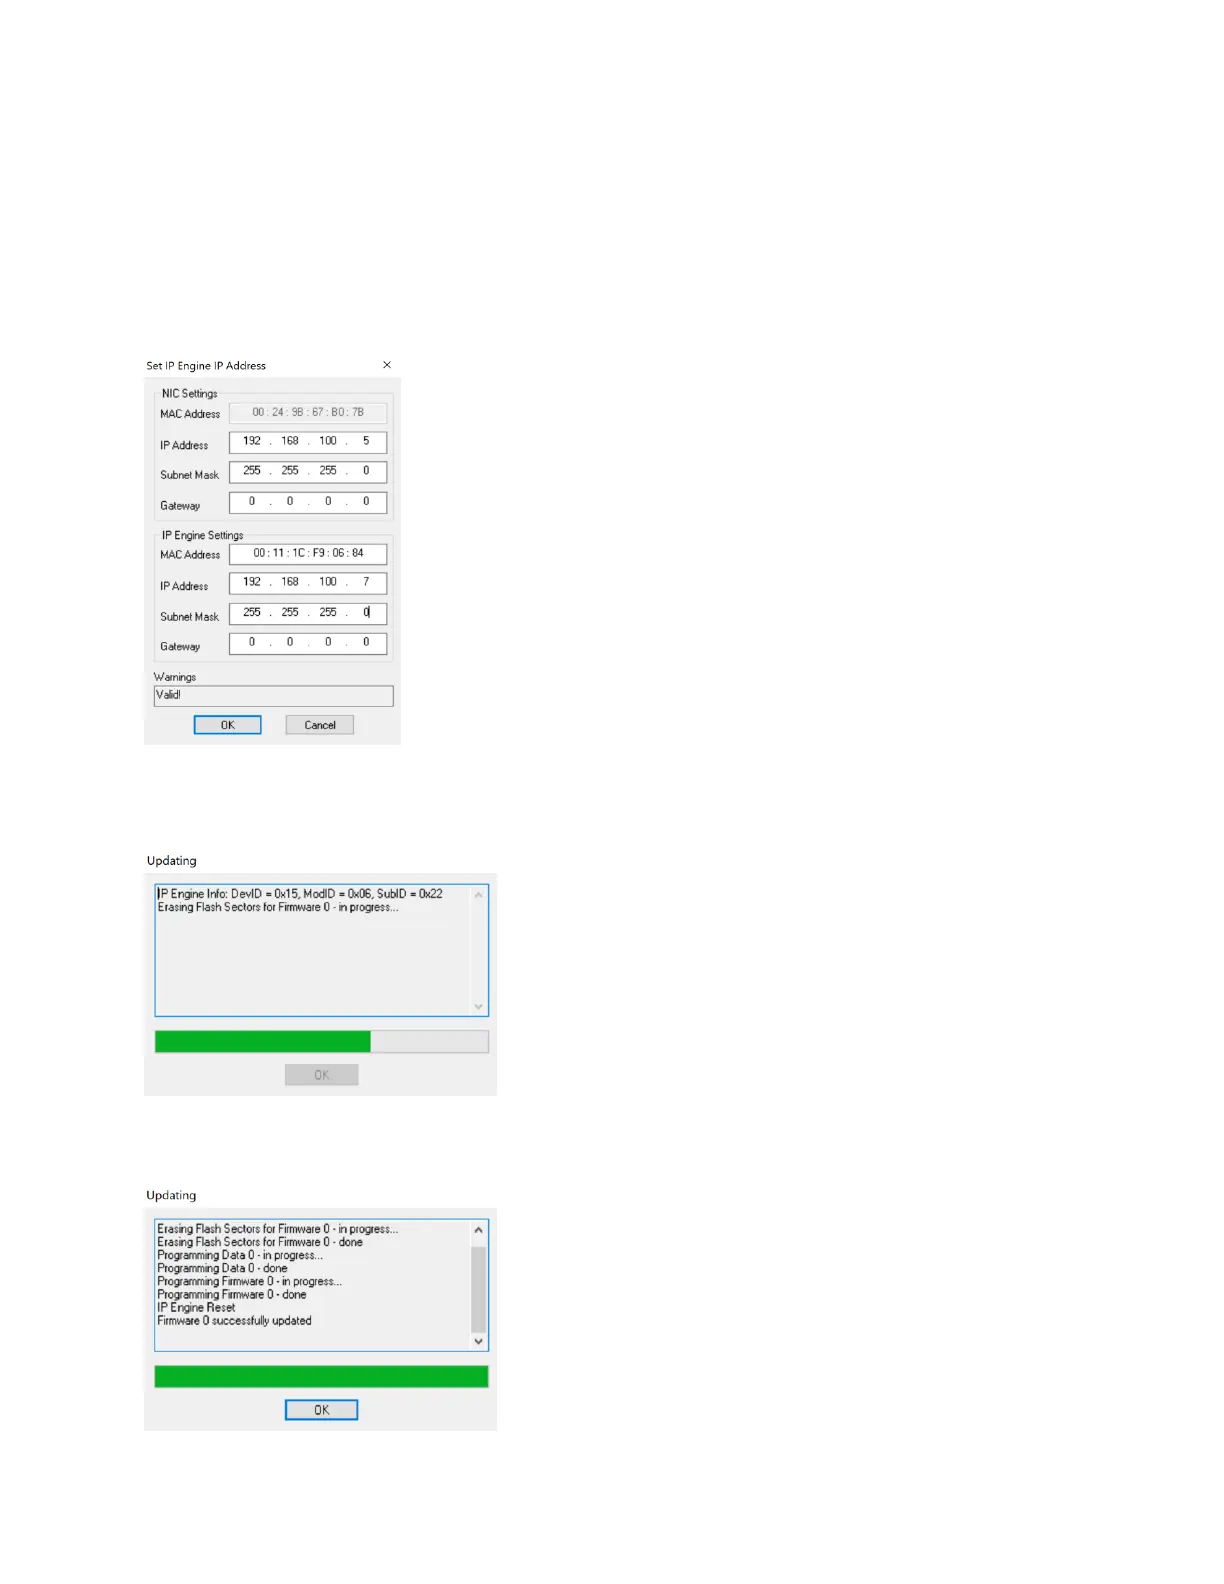
a. Note that if an IP address conflict exists, users will be prompted to change the camera’s
IP address prior to the update taking place. Under the “IP Engine Settings” box, users
can set an IP address for the camera that is similar to the computers adapter settings.
When a valid IP address is set, the user should see “Valid!” under the “Warnings” box.
See Figure B-3. Click “OK” to close the IP address window.
Figure B-3 Setting the Camera's IP Address
6. Click “OK” to start the update process and wait for the firmware update to complete. This could
take multiple minutes. See Figure B-4.
Figure B-4 Update in Progress
7. Once the update is complete, click “OK.” See Figure B-5.
Figure B-5 Update Complete