In helicopters, there is generally enough room on
the servo tray to achieve the necessary separation. If
necessary, a mount can be made using clear plastic to
mount the remote receiver as shown below.
Other Important Installation Tips
1. Mounttheservosusingrubbergrommetsandbrass
eyelets to isolate them from vibration. Do not over-
tighten the mounting screws; this will negate the
vibrationabsorptioneffectoftherubbergrommets.The
following diagram will assist you in properly mounting
your servo.
Thebrasseyeletsarepushedfromthebottomupinthe
rubbergrommets.Whentheservoscrewistightened
securely, it provides the proper security as well as the
proper vibration isolation for your servo.
2. Theservosmustbeabletomovefreelyovertheir
entire range of travel. Make sure that the control
linkages do not bind or impede the movement of any
of the servos.
3. Mount all switches away from the engine exhaust and
away from any high-vibration areas. Make sure the
switch operates freely and is able to operate over its
full travel.
It’s necessary to program the receiver to the transmitter
so that the receiver will only recognize that specific
transmitter, ignoring signals from any other sources. If the
receiver is not bound to the transmitter, the system will
not operate. During binding, the servo’s fail-safe positions
are stored.
Thefollowingsequencedescribesthebindingprocedure
fortheJRR921;however,allJRandSpektrumDSM
aircraft receivers are bound in the same way.
How To Bind
1. Withthesystemhookedupasshown,insertthebind
pluginthechargeplugreceptacle.Theswitchmustbe
a3-wiretypeswitch(JRPA001orJRPA004)toenter
bind mode through the switch. Plug the receiver’s
power lead from the switch into the receivers bind
port. If a 3-wire switch is not available, install the male
bind plug into the bind plug receptacle and power the
receiver through any other open port to enter bind
mode.
3. Establishthedesiredfail-safestickpositions:normally
low throttle and flight controls neutral.
4. Press and hold the bind button on the back of the
transmitterwhileturningonthepowerswitch.The
bind button should flash and can then be released, and
withinafewsecondsthesystemshouldconnect.The
LEDsonthereceiversshouldgosolid,indicatingthe
system has connected.
5. Remove the bind plug from the receiver or switch
harness and store it in a convenient place.
6. Afteryou’veprogrammedyourmodel,it’simportantto
rebind the system so the true low throttle and neutral
control surface positions are programmed.
Note
:Tobindanaircraftwithanelectronicspeed
controller that powers the receiver through the
throttlechannel(BEC),insertthebindplugintothe
battery port and proceed to Step #2.
Binding
ModelMatch
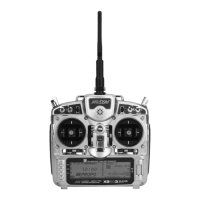
TheX95032.4featuresModelMatchtechnologythat
prevents the operation of a model if the wrong model
memory is selected. During binding, the receiver actually
learnsandremembersthespecificmodelmemory(1thru
50)thatthetransmitteriscurrentlyprogrammedto.Laterif
the incorrect model memory in the transmitter is selected
and the receiver is turned on, the model simply won’t
operate, preventing a possible crash. Change programming
to the correct model memory and you’re set to fly.
ServoMountingTab
Screw
Rubber Grommet
BrassEyelet

 Loading...