2. Select Master. All Programmable Mixers default
to Throttle as both the Master and the Slave
(THROTHRO). The first THRO is the Master and
the 2nd THRO represents the Slave. Since the Pitch is
the Master in this example, highlight the first channel
with the Selector and select PIT to the left of the
arrow.
3. Select Slave. Highlight and select THRO to the right of
the arrow to obtain a list of channels that can be the
Slave. Highlight and select AILE as the Slave.
4. Select Position and Flight Modes. Move the Selector
to highlight each of the active flight modes (NRM, ST1,
ST2, ST3, ST4, GER, and then select the mix position
(0 or 1). Since the mix value will be in position 0,
the flight modes where the mix would not be required
would be set to the POS 1 mix position (will be left at
0%).
The number changes from 0 to 1 as the switch is moved
back and forth. When the number is 0, the mixer looks at
the Pos0 values (not programmed yet) and when it is a
1 it looks at the Pos1 values (also not programmed yet).
For this example, assume this mix will be used in Stunt
Modes 1 and 2 only.
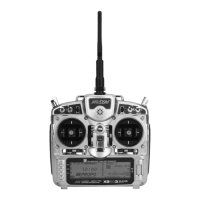
5. Travel and Direction. Highlight Pos0 with the Selector
and Press to access the values. Move the throttle
stick to the full high position and the upper value next
to Pos0 should be highlighted. Set the higher Pos0
parameter to a low negative or positive value (check
aileron function for proper direction) to a starting
value of between 3% and 5%. This is the amount of
deflection of the Aileron (Slave channel) that occurs
when the mixer is turned on and the throttle is moved
from center to full throttle.
If an Aileron mixing value is also required for center stick
to low Pitch, move the throttle stick to the low position.
You can then highlight and adjust the Pos0 mix value as
needed.
6. Offset. Leave the offset value to 0% for this mix, and
0% corresponds to the center stick position.
7. Verify Proper Mix Operation. Move the Flight Model
switch to the Stunt 1 or Stunt 2 positions, and move
the Throttle stick from center to full throttle, and from
center stick to low throttle. If the mix is activated and
functioning properly, you should see a slight aileron
servo movement (easiest to see at the aileron servo
arm) when the throttle stick is moved. Verify that the
Aileron servo moves in the desired direction to correct
the trim problem. Next, switch the Flight Mode switch
to the Normal or Throttle Hold positions (set to off in
this example), and verify that the mix is being turned
off for these desired flight modes.
The example below demonstrates a Multi-Point
Program Mix for coupling the Retractable Gear function
to the Flight Mode switch so the Gear automatically
moves up and down when moving through the Flight
modes.
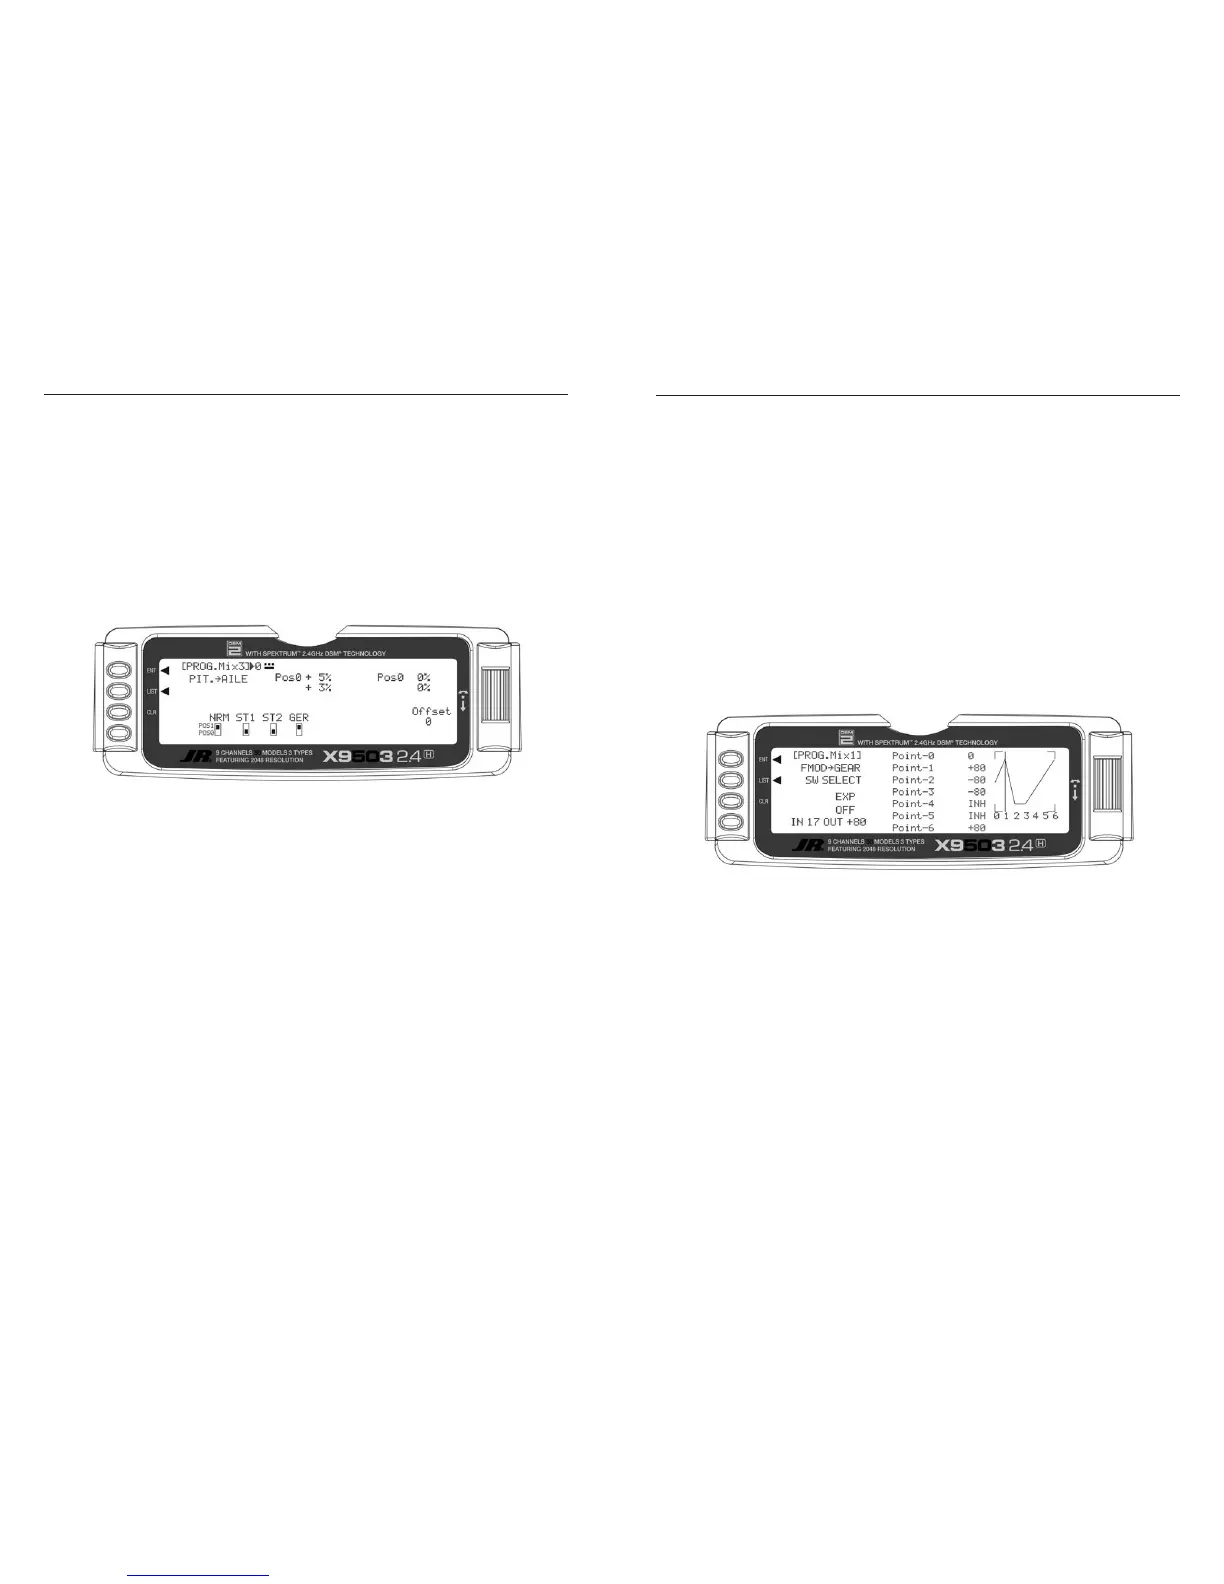
This Multi-Point mix (mixes 1 and 2) will use the FMOD
(Flight Mode switch) as the Master and the Gear (or other
available auxiliary channels) as the Slave. The mix will be
activated with the Flight Mode switch.
Select and set the Mix parameters in the following
order: Program Mix number (1 or 2), Master and Slave
Channels, switch Selection, Set Points Travel/Direction,
and Expo. This is generally a good sequence to follow
when setting up Multi-Point Programmable Mixers.
1. Program Mix Number. Highlight and select one of the
Multi-Point Programmable Mixers (PROG.MIX1
or PROG.MIX2) to obtain the first Multi-Point
Programmable Mix display. Then press ACT next to
CLR or highlight and select INH to obtain the main
mix display. The example is using PROG.MIX1.
Flight Mode switch in Normal position
2. Select Master. All Programmable Mixers default
to Throttle as both the Master and the Slave
(THROTHRO). The first THRO is the Master and
the second THRO represents the Slave. Highlight and
select the first THRO to the left of the arrow to obtain
a list of channels and select FMOD as the Master.
3. Select Slave. Highlight and select THRO to the
right of the arrow to obtain a list of channels that can
be the Slave. Highlight and select GEAR as the Slave.
Now, if you move the Flight Mode or Throttle Hold
switches, the vertical cursor on the screen moves to
one of the 7 points for each of the flight modes. Point
1 will be Normal, Point 2 will be Stunt 1, Point 3 will
be Stunt 2, and Point 6 will be Throttle Hold.
 Loading...