Note:Youshouldfullychargeboththetransmitter
and the receiver battery packs prior to each flying
session. Also, check the condition of the receiver
battery between each flight using a reliable battery
testerwithabuilt-inload.Theincludedwallcharger
slowchargesata110mArate.Inordertofully
charge the included batteries, you should leave the
charger and batteries hooked up to the included wall
chargerfor15hours.
Youcanuseanoptionalfastchargertochargeboththe
transmitter and receiver batteries. However, the batteries
must be properly charged and the charge condition
should be checked prior to flight. False peaking is a
common occurrence with many fast chargers (batteries
giving an indication the battery is fully charged when
in fact the battery is only partially charged). False
peaking can lead to disastrous results and it is the
pilot’s responsibility to verify the charge condition of the
batteries before every flight. (Also see Receiver Power
Requirements page G-24)
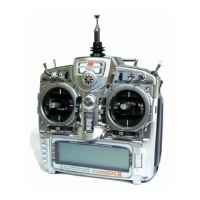
JR Transmitter Charging
ThecenterpinonallJR
®
and Spektrum
™
transmitters is
negative.Therefore,thecenterpinonallJRchargersis
negative,notpositive.Thisisdifferentfrommanyother
manufacturers’chargersandradiosystems.Bewareof
improper connections based on “color-coded” wire leads,
astheymaynotapplyinthisinstance.Youmustmake
sure that the center pin of your JR transmitter is always
connected to the negative pole for correct polarity.
Note
:Whenusingafastchargertochargethe
transmitterbatterydonotexceed1.5amps(or
1500mAh)chargerateordamagetothetransmitter
or battery damage can occur.
Using the Included Charger
Thepilotlampsshouldalwaysbeonduringthecharging
operation. If not, check to make sure that both the
transmitter and receiver are switched off.
DonotusethechargerforequipmentotherthanJR.The
chargingplugpolaritymaynotbethesame.Equipment
damage can result.
Do not use other manufacturers’ after-market accessories
that plug into the transmitter’s charging jack if you are
unsure of the polarity compatibility with your radio. Seek
expert advice to avoid possible damage.
During the charging operation, the charger’s temperature
is slightly elevated.
All preprogrammed data is protected by a flash memory
that guards against main transmitter battery failure.
 Loading...