The X9503 2.4 contains a Trainer System that allows
the instructor to transfer some or all of the primary
flight control functions (Throttle, Aileron, Elevator and
Rudder) to the student. It also allows for indicating if the
transmitter is to be the Master or Slave. The Trainer (TRN)
switch transfers control to the student when the X9503 2.4
is being used as the Master/Instructor transmitter. All Dual
rates and Exponential settings in the Master transmitter
are transferred to the Slave transmitter when the master
transmitter channels are selected individually in the trainer
menu. The Slave transmitter battery must be charged.
1. Connect the Trainer cord between the Master and
Slave transmitters. Turn the power on to the Master
transmitter. The Slave transmitter remains powered off
and can even have the module removed.
2. Make sure the Slave transmitter is in the PPM/FM
modulation mode. If the slave system is a X9503 2.4 or
any other Spread Spectrum-only system, such as other
JR 2.4GHz or Spektrum systems, this does not apply.
3. Highlight and select Trainer in the FUNCTION LIST to
obtain the Trainer Display.
4. If using the X9503 2.4 as the Master transmitter, select
the channel(s) the Slave transmitter will operate when
the trainer switch is depressed.
When all channel selectors are in the MAST position,
the slave system must be programmed for the model,
meaning all programming necessary for the model
must be programmed in both the master and the slave
systems. Also when all the channel selectors are in the
MAST position, the slave system should be left in normal
default MASTER mode. To transfer only certain channels
to the student, highlight and select the channels you
will transfer, moving the indicator for these channels to
the SLAV position for these channels. When less than
all channels are selected as SLAV, PROGRAM T appears
on the display indicating that the Trainer System has
been programmed to transfer only selected channels.
When the channel selectors are in the SLAV position,
all programming of the master system will be used, and
only the stick movements of the 4 primary channels are
used from the slave system when control is given to the
slave transmitter. In this case, the slave system does not
need to be programmed for the model. Also the slave
system should be set to Slave mode in its trainer system.
The X9503 2.4 is now ready to be used as the Master
or instructor transmitter. Depress the Snap Roll button
to transfer control to the student. Control will remain
transferred until the Snap Roll button is released.
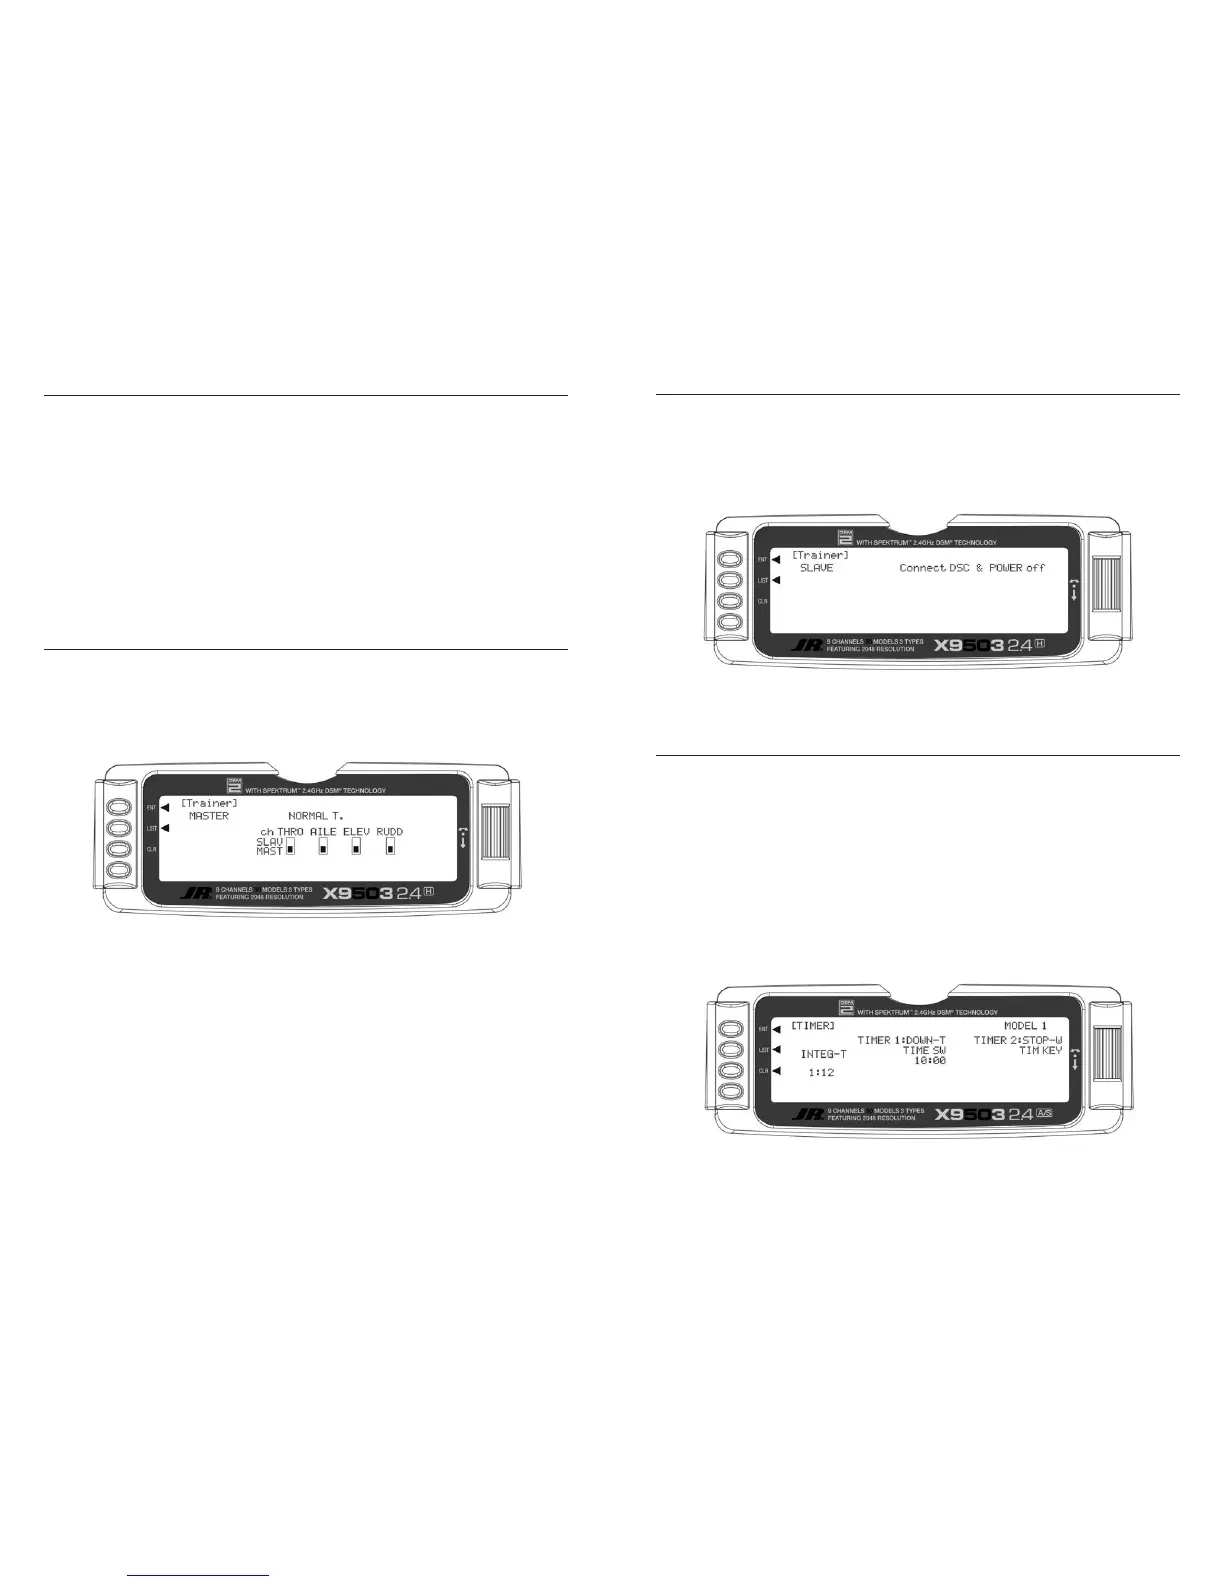
Highlight and select
MASTER and the display will switch
to SLAVE. A message appears instructing to Connect
DSC & POWER off
. Make sure the transmitter power
switch is in the OFF position and the DSC or trainer cord
is connected between the 2 transmitters.
If the master system is an XP9303, X9303 2.4, X9503
2.4, or 12X and the individual channels are not selected
in the master system’s trainer function, leave the slave
system’s trainer function in the default MASTER setting. In
this case, both the master and the slave systems must be
fully programmed and set up to fly the model including all
servo reversing, travel adjust, program mixes and all other
necessary programming.
You can now use the X9503 as the Slave or student
transmitter.
The X9503 2.4 contains a Timer System with three
timers. One is an integrated timer that keeps track of
total transmitter-on time for the model and it displays
on the Main screen. You can configure the other timers
as Countdown timers or as Stopwatches. These timers
also appear on the Main display when active and can be
started, stopped and reset from the Main display.
1. To configure a timer as a Countdown timer, highlight
and select
Timer in the FUNCTION LIST to obtain the
Timer display.
Highlight and select INH under TIMER and then select
DOWN-T. Use the Selector to set the countdown start
time. Once the timer is set, TIM will appear on the Main
display in the lower left corner. You can program the
timers to several different buttons or switches. Use the
Selector to highlight the desired button or switch to
operate the timer. Press the Selector to confirm the
selection.
2. To Reset the Integrated Timer, highlight and select the
time under
INTEG-T and Push [CLR]=0:00 appears
on the display. Press the CLR button to the left of the
display to reset the integrated timer.
When all channel selectors are in the MAST position,
NORMAL appears on the display and all 4 channels
are transferred to the student when the trainer switch is
depressed.
 Loading...