Note: The GOVERNOR function is only listed in
Function Mode when first activated in the Device
Select function in System Mode.
You can use the X9503 2.4’s Governor function with most
currently available Governors. The Governor function
allows you to set the Governor rpm values for each of
the Active Flight modes. It automatically changes the
Governor rpm values as set when the Flight Mode switch
is moved through each of the active flight modes.
The value range in the Governor function is +/-
0%–125%, and its values follow the Travel Adjust values
exactly. In other words, a desired Travel Adjust value of
+55% is +55% in the Governor function.
The Governor program, when activated in System Mode,
functions through the GEAR channel (Channel 5) of the
X9503 2.4. To properly connect a Governor to the receiver,
connect the rpm signal lead from the Governor to the Gear
(CH5).
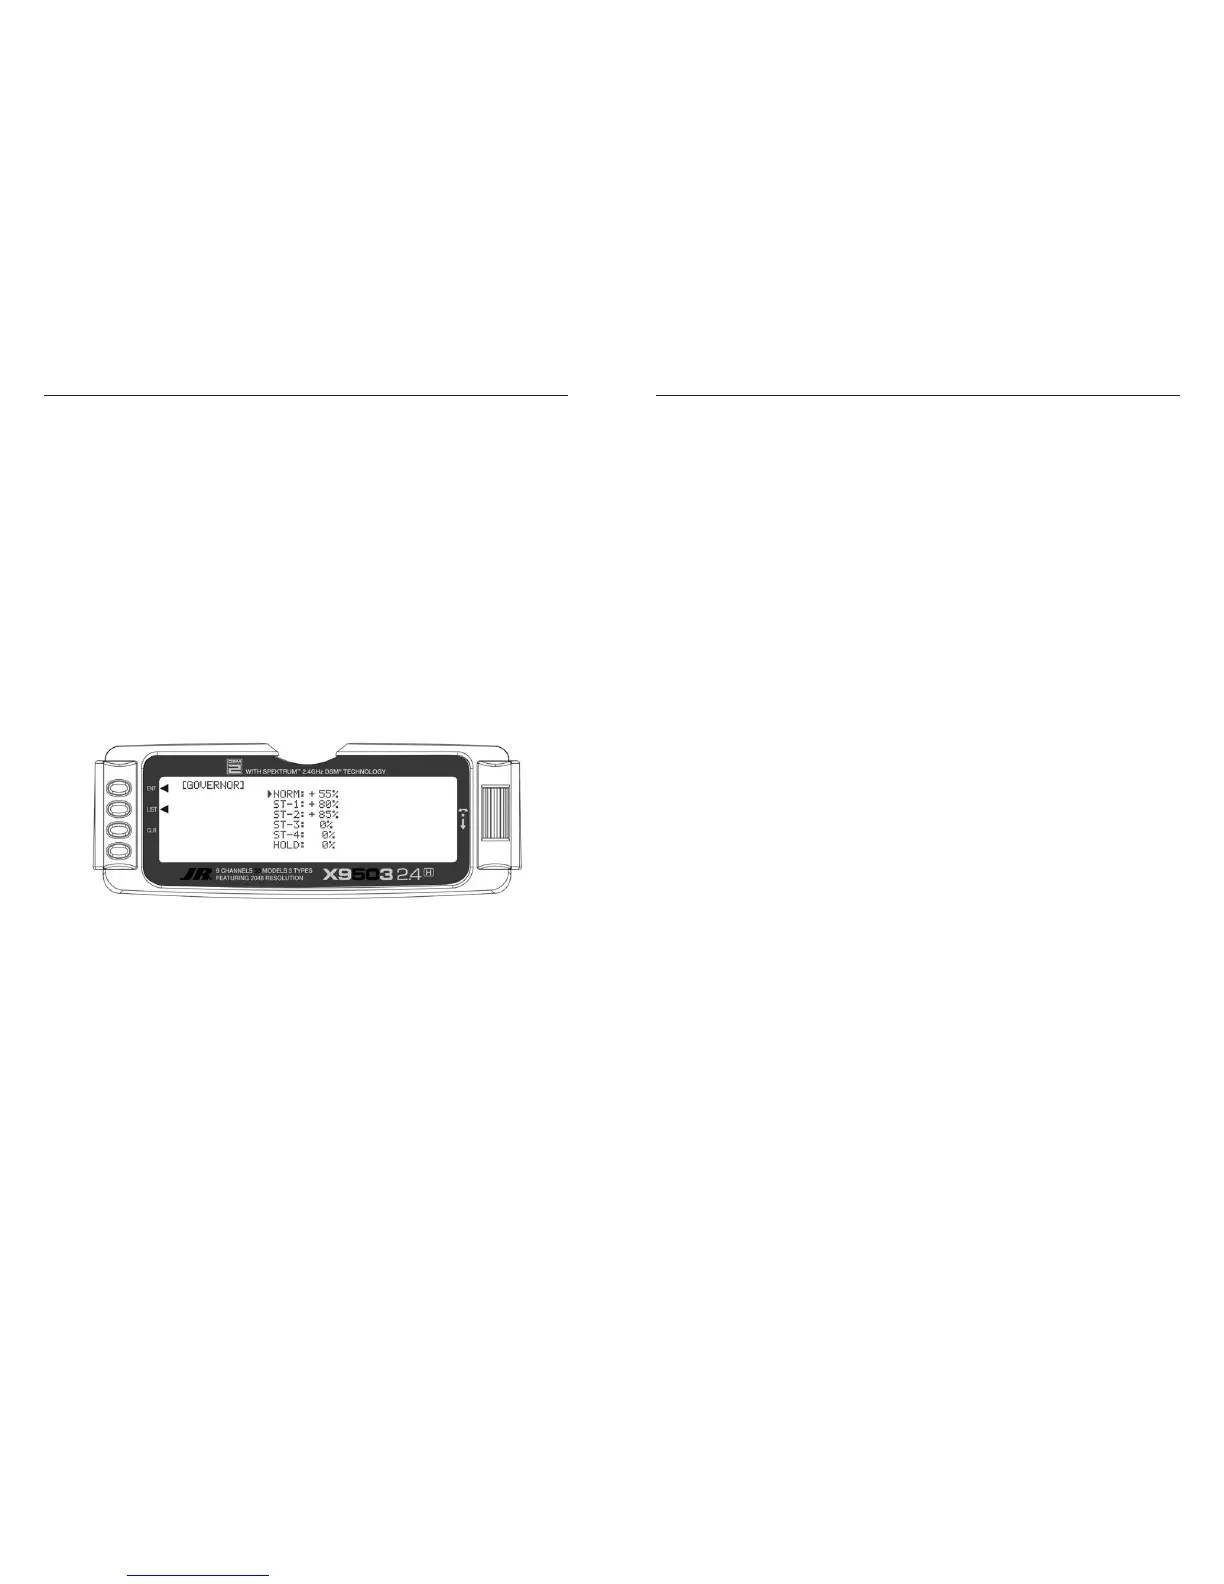
Accessing the Governor Function
1. Turn the transmitter ON.
2. Press the LIST key to enter Function mode.
3. Highlight the GOVERNOR function. Press the
Selector to access.
4. Highlight the value to be adjusted with the Selector,
then press to access the value. Roll the Selector to
adjust the value as needed.
5. To exit the Governor function, highlight LIST, and
press.
Note: Flight Modes ST-3 and ST-4 will only be
shown if activated previously in System Mode.
For Governors like the Model Avionics “Throttle Jockey,”
leave the Travel Adjust values for the Gear channel at
+/-100%, and set your Governor rpm values from the rpm
calculator in the Governor function.
For other brand Governors, you should also leave
the Travel Adjust values for the Gear Channel (CH5)
at +/-100%. You can then increase the values in the
Governor function above +/-100% up to +/-125% to
increase the rpm remotely from the preset rpm selected at
the Governor.
Note: To turn off the Governor Function for engine
tuning, etc. return the value for the desired flight
mode to zero. Remember the value so it can be
re-entered after tuning.
The X9503 2.4 System provides 4 Standard
programmable mixes (PROG.MIX3 through PROG.MIX6)
and 2 Multi-Point programmable mixes (PROG.MIX1 &
PROG.MIX2). Mixing occurs when the pilot moves a stick,
switch or lever on the Master channel and the transmitter
generates an input for the Slave channel. The Slave’s input
is based on the pilot’s input to the Master channel and the
parameter defined in the programmable mixer.
You can use programmable mixers whenever you want
a channel to react or move (Slave) by providing input
to another channel (Master), or to move a channel by
moving a switch or lever. They are typically used to
compensate for deficiencies in helicopter design/setup
such as eliminating a pitch-to-aileron, or pitch-to-elevator
trim change issue when collective is given. They are also
used to activate special helicopter functions like Retracts,
Landing Lights, etc.
Multi-Point Mixing provides the ability to define a
customized “curve” of travel that the Slave channel
follows as it reacts to the Master channel. It is different
from Normal Mixing in the sense that Normal Mixing
results in a linear movement of the Slave channel in
relation to the Master. With Multi-Point Mixing there
are 7 points (includes endpoints) along the travel of the
Master channel you can adjust to control the action of the
Slave channel (more or less travel in the same/opposite
direction) providing the ability to deviate from a linear
mixing action.
Mixes are programmable, allowing any of the 9 channels
to be Master, Slave or both. Additionally there are 4
options for Master channels that begin with a “#” (pound
sign), these Master channels are origin type mixes. These
include #AIL, #ELE, #RUD, and #PIT. Origin mixing
bypasses any other mixing that might affect that channel
such as throttle curves or other programming and uses
the stick position only to control the mix. There are also
4 options for Master channels that end with a + sign,
these Master channels are for type mixes. These include
THR+, ELE+, AIL+, and RUD+, and the trim of the Master
channel as well as any other mixing to the Master channel
to control the Slave channel of the mix. You can also set
the Timer, TIMT, switch (momentary switch) as the Master
channel of a mix.
You can also program the mixing parameters and include
the direction of travel of the Slave channel; the amount
of travel for the Slave channel; the Offset (where the mix
starts and changes direction) and the switches/levers/
sticks used to turn a mixer on and off. You can select and
adjust all of these elements in Programmable Mixes.
Some examples of how programmable mixers might be
used include but are certainly not limited to:
• Swashplate Timing: Improves Rolling and
Vertical Maneuver tracking
Use this when a heli will not roll on its axis (tail boom)
correctly, or pulls to the Left or Right during pitching
maneuvers (loops, stall turns, etc.).
Most Helis need and can benefit from this form of mix to
improve their overall flight performance. This trick mixing
is used by most of the pros to make their models fly more
accurately, and in turn, more easily.
2 Separate Mixes are required
Mix 1: Elevator to Aileron (Corrects vertical
tracking)
Use a program mix Elevator to Aileron to correct a
Vertical pull/ issue. The mix allows the Aileron servo to
move slightly in the opposite direction of the out of track
direction in order to keep the aircraft from pulling left or
right when performing a vertical maneuver. This standard
mixer designates the Elevator as Master and the Ailerons
as Slave.
Mix 2: Aileron to Elevator (Corrects Rolling
Maneuvers)
To add swashplate timing for Rolling maneuvers, a similar
mix of Aileron (Master) to Elevator (Slave) would be
created additionally. For these types of mixes, you would
use Standard Program Mix numbers 3 through 6.
 Loading...