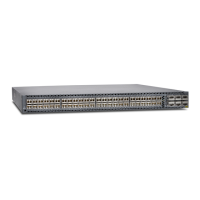
Mounting an ACX5000 Router in a Rack or Cabinet
You can mount all ACX5000 routeron a four post19-in. rack or cabinet using the mounting
kit provided with the device.
For four post rack or cabinet installations, the mounting kit contains two front mounting
rails with two matching rear mounting blades. This configuration allows either end of the
router to be mounted flush with the rack and still be adjustable for racks with different
depths.
The mounting kit for the ACX5096 has mounting rails, blades, and brackets for the
four-post configuration.
The front and rear rack rails must be spaced between 28 in. (71.1 cm) and 36 in. (91.4 cm)
front to back.
This topic describes:
•
Before You Begin Rack Installation on page 104
•
Four Post Procedure on page 106
•
Two Post Procedure on page 108
Before You Begin Rack Installation
Before you begin mounting a ACX5000 router in the rack or cabinet:
1. Ensure that you understand how to prevent electrostatic discharge (ESD) damage.
See Prevention of Electrostatic Discharge Damage.
2. Verify that the site meets the requirements described in “Site Preparation Checklist
for an ACX5000 Router” on page 45.
3. Place the rack in its permanent location, allowing adequate clearance for airflow and
maintenance, and secure it to the building structure.
4. Read General Site Guidelines, with particular attention to Chassis Lifting Guidelines for
a ACX5000 Router.
5. Remove the router from the shipping carton. See “Unpacking an ACX5000 Router”
on page 101.
6. Ensure that you have the following parts and tools available to mount the router in a
rack:
•
ESD grounding strap (not provided).
•
Blades, rails, or brackets (provided).
•
For four-post installations:
•
One pair of rear mounting blades. These mounting blades support the rear of
the chassis and must be installed (provided).
•
One pair of front mounting rails. The mounting blades slide into the mounting
rails to support the router (provided).
Copyright © 2015, Juniper Networks, Inc.104
ACX5048 and ACX5096 Universal Access Router

 Loading...