Installation
April 2020 4-14 06-237619-001
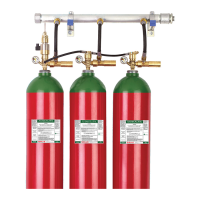
4-6.3 Install Discharge Hoses to Manifold Check Valves
After installing the manifold, install the discharge hoses to the manifold check valves.
4-6.4 Securing Single-Row Cylinders
Follow this procedure to secure the cylinders in a single row (see Figure 4-5):
Note: The installation of the manifold and the pipe work within the cylinder storage area/room
must be completed before cylinders are moved into the cylinder storage area/room.
1. Use 1/2” expansion bolts (or equivalent) with washer or similar to secure the channel
iron/Unistrut supplied to a wall or solid structure. On steel structures, The channel
iron/Unistrut could be fixed by welding.
2. Tighten bolts in accordance with the manufacturer’s recommendation for the selected fixing
and the strength of the wall.
3. Install all sections of channel iron/Unistrut horizontally and at the same height from the
floor.
4. For single row, secure cylinders using the single row bracket, P/N 01-8131-0000 for 80L
cylinders.
4-6.5 Securing Multi-Row Cylinders
Follow this procedure to secure the cylinders in a multi-row setup (see Figure 4-6):
Note: The installation of the manifold and the pipe work within the cylinder storage area/room
must be completed before cylinders are moved into the cylinder storage area/room.
1. Use 1/2” expansion bolts (or equivalent) with washer or similar to secure the channel
iron/Unistrut supplied to a wall or solid structure. On steel structures, The channel
iron/Unistrut could be fixed by welding.
2. Tighten bolts in accordance with the manufacturer’s recommendation for the selected in-
sert and the strength of the wall.
3. Install all sections of channel iron/Unistrut horizontally and at the same height from the
floor.
4. Fit clamping bolts into the channel iron.
Note: When bolt and nuts in AISI316 are used, apply silicone spray or “Molykote
™
lacquer” to
the male threads before assembly.
5. If using Unistrut profiles, apply counter nut, washer, and plate nut on the bolt. Fit the bolt
into the profile, then tighten the nut loosely against the washer. Use a wooden spacer as a
template for exact location of bolts and fix by tightening the nut against the washer. Apply
max torque 7.4-11.1 ft lbf (10 – 15 N-m).
6. Fit wooden spacer on the clamping bolts (double row only).
7. Place cylinder into position.
8. Fit clamping bar on cylinder bracket as appropriate. Tighten nuts on clamping bolts lightly
at this stage (adjustment of cylinders may be required during hose installation). Do not use
the clamping bolt as a means of pressing the cylinder into the bracket.
WARNING
Use caution when installing the cylinders into place.
The high pressure cylinder valve is capable of producing high discharge thrust
from the valve outlet if not handled properly. Remember that pressurized
cylinders are extremely hazardous. Always ensure the Safety Transport cap is
fitted before any movement of the cylinder. Failure to do so can result in serious
bodily injury, death, and property damage.