Maintenance
06-237619-001 6-7 April 2020
6-6.6 Test Release Units
Release units must be tested semi-annually for proper operation. This test can be performed
without fully discharging the Kidde IGS agent cylinders. In systems with multiple release units,
test one release unit at a time before proceeding to the next, as follows:
Note: Do not remove the solenoid on the release unit when testing release units.
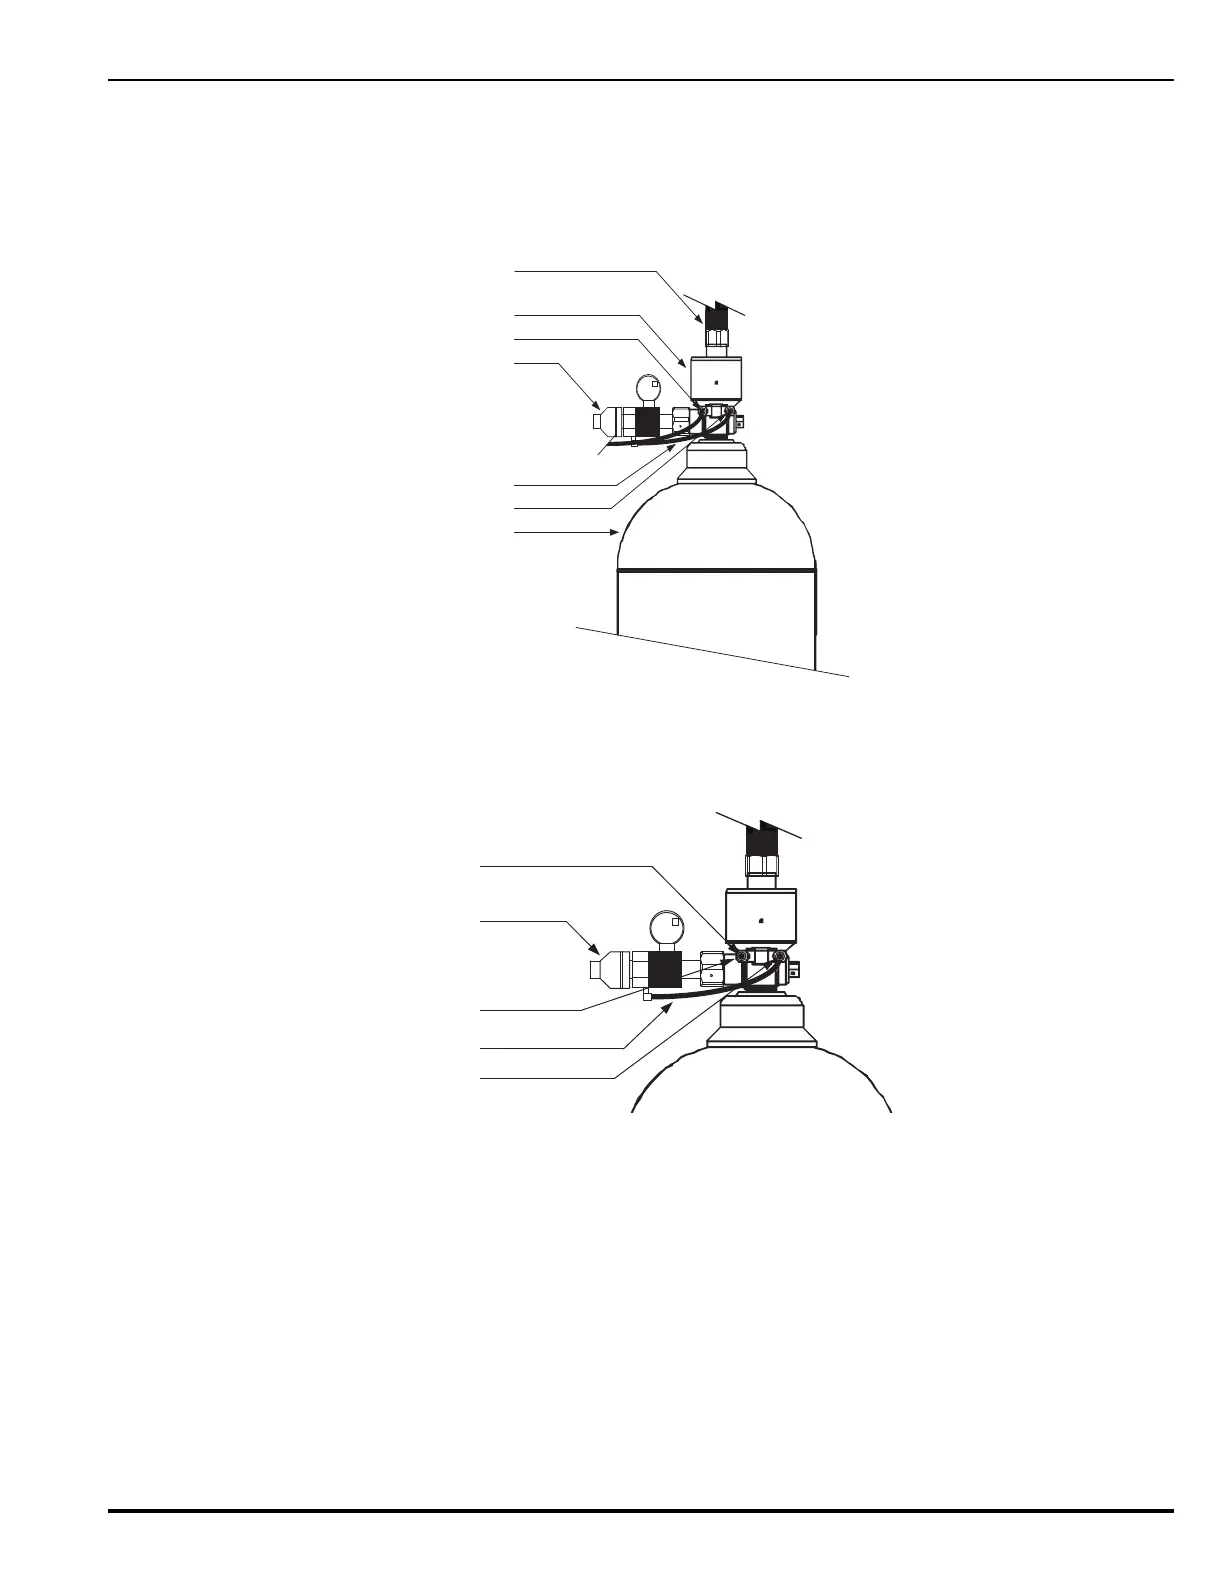
Figure 6-1. Typical Primary Cylinder/Valve Assembly (Rear View)
1. Remove the actuation line connecting the master cylinder with the release unit to the
next slave cylinder. This is the actuation line installed in the release outlet.
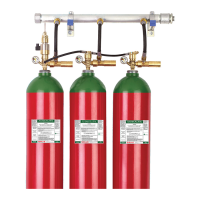
Figure 6-2. Spare Pilot Line Bleed Valve Location
2. Install a spare Pilot Line Bleed Valve in the release outlet from where the actuation hose
was removed. Make sure to push the bleed valve in fully.
3. Disconnect the actuation hose from the release unit to the valve at the release inlet.
4. Disconnect the Discharge hose from the discharge outlet on the valve. Immediately
install the anti-recoil cap on the valve’s discharge outlet.
5. Reconnect the actuation hose from the release unit to the valve at the release inlet. Make
sure to push the actuation hose in fully.
6. Operate the Kidde IGS System electrically. This can be accomplished by actuation of the
Kidde IGS System at the system control panel or by manual operation of an electric pull
station.
Discharge Hose
Valve
Release Unit
Actuation Hose
Cylinder
Release Outlet
Release Inlet
Release Unit
Actuation Hose
Release Outlet
Release Inlet
Install Spare
Bleeder Valve Here