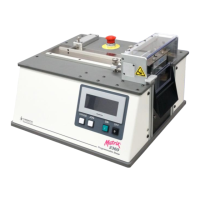
Matrix 2360 Programmable Shear User Manual - Section 6
40 12-092600 A
6.2.1 Installing the Automatic Roll Feed
The Automatic Roll Feed Mechanism is shipped separately from the main body of
the machine. The optional equipment is designed to make installation quick and
easy.
The Automatic Roll Feed Mechanism is delivered with the following parts:
Two ¼-20 x 1.5” hex head screws with matching washers,
and a new fan panel with a power plug and wiring installed.
ELECTRICAL HAZARD: Disconnect the unit from its power
source before beginning any maintenance or repair procedure. If a
panel is opened, exposure to live electrical circuits is possible.
Failure to follow all electrical safety procedures could result in
SERIOUS INJURY or DEATH BY ELECTROCUTION
Tools required are:
3/16” Hex Key Wrench
3/32” Hex Key Wrench
5/32” Hex Key Wrench
9/64” Hex Key Wrench
Small, Flat Blade Screwdriver
Follow these instructions to install the Automatic Roll Feed Mechanism.
1. Disconnect the equipment by unplugging the cord.
2. Remove the front panel (the panel that wraps around the unit and includes
the touch screen) by removing four ¼”-20 black oxide button head screws.
Place these screws in a secure location. Do not disconnect the electrical
connections. Tilt the front panel face down onto a soft surface. Avoid
scratching the touch screen.
3. Trace the J6 fan power lead to
the top of the circuit board and
unplug the fan. The fan
connection point is labeled J6
above the connector and FAN
below it. Remove the fan panel
by removing four ¼”-20 button
head screws. Place these
screws in a secure location.
When removing the fan panel,
thread the fan power cable out of
the enclosure.