Matrix 2360 Programmable Shear User Manual - Section 6
46 12-092600 A
6.2.2 Setting the Loop Sensor Controls
The loop sensor adjustment is set before
shipment. The settings should be
adequate for most applications. If
adjustment is necessary for your
application, use a small Phillips
screwdriver to release the screw holding
the sensor controls cover. Open the
cover to expose the sensor control panel.
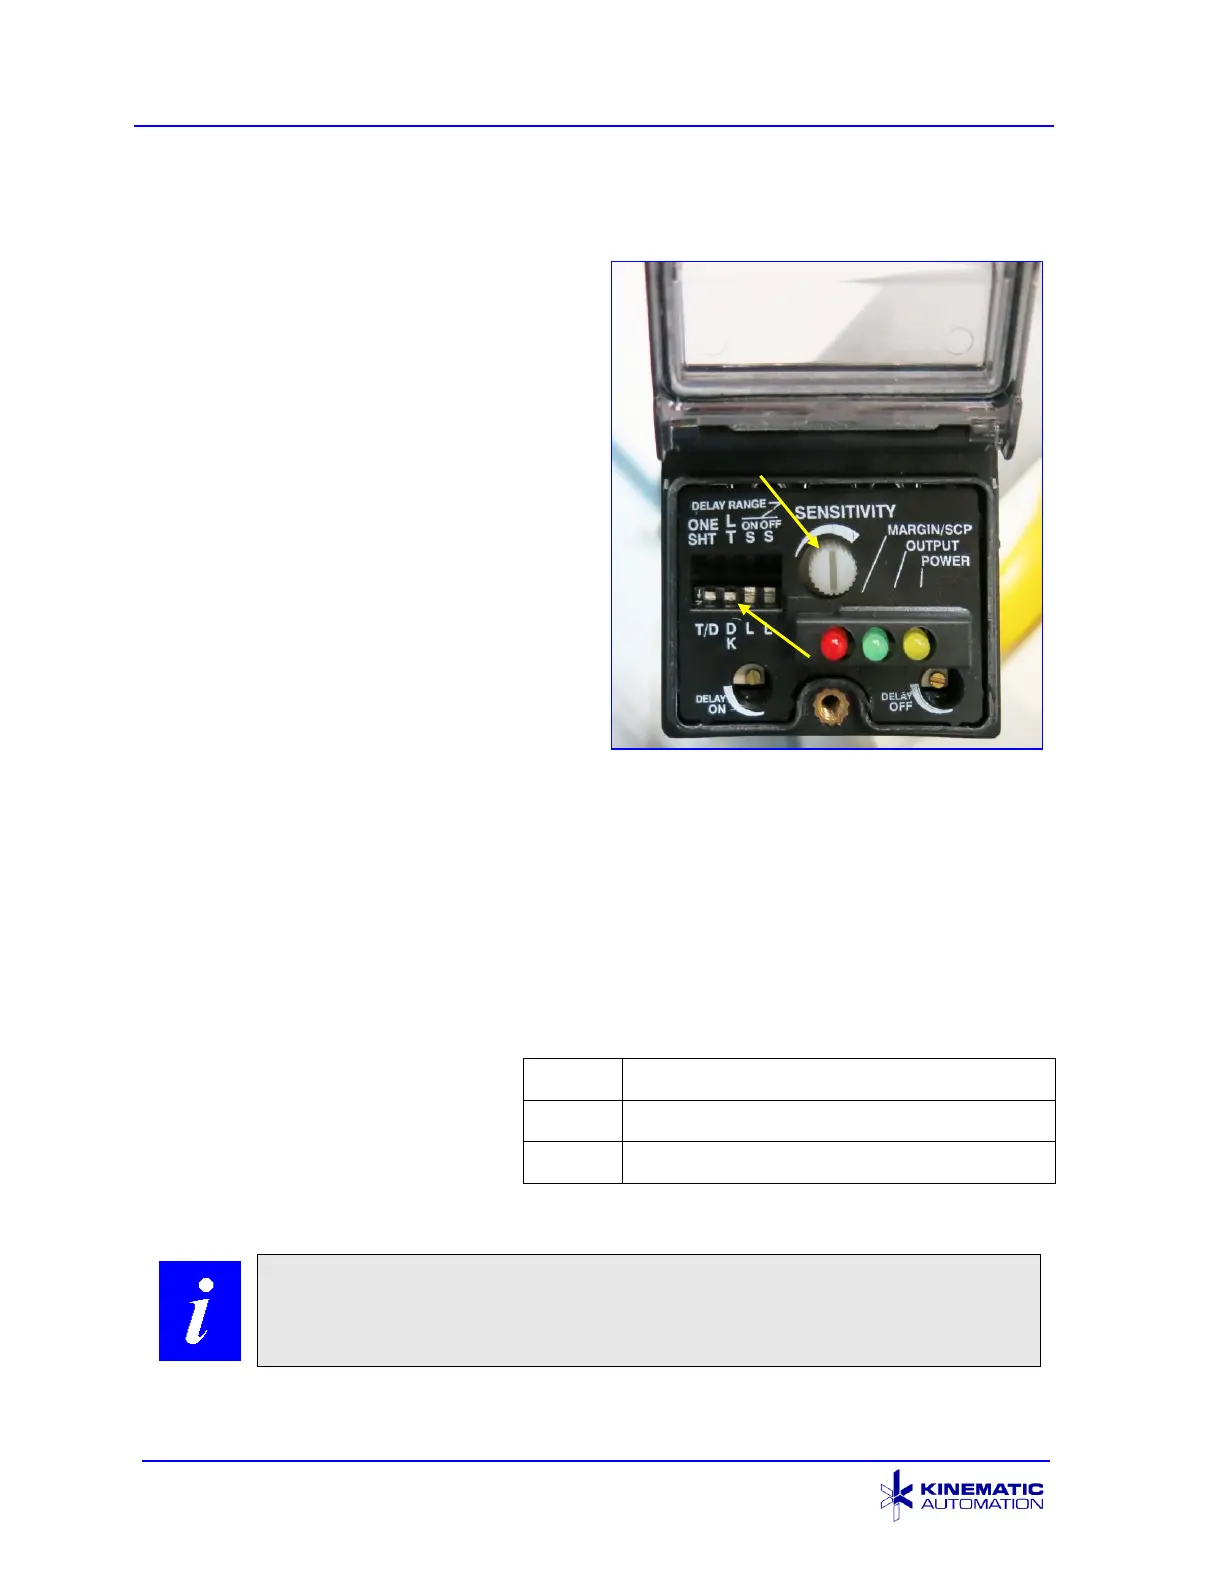
1. Set the Light / Dark (LT /DK) switch
to the Dark position (Down).
2. Set the sensitivity control to the
mid-point position. Test with
material in place after installation.
Some materials work best with the
sensitivity control fully clockwise.
3. Slightly loosen the sensor mount
(the plastic nut behind the
mounting plate). Slowly change the sensor angle downward and observe that
the loop gets larger. If a smaller loop is desired, move the sensor angle
upward, then put some of the material back onto the roll by manually turning
the roll. Continue to adjust the sensor angle until the loop is the desired size.
Tighten the sensor mount when done.
The loop size may also be changed by adjusting the sensitivity control. A
lower setting makes a bigger loop, and a higher setting makes a smaller loop.
The Light Emitting Diodes (LEDs)
indicate the conditions shown
here:
When done, close the sensor
cover and secure it with the screw.