6
INFORMATION FOR REPLACING THE
FUNCTIONAL UNITS
EN 74
6.6 Oil filter replacement
6.6.1 Disassembly
I
mportant
•
Before proceeding with operation, read Par. 3.3.2.
•
Perform the operations described in Par. 5.2.
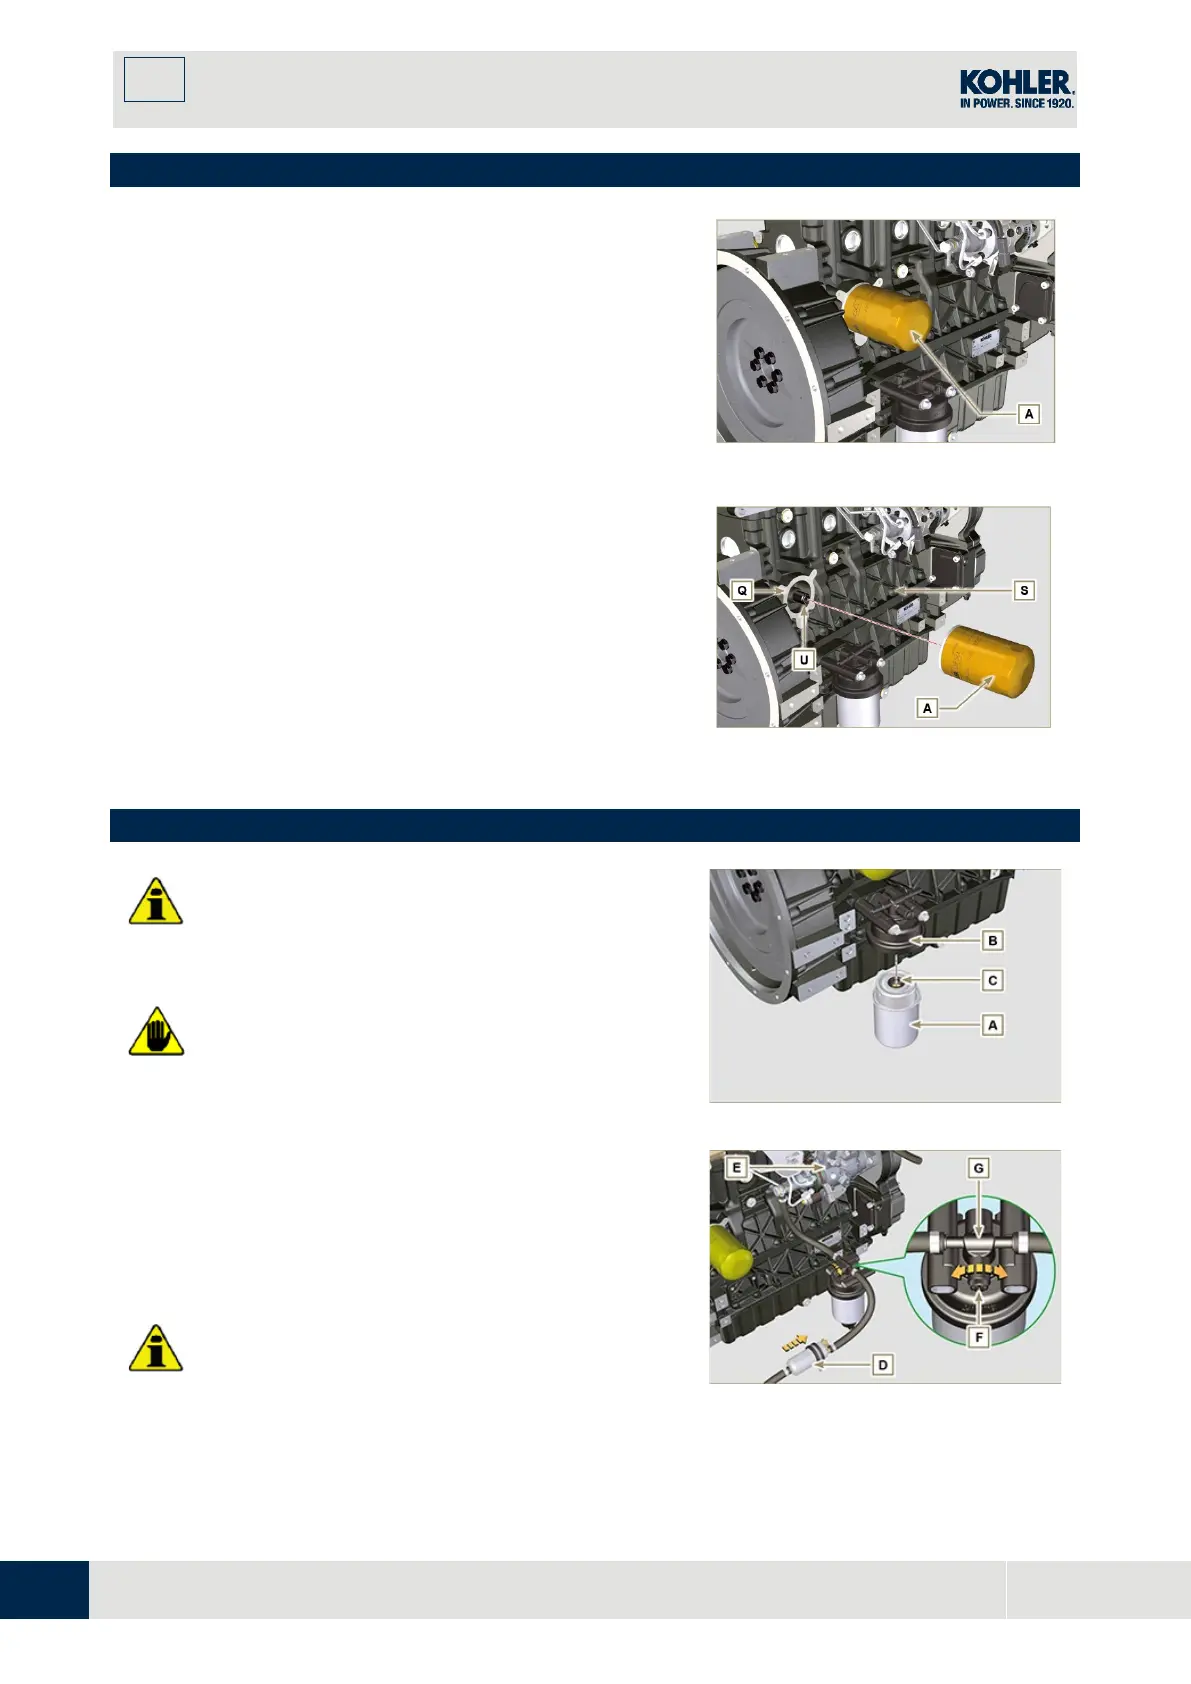
1.
Unscrew the cartridge A.
I
mportant
•
I
n the event of mounting the fitting
U
on the crankcase
S
(tightening torque at
1
5 Nm + Loctite 2701
).
1.
Check that the surface Q on crankcase S are fr
ee
f
rom impurities.
2.
Screw the cartridge A on the fitting U (tightening
torque at 15 Nm).
Fig 6.49
6.7 Fuel filter replacement
•
Before proceeding with operation, read Par. 3.3.2
W
arning
•
In case of low use replace il 12 months.
1.
Procure a suitable container to collect the fuel.
2.
Rotate the filter A to take it to the unlocked position
and remove it.
3.
Lubricate the gasket C.
Assemble the filter A on the support B and rotate i
t
until reaches the lock position.
I
mportant
•
Do not fill the new cartridge A with fuel.
4.
Turn the key on the control panel to the ON position.
The electric pump D sends fuel to the filter and then
the
injection pump E.
Fig 6.50
Fig 6.51

 Loading...


