INFORMATION ABOUT OPTIONAL
COMPONENTS
11
175
EN
11.18 Crankcase oil filter - Lengthwise assembly
1.
Perform the operations indicated in Par. 5.2.
I
mportant
•
Before performing the operation, check Par. 3.3.2 .
•
To replace only the cartridge, refer to operations 2 (
P
ar. 11.16.1 ) and 6 ( Par. 11.16.2 ).
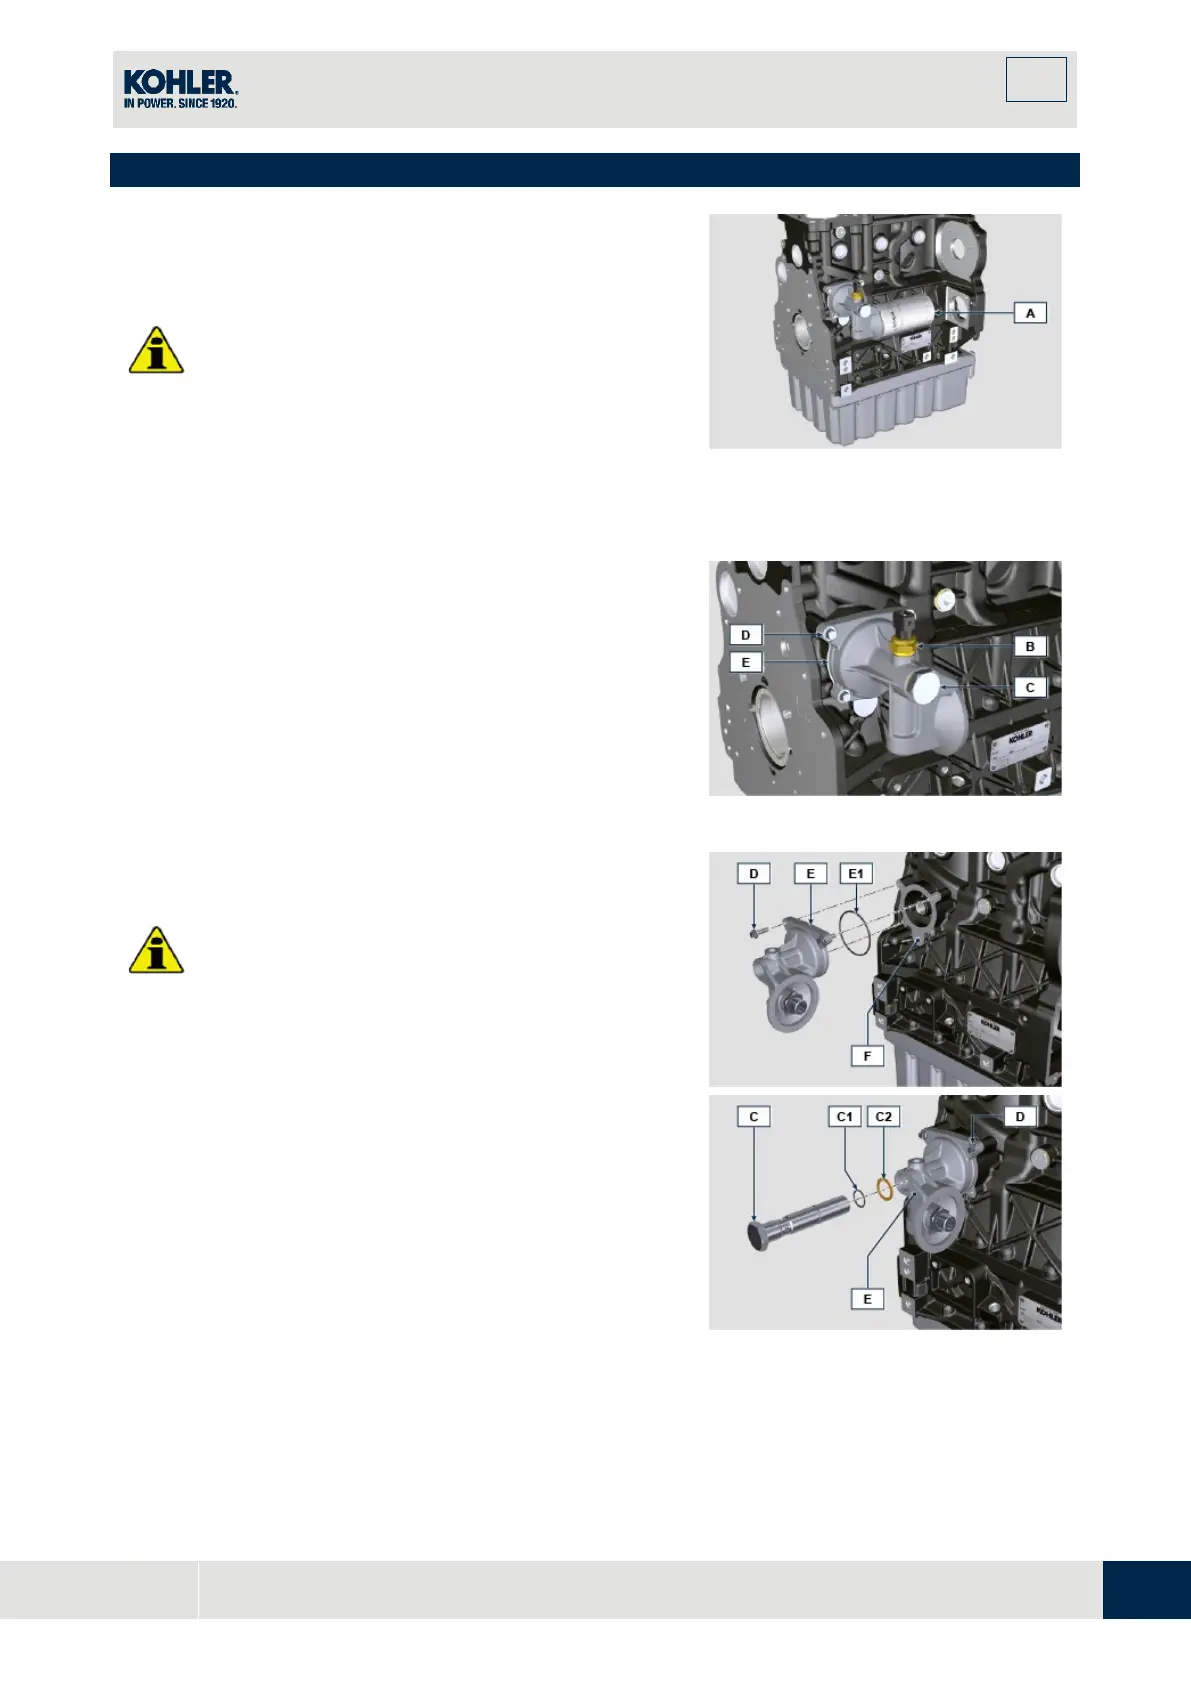
2.
Unscrew the cartridge A .
Fig 11.86
3.
Unscrew and remove the oil pressure switch B
together with its copper gasket from the support E .
4.
Unscrew the union C together with its copper gasket.
5.
Loosen the screws D and remove the support E .
Fig 11.87
11.18.2
Assembly
Important
•
Replace the gaskets E1 , C1 , C2 and B1 at every
assembly.
•
Lubricate the gaskets E1 , C1 with oil before
performing the assembly.
1.
Fit the support E on the crankcase F using the
screws D and placing the gasket E1 in-between; do
not tighten the screws D .
2.
Insert the gasket C2 and C1 on the union C .
3.
Apply Loctite 2701 on the thread of the union C , fix
the union C to the crankcase F (tightening torque of
25 Nm ).
4.
Tighten the screws D (tightening torque of 10 Nm ).
Fig 11.88

 Loading...


