Setting up page 23
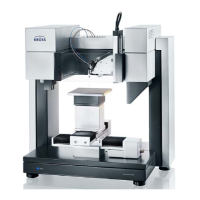
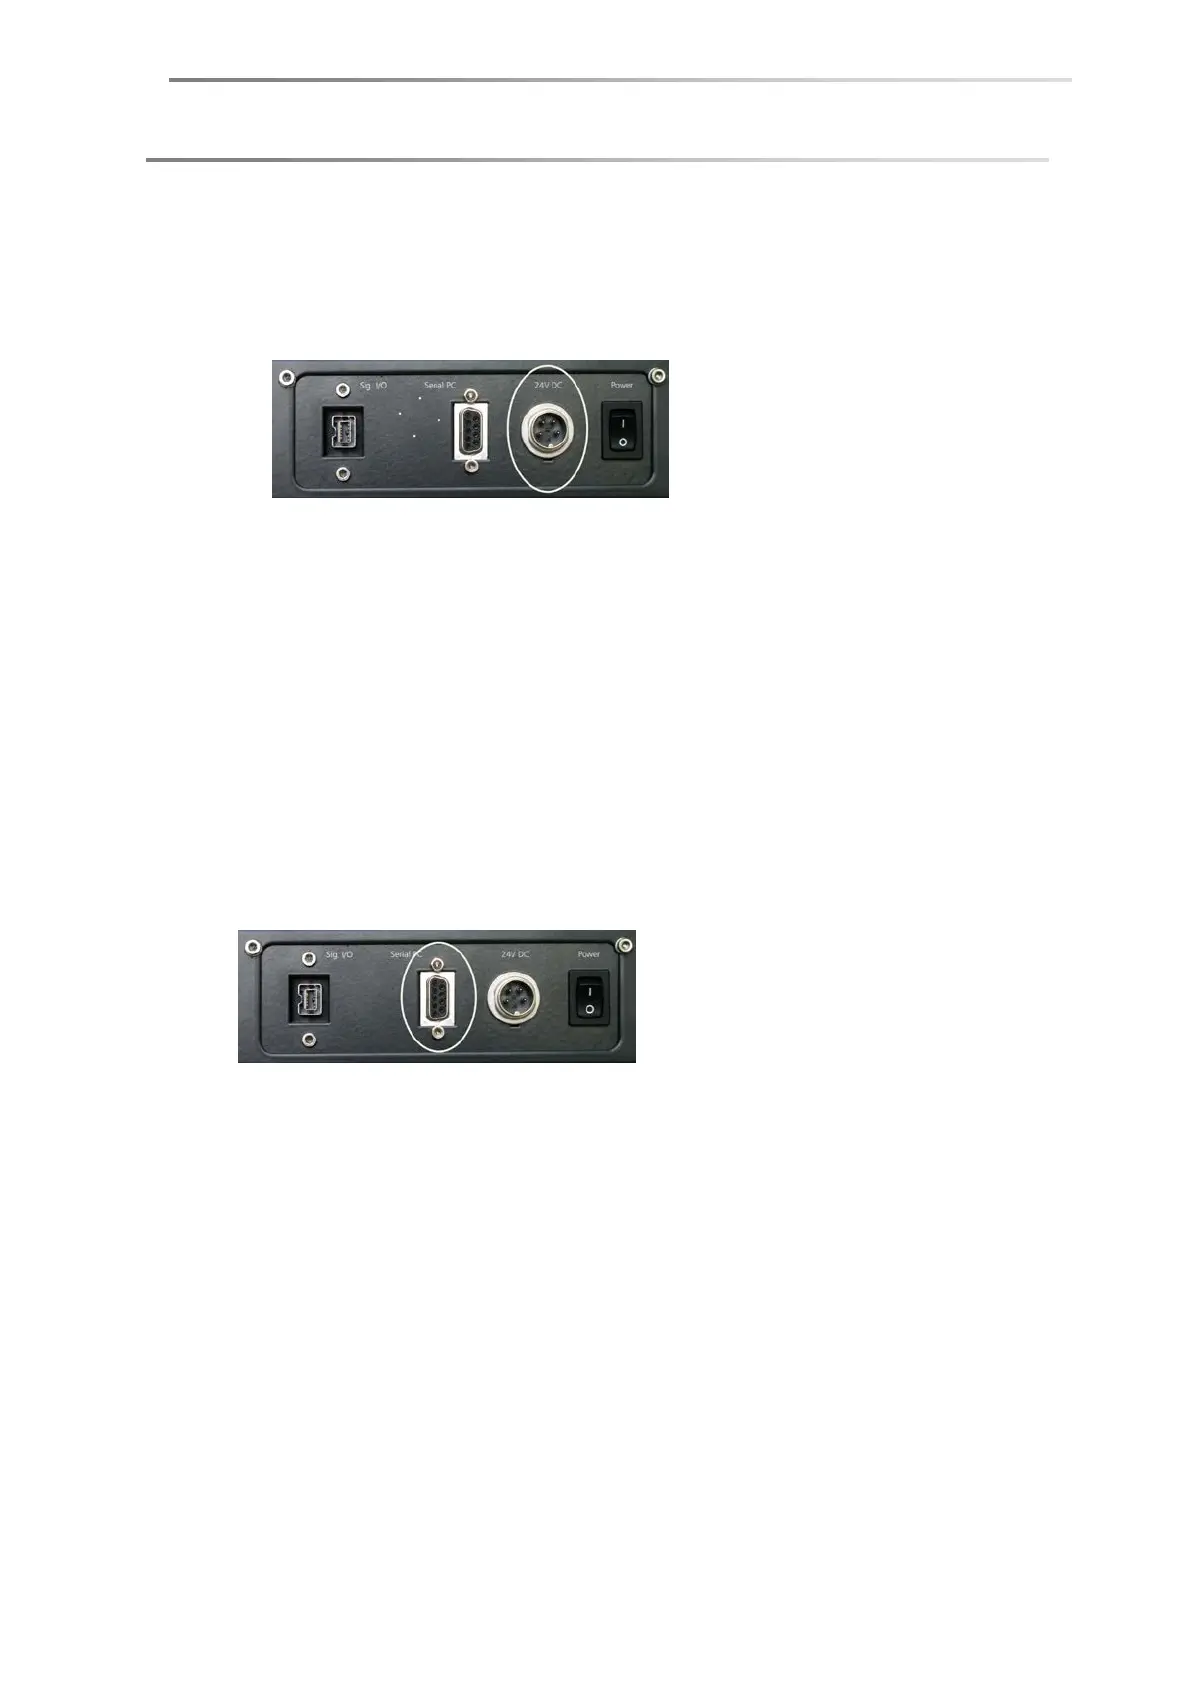
5.5 Power supply / power switch
A net adapter was delivered with the DSA100.
Connect the round 4-pin plug to the 24V DC socket on the rear panel of the
DSA100.
Connect the net adapter to the mains (100-240V AC).
The main switch Power is on the right hand side (rear view). After the instrument
has been switched on all the software-controlled axes, the needle selector and
the syringe drives (if present) move to their zero positions for initialisation.
When the instrument is switched on the LED on the front panel lights up to
show an intensive blue; when the instrument is switched off it is still weakly lit
up.
SPAC S PA C S PAC SPAC
5.6 Connecting the computer
The computer is to be connected to the RS232 connection (Serial PC ) at the rear
side of the DSA100.
A corresponding cable is within the supply of the instrument.
5.6.1 Carrying out the connection
Serial port connection
Connect the RS232 connector (Serial PC ) at the DSA100 rear panel with a serial
interface of the computer.