Mounting axes page 39
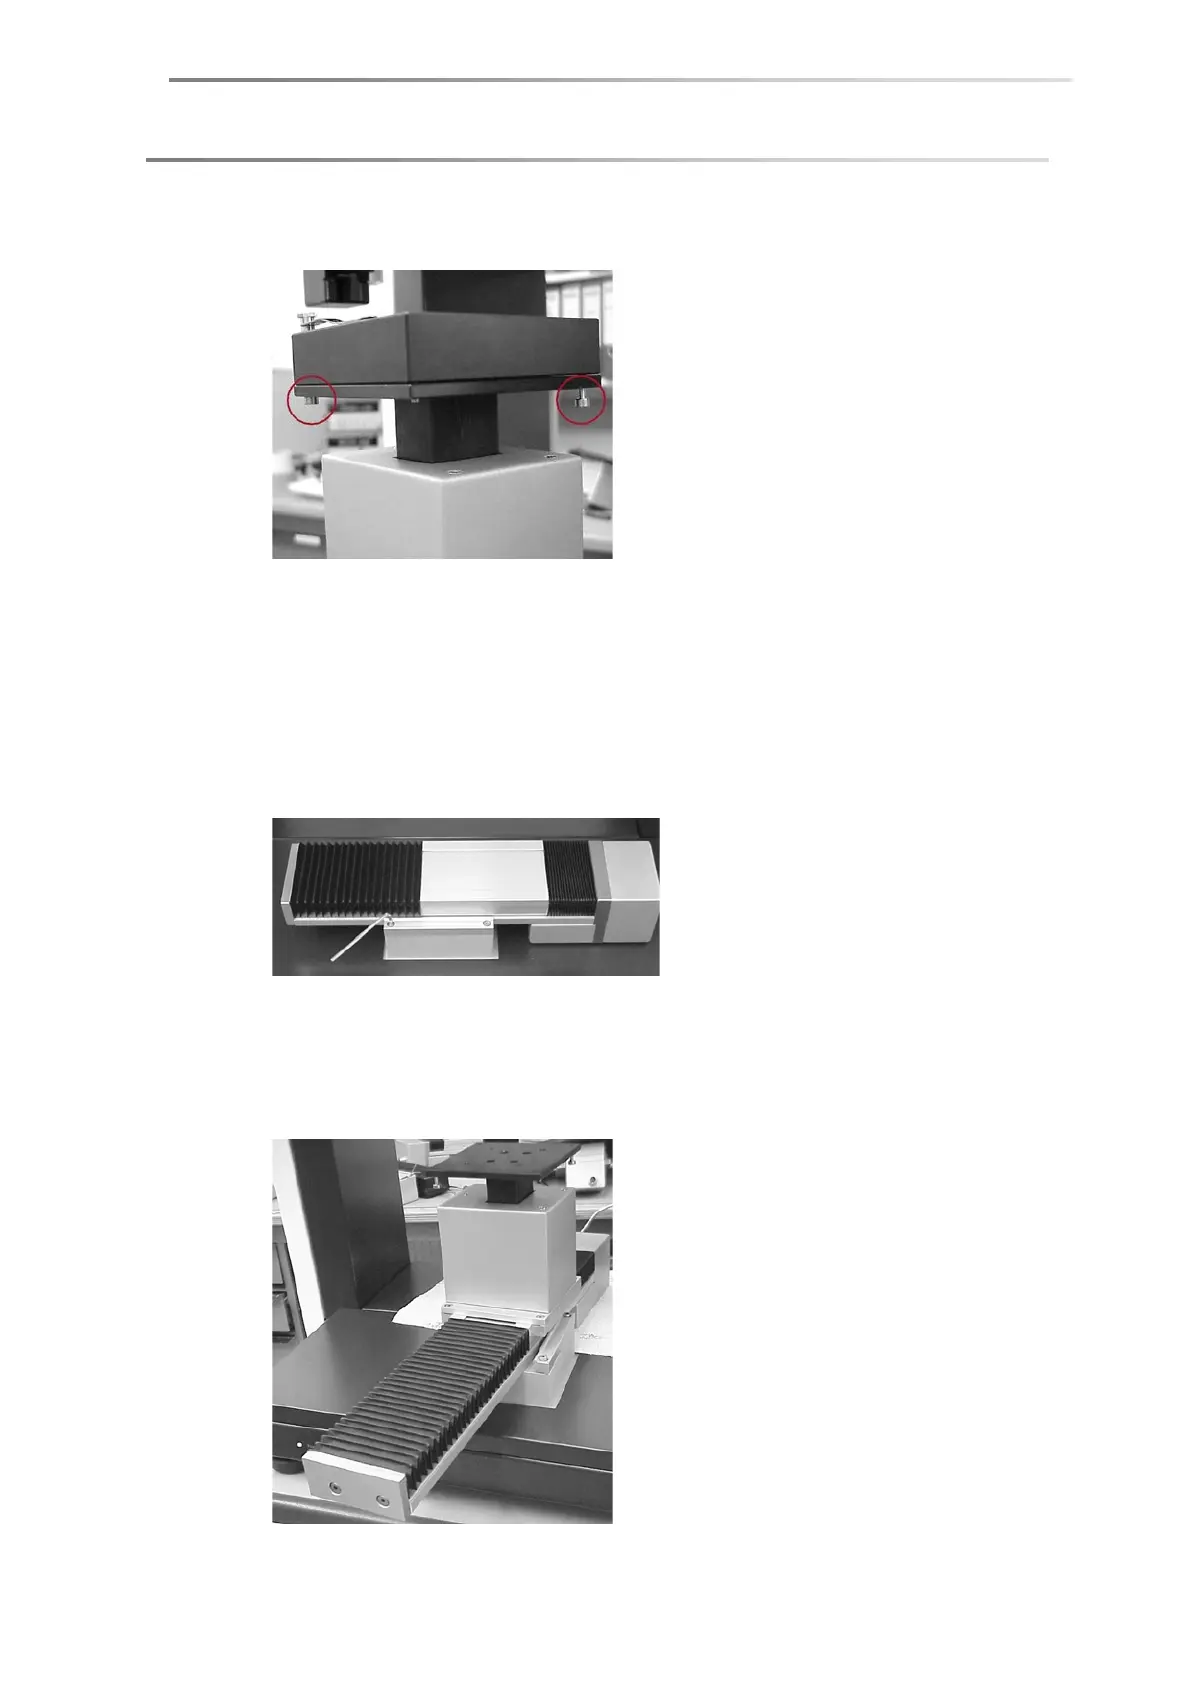
4. Loosen the screws beneath the sample table support. Remove the sample table
support from the z-axis.
Place a cloth over the rear side of the DSA100 frame in order to prevent
scratches during the further steps.
5. All the axes are fastened with fixing strips and screws. Remove the attachment
screws for the y-axis (3 mm allen wrench).
Hold the y-axis firmly so that it cannot fall to the ground.
6. Screw off the remaining x-axis in the same manner.
7. Replace the currently assembled spacer with the 49 mm spacer.
8. Place two non-threaded fixing strips on the spacer (y-direction) without
fastening them down. Now place the y-axis on the spacer so that the grooves of
the fixing strips are located on the guide ridges of the y-axis.