BRAKES
35
REAR BRAKE DISC INSPECTION
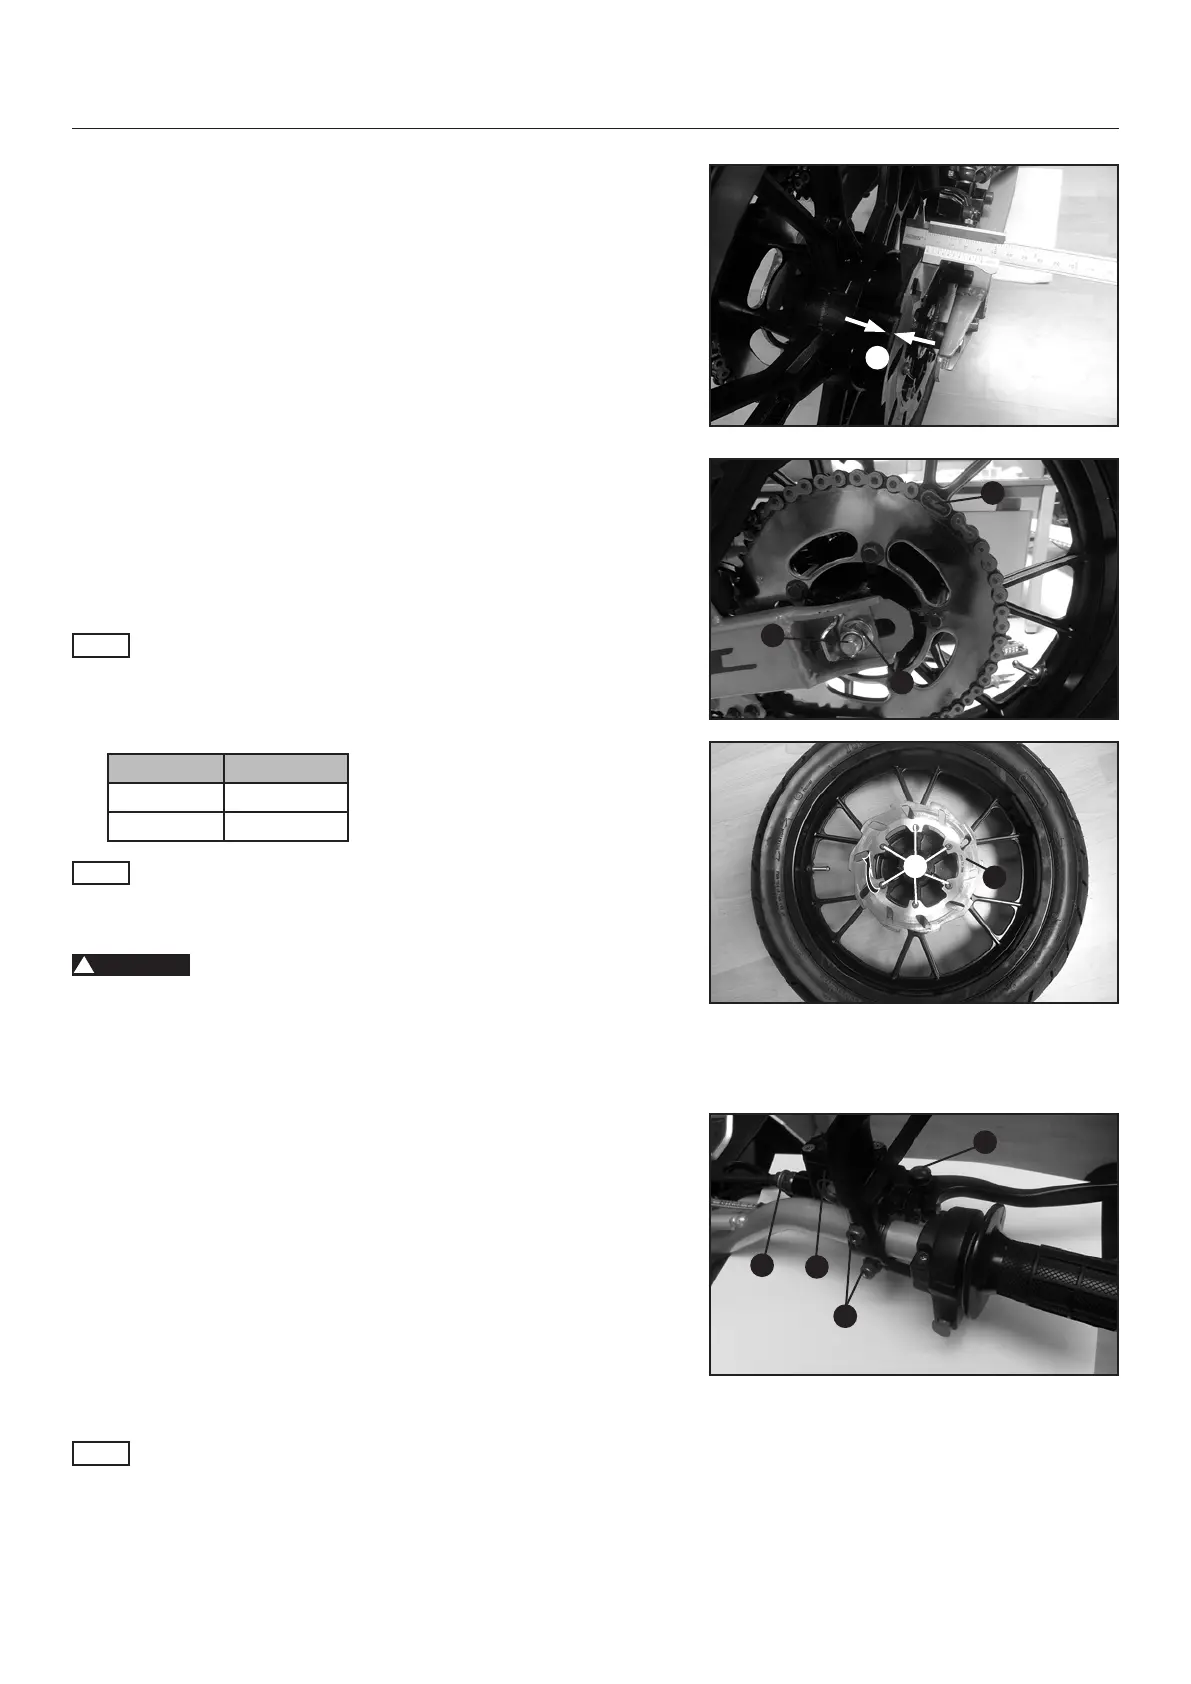
1. Check the thickness of the rear disk at several places on the
disk to see if it conforms to measurement.
Allowable limit A: 3 mm
If the brake disk thickness is less than the specied value
change the brake disk. Check the front disk for damage,
cracking and deformation. If the brake disk exhibits damage,
cracking or deformation change the brake disc.
2. Place an appropriate supporting stand under the vehicle in
order to raise the rear wheel up.
3. Disconnect the chain (1).
4. Remove the rear axle-nut (2) to remove the axle (3) in order
to remove the rear wheel.
5. Remove the six screws (4) to remove the rear brake disc (5)
and mount a new one if the old one is worn.
NOTE
Take care to the position of the new brake disc (Arrow).
6. Reassemble in reverse order.
NOTE
Take special care that the axle spacer are installed correct.
!
WARNING
Always keep the brake discs free of oil and grease, and clean
them with brake cleaner when necessary. Please consider that a
dirty brake disc inuence the brake performance.
FRONT BRAKE LEVER/ MASTER BRAKE CYLINDER RE-
PLACEMENT
When the performance of the front brake is poor it could be
possible that the plunger module gaskets are defect.
1. Drain the brake uid from the hydraulic brake system.
2. Remove the brake line (1) from the master cylinder (2).
3. Remove the two bolts attaching the brake master cylinder (3).
4. Remove the brake master cylinder.
5. Remove the brake lever bolt (4) and the brake lever.
6. Replace defect parts and assemble in reversed order.
7. Rell the brake system.
NOTE
The plunger module is not available separately.
1
2
3
4
A
5
4
PART. NO. TORQUE
3
85-98 Nm
4 22-29 Nm
1
2
3
 Loading...