BRAKES
38
3. Remove the master brake cylinder cover.
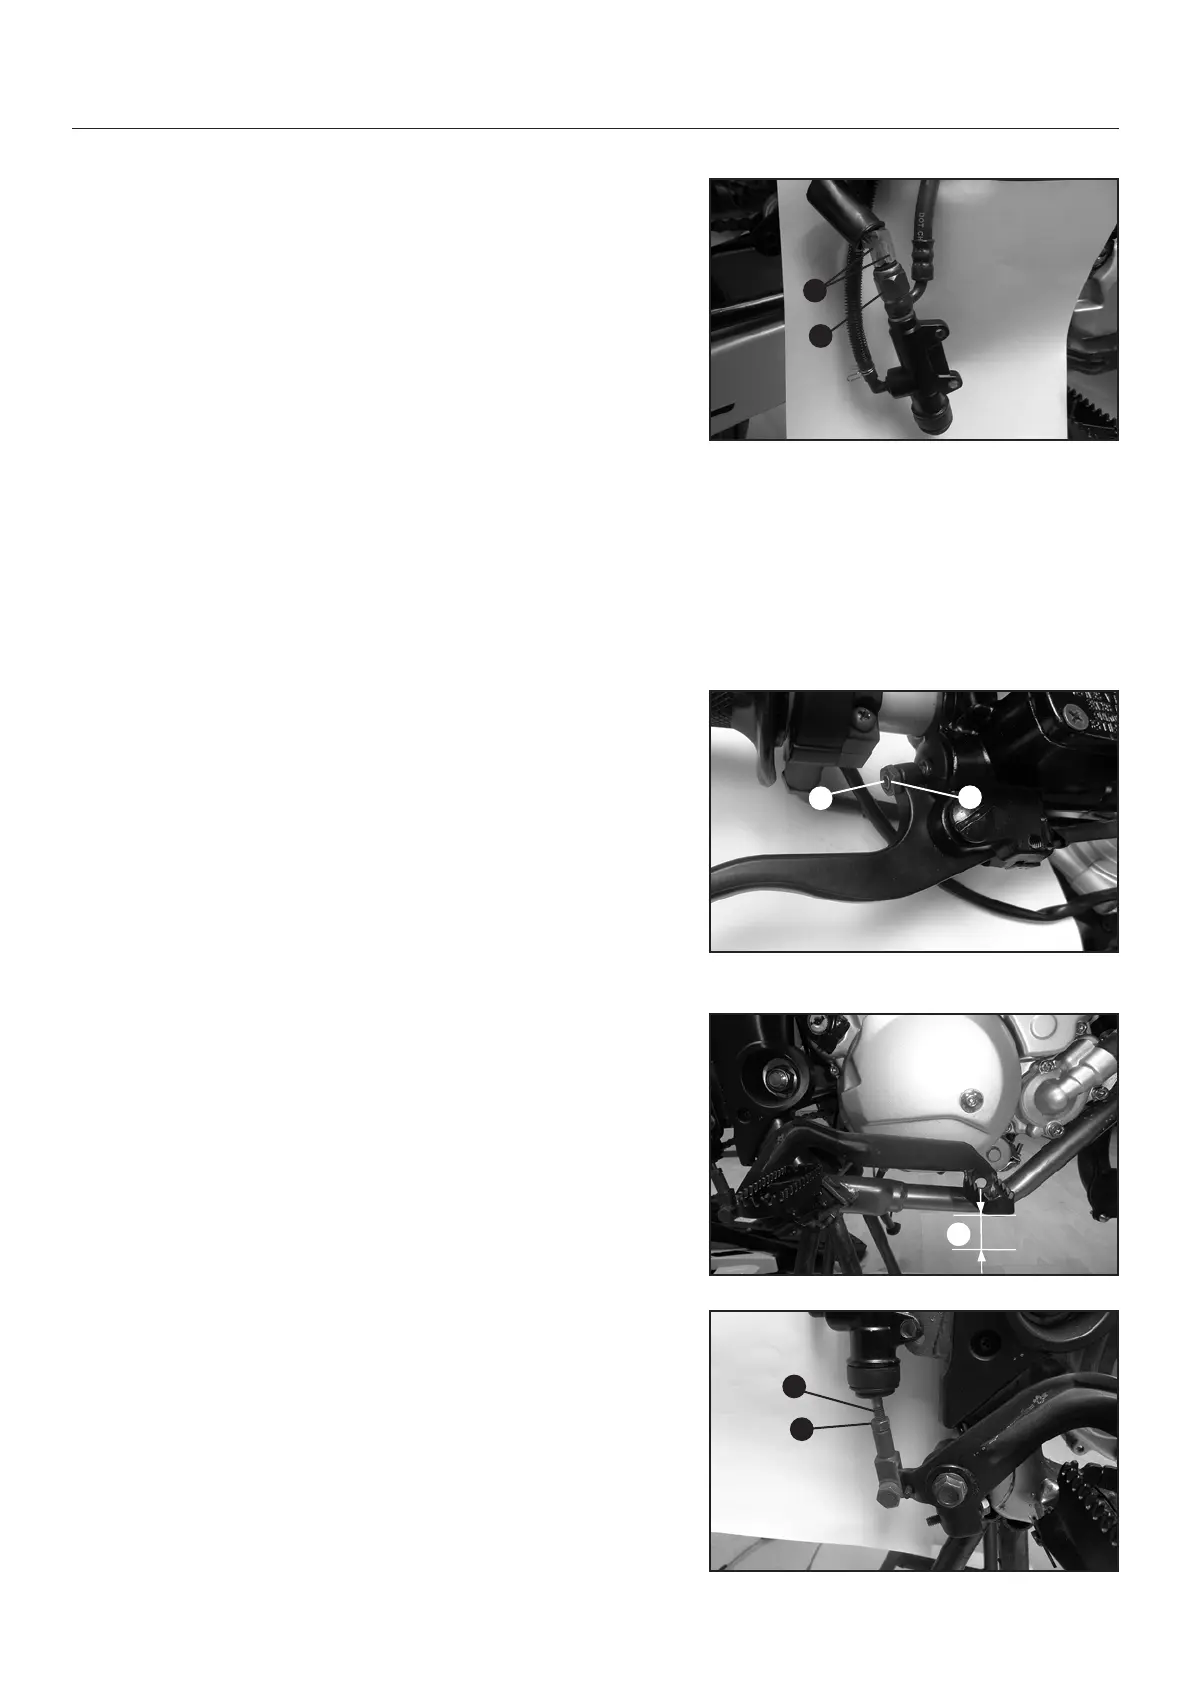
4. Remove the two plugs (3).
5. Remove the banjo bolt (4) from the master brake cylinder.
6. Replace the brake hose. Take care that the brake hose is
installed correct and is connected to all brackets. Use new
gaskets when you connect the brake hose.
7. Remove the brake uid reservoir.
8. Add the recommended brake uid to the MAX level.
9. Open the bleed valve (5) and add a brake bleeding tool on
the valve. Start to aspirate the brake uid as long as air is in
the system. Take care that the brake uid level in the master
brake cylinder will not fall lower than the MIN level otherwise
you suck air in the system once again.
1. Suck continuously the air out of the system and add brake
uid continuously until the system has been bleeded.
9. Close the vent valve and rell the brake uid reservoir to the
MAX level.
10. Reassemble all other parts in reverse order.
FRONT BRAKE LEVER ADJUSTMENT
1. Loosen the nut (1).
2. To Adjust the front brake lever, screw the bolt (2) in or out.
3. If the position of the lever is adjust, thighten the nut (1).
If you can not adjust the free play correct check the brake pads
for wear.
REAR BRAKE LEVER ADJUSTMENT
1. Operate the right foot brake lever un-
til the brake pads lie down on the brake drum.
The free play (A) between the 0 position and the pressure
point must be 10 to 20 mm. When free play is higher or lower
the steel rod need to be adjusted.
1. Remove the master brake cylinder cover.
2. Loosen the nut (1).
3. To adjust the foot brake lever, screw the bolt (2) in or out.
4. Thighten the nut (1).
5. Reassemble in reverse order.
If you can not adjust the free play correct check the brake pads
of wear.
3
4
1
2
1
2
A



 To Next Page