EasyManuals Logo
Home>Kyocera>All in One Printer>ECOSYS M3540dn

Kyocera ECOSYS M3540dn Service Manual

Kyocera ECOSYS M3540dn
483 pages
To Next Page IconTo Next Page
To Previous Page IconTo Previous Page
Page #309 background imageLoading...
Page #309 background image
2NM/2NX/2NY/2NZ/2P0/2P6
1-5-27
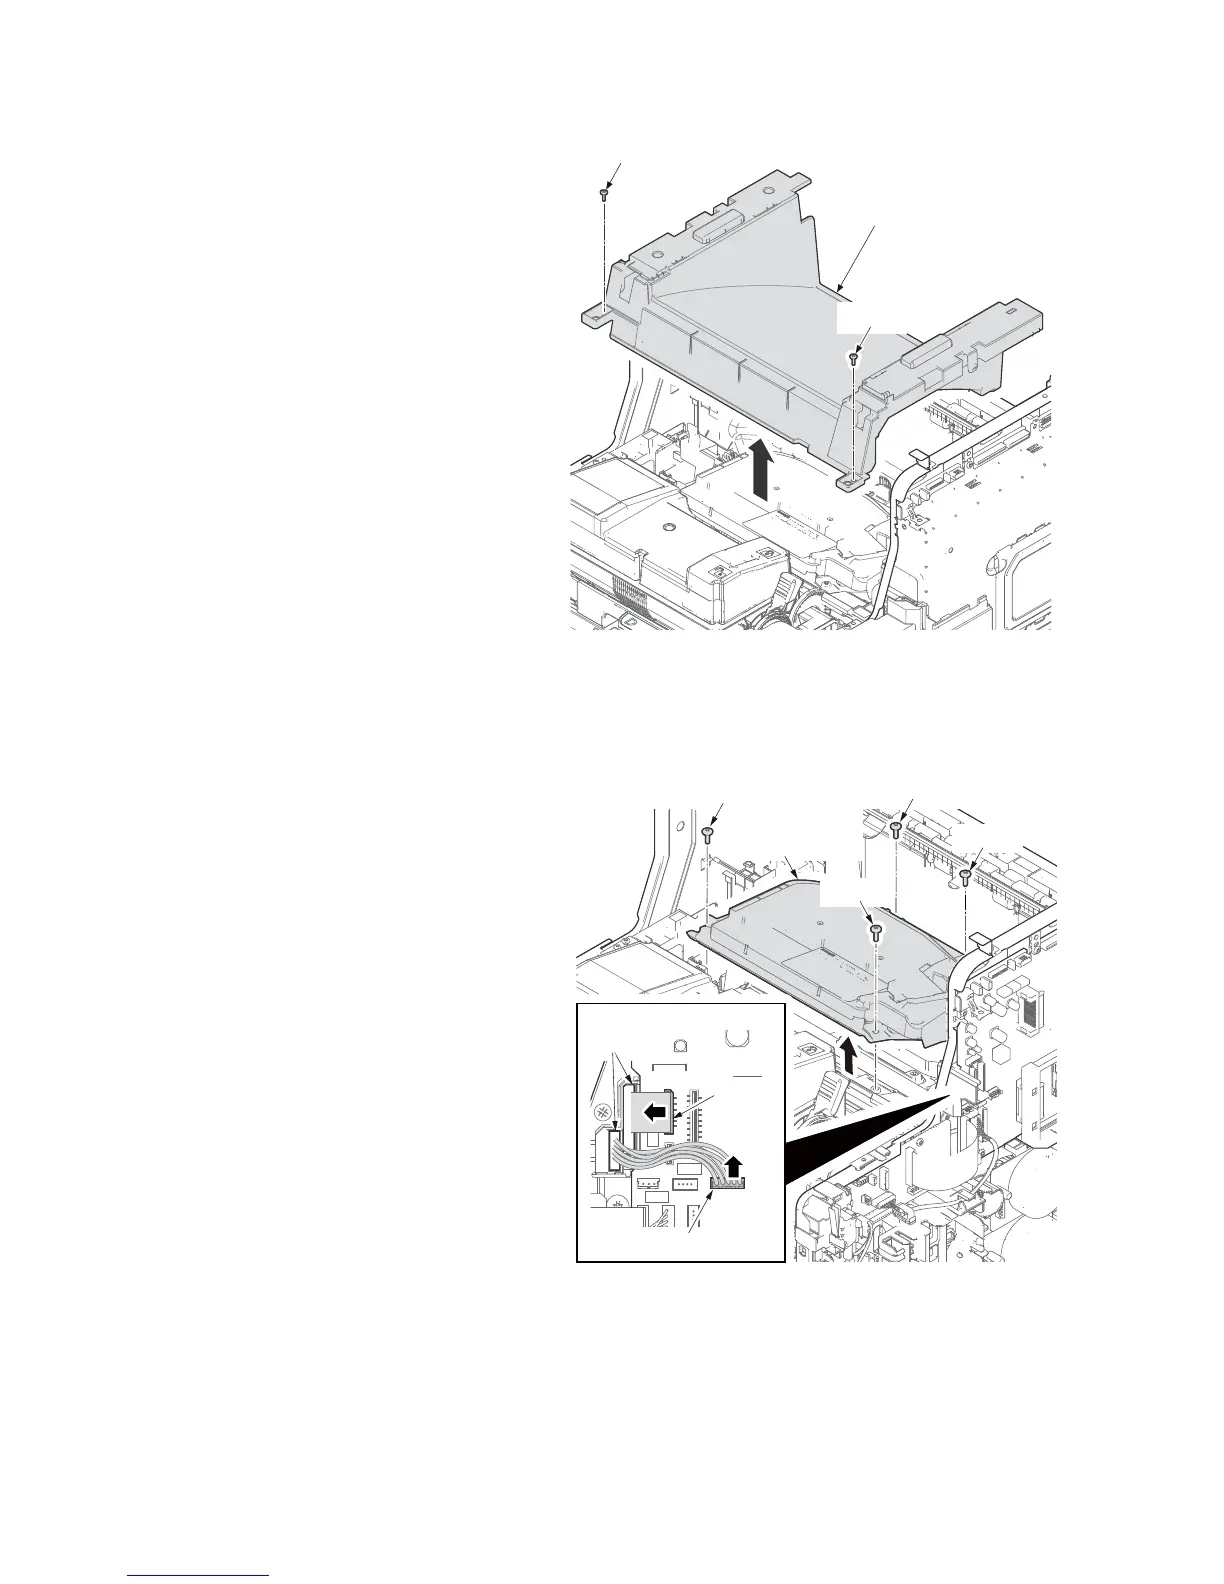
10. Remove two screws.
11. Remove the top tray cover upward.
Figure 1-5-44
12. Pull the connector and FFC from control
PWB out.
13. Pull the connector and FFC out through
the apertures.
14. Remove four screws and then remove
the laser scanner unit upward.
15. Check or replace the laser scanner unit
and refit all the removed parts.
Figure 1-5-45
Screw
Screw
Top tray cover
YC15
YC16
Screw
Screw
Screw
Screw
Apertures
Connector
Control PWB
Laser
scanner unit
FFC

Table of Contents

Other manuals for Kyocera ECOSYS M3540dn

Questions and Answers:

Question and Answer IconNeed help?

Do you have a question about the Kyocera ECOSYS M3540dn and is the answer not in the manual?

Kyocera ECOSYS M3540dn Specifications

General IconGeneral
BrandKyocera
ModelECOSYS M3540dn
CategoryAll in One Printer
LanguageEnglish

Related product manuals