64 General Maintenance
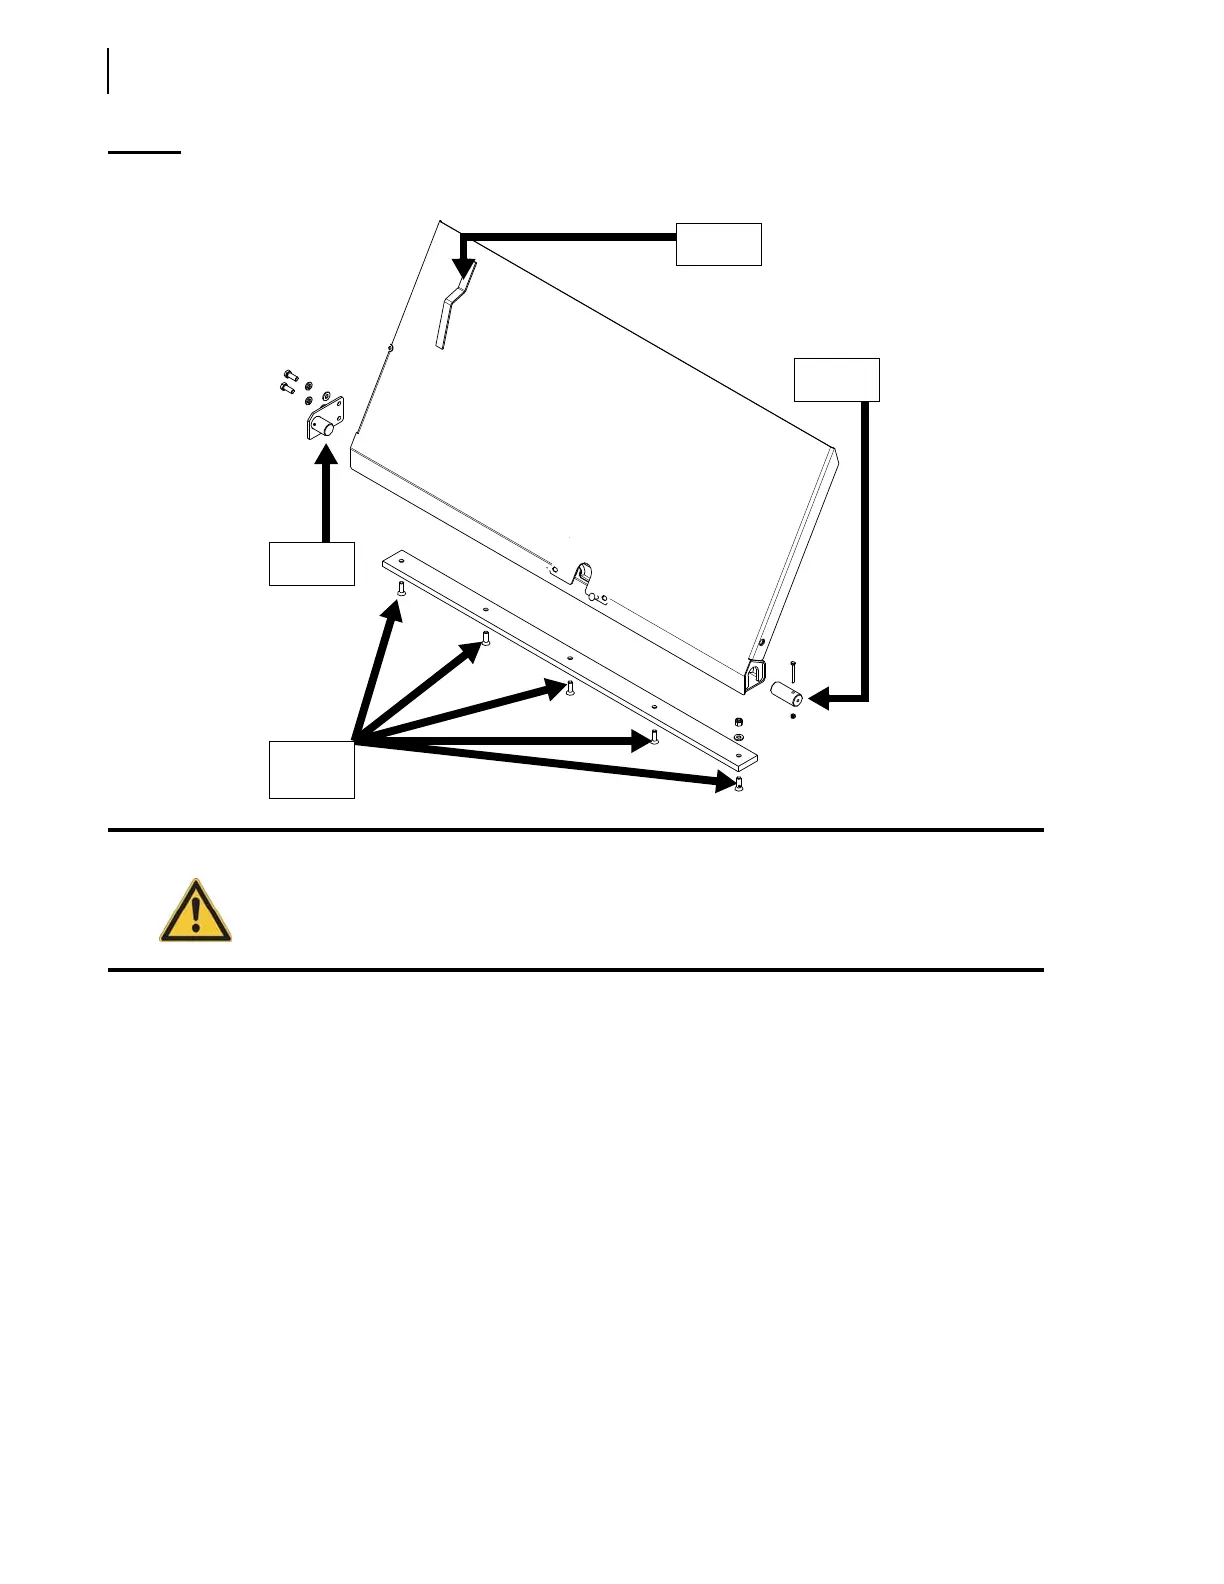
Figure 3-58
Floating panel
9 c. Secure the panel with a sling or cable.
9 d. Remove the 2 pivots at the base of the floating panel (see Figure 3-58).
9 e. Lift the floating panel out of the hopper using an appropriate lifting device.
10. Remove the retaining screws holding the lower wear pad in place (see Figure 3-58).
11. Replace the old wear pad with a new one and put back all the retaining screws.
12. Reinstall the floating panel.
For this task, use steps 7a.) to 7e.) in reverse order of disassembly.
13. Reinstall the hopper divider guard (see Figure 3-27).
14. Reinstall the chute.
For this task, use steps 4a.) to 4l.) on page 38 in reverse order of disassembly.
15. Check for even contact between the wear pad, packer blade and follower panels.
Warning!
Keep hands and fingers away from the pinch point of the floating panel.
Handle
Pivot
Pivot
Retaining
screws