Installation Guide
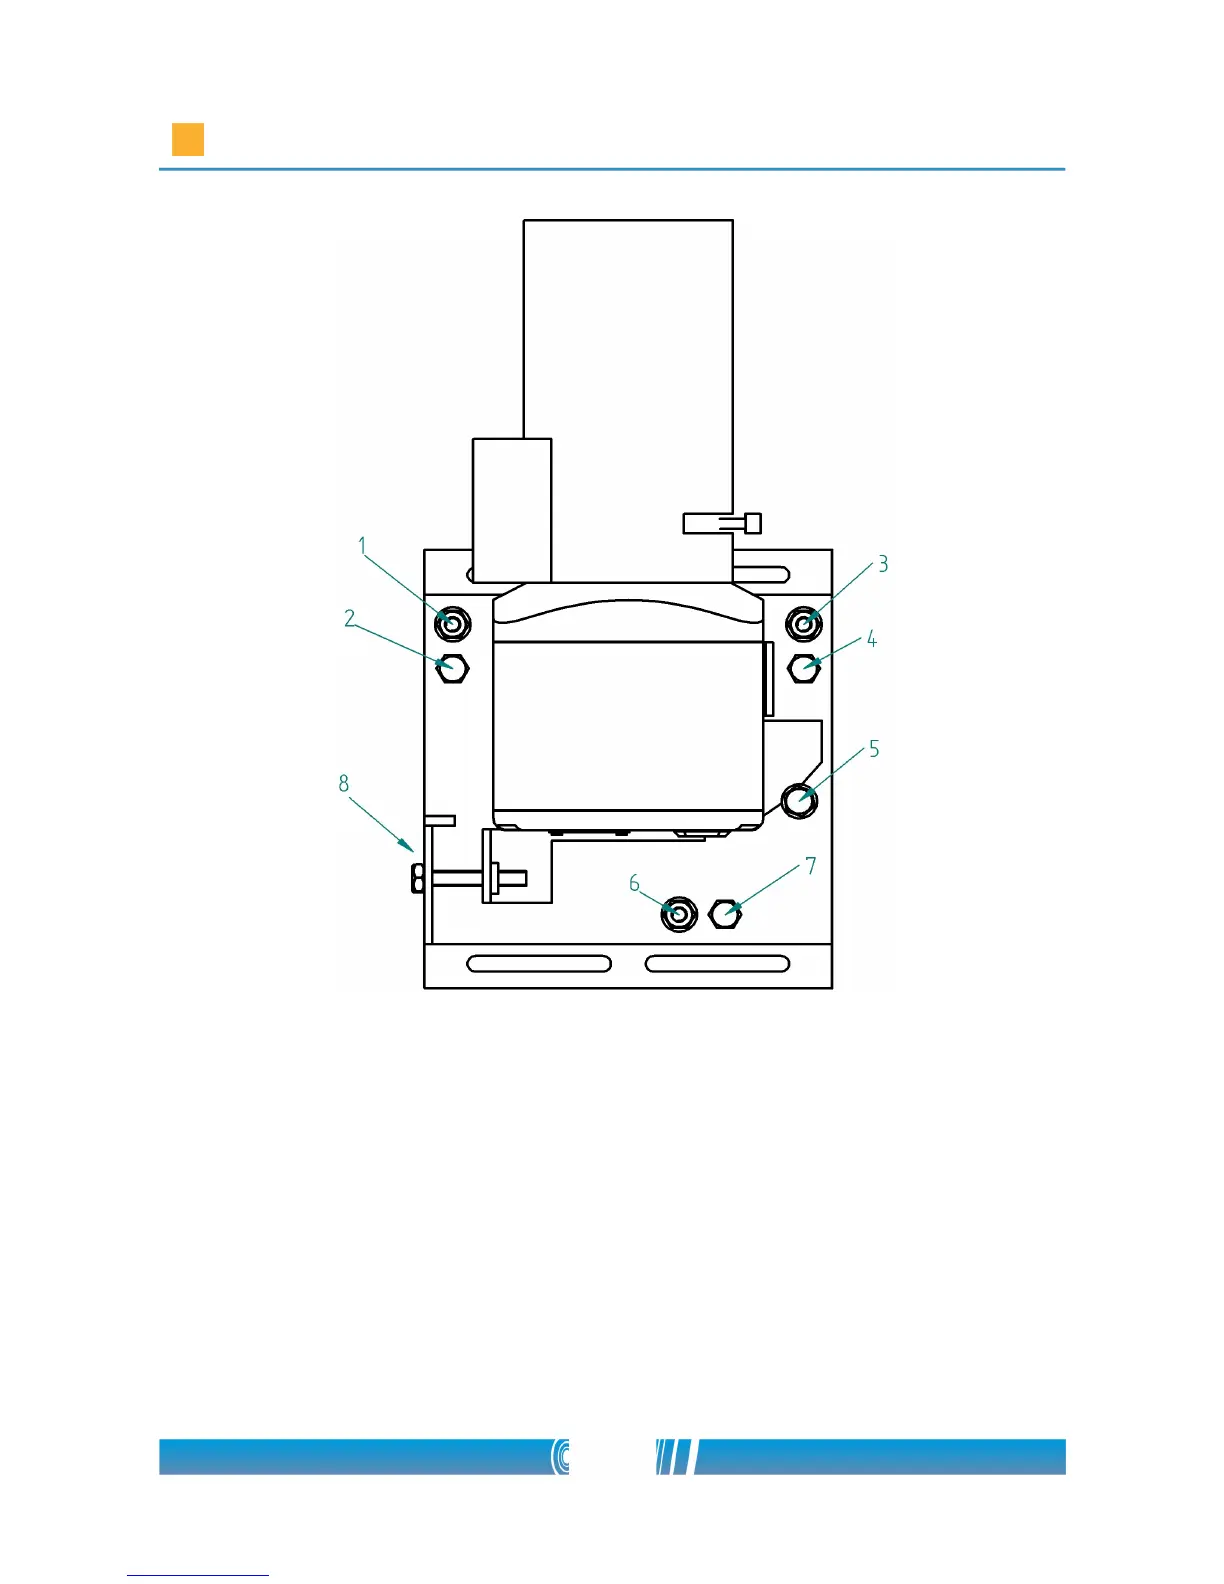
• Loosen the fixing screws (2), (4), (5), (6)
• Set the rotation (horizon) with screws (1) and (3)
• Set the pan position (height of the horizon) with screw (7)
• Set the tilt (horizontal) position of the camera with screw (8)
• Tighten the fixing screws (2), (4), (5), (6)
• Repeat these steps for all the cameras in the camera group!
NOTE: If you don't have the opportunity to connect more cameras at the same
time to the laptop, connect the cameras directly to the computer! After you
11/80