Installation Guide
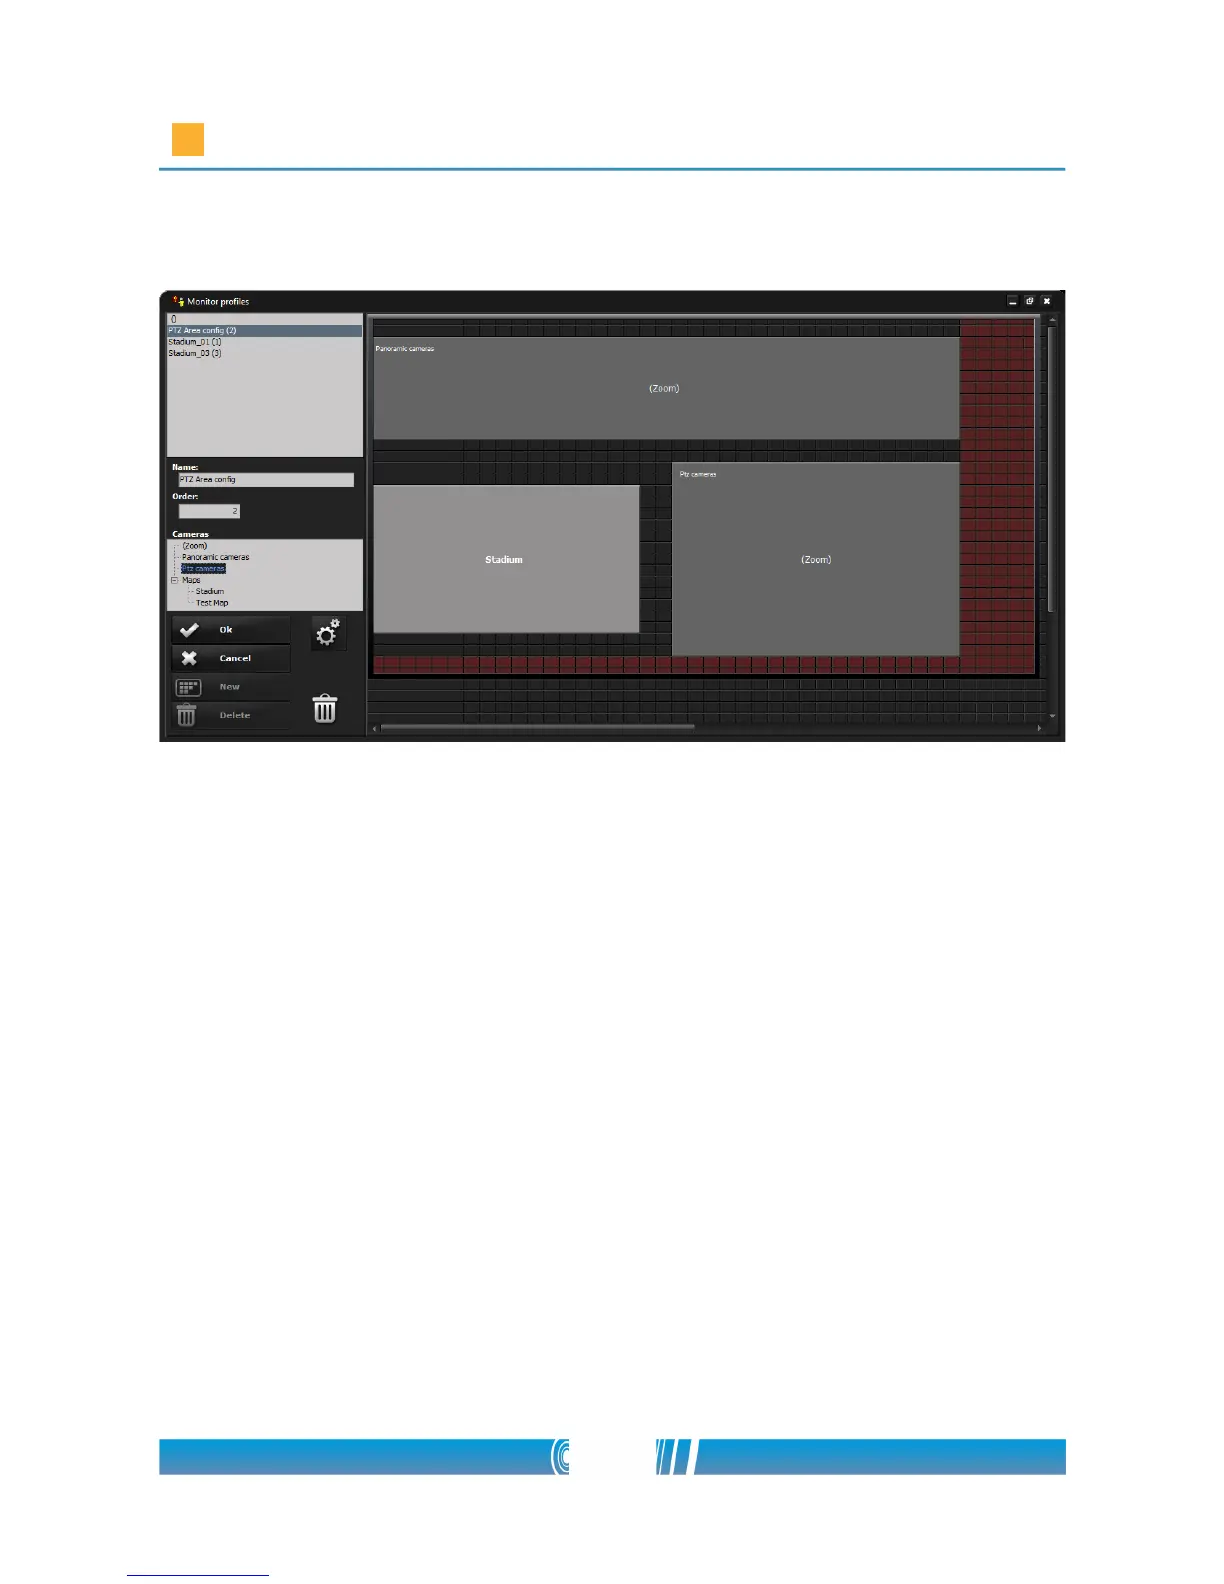
camera, selecting PTZ cameras from the left tree!
5. Click on OK, then close the Monitor Profiles window!
Configuring PTZ Area
1. Click on Video menu and open Setup / PTZ Area Config!
2. Choose the previously created profile, which you can find in the lower
left corner!
3. On the PTZ Area Config window select the appropriate panoramic
camera from the left Camera tree by a double click. The same method
has to be performed with the configurable PTZ camera as well.
4. Three buttons can be seen on the images of the panoramic camera and
on the map. N is for creating a new Guidance point, D is for deleting an
existing point and M is for modifying a created Guidance point. You can
also find the M icon on the PTZ image.
5. To create a new Guidance point activate the N button on the panoramic
image by clicking on the icon. The active icon turns to red.
68/80