Operation ProtoMat S
66 HB V0.9/Mrz-11 © 2011 LPKF AG
6
■ Produce a drill hole
1. The preparative activities are described in detail on page 61.
➨ The PCB material is fixed on the working table.
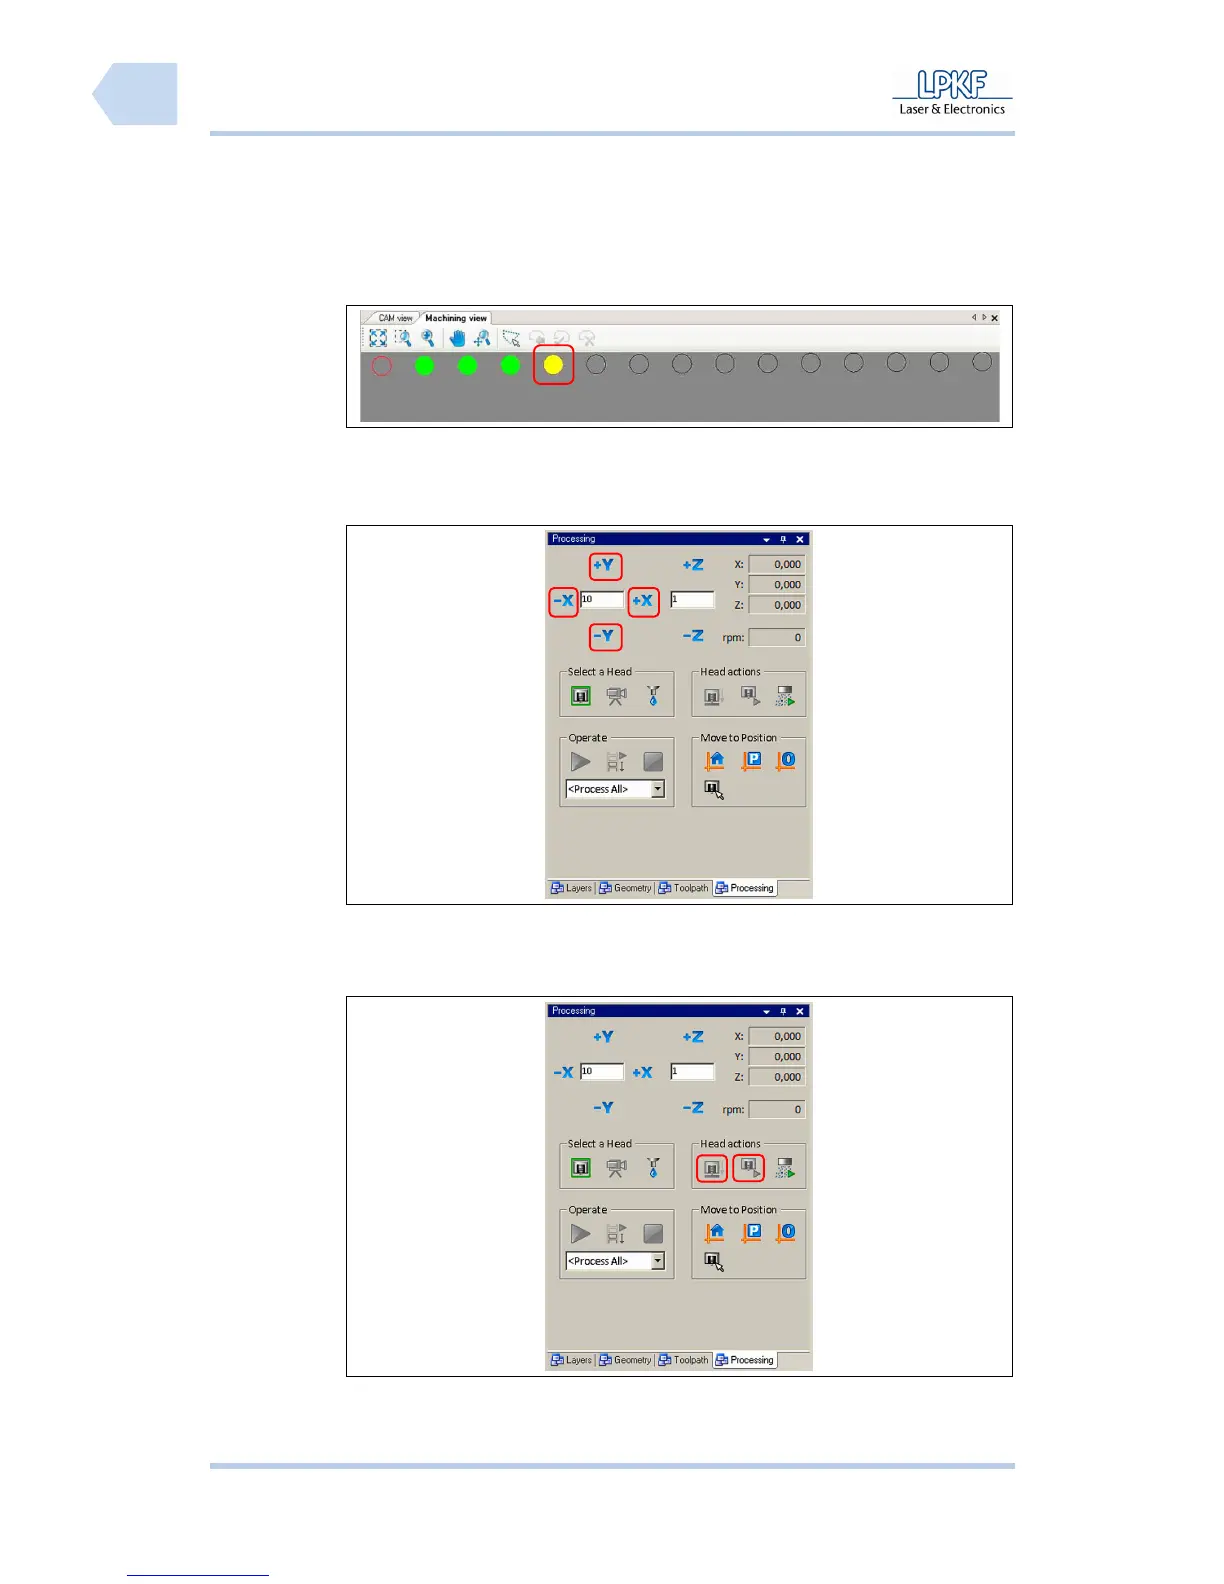
Fig. 37:
Machining view
select tool
2. Select a drilling tool.
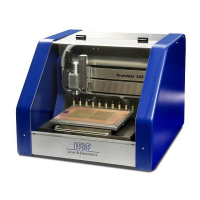
3. Move the mill/drill head to the start position:
Fig. 38: Adjust
position
Type a value into the input filed \X/Y step size\ and click[+X], [-X], [+Y] or
[-Y] until the drilling position is reached.
The exact position is displayed in the output fields \X:\ and \Y:\.
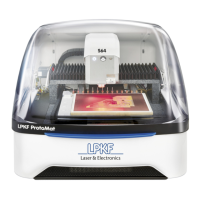
Fig. 39: Control
milling/drilling
head
4. Click on [motor on/off].