UM-1151140EN, Rev. C, May 2016
System
Installation
and
Initial
Setup
4.4. Installation and
Setup
The system has passed full quality assurance testing before shipment and
should be operational upon delivery.
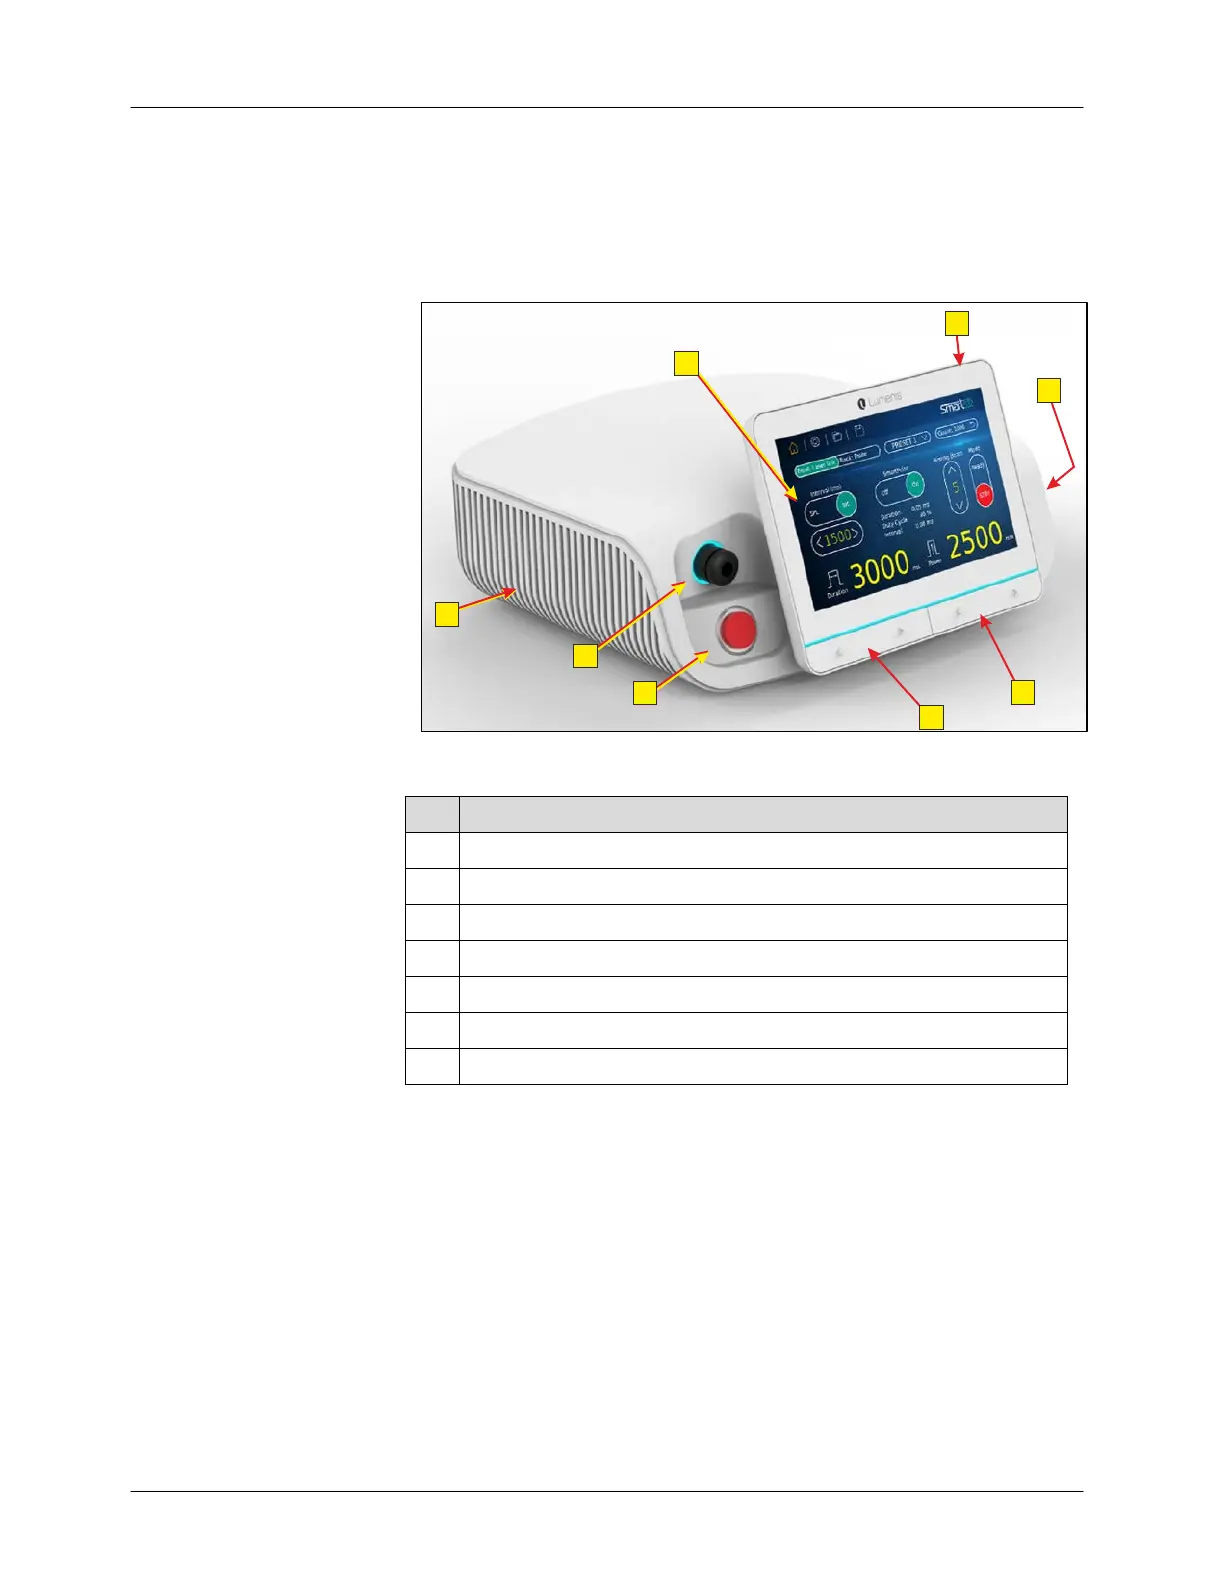
The front panel of the Smart532 laser system is shown in Figure 4-2.
Figure 4-2: Smart532 Laser System – Front Panel
# Description
1 Touch-screen control panel
2 Main on/off button
3 Power setting ▲ and ▼ buttons
4 Pulse duration setting ▲ and ▼ buttons
5 Fiber connection port (SMA-906)
6 Laser emergency stop button
7 Cooling grids