214658 52 Revision A
4.4.3 Removing Auger Fingers
Follow these steps to configure the auger fingers for a New Holland 1 m (40 in.) feeder house:
NOTE:
There should be 16 fingers on the auger.
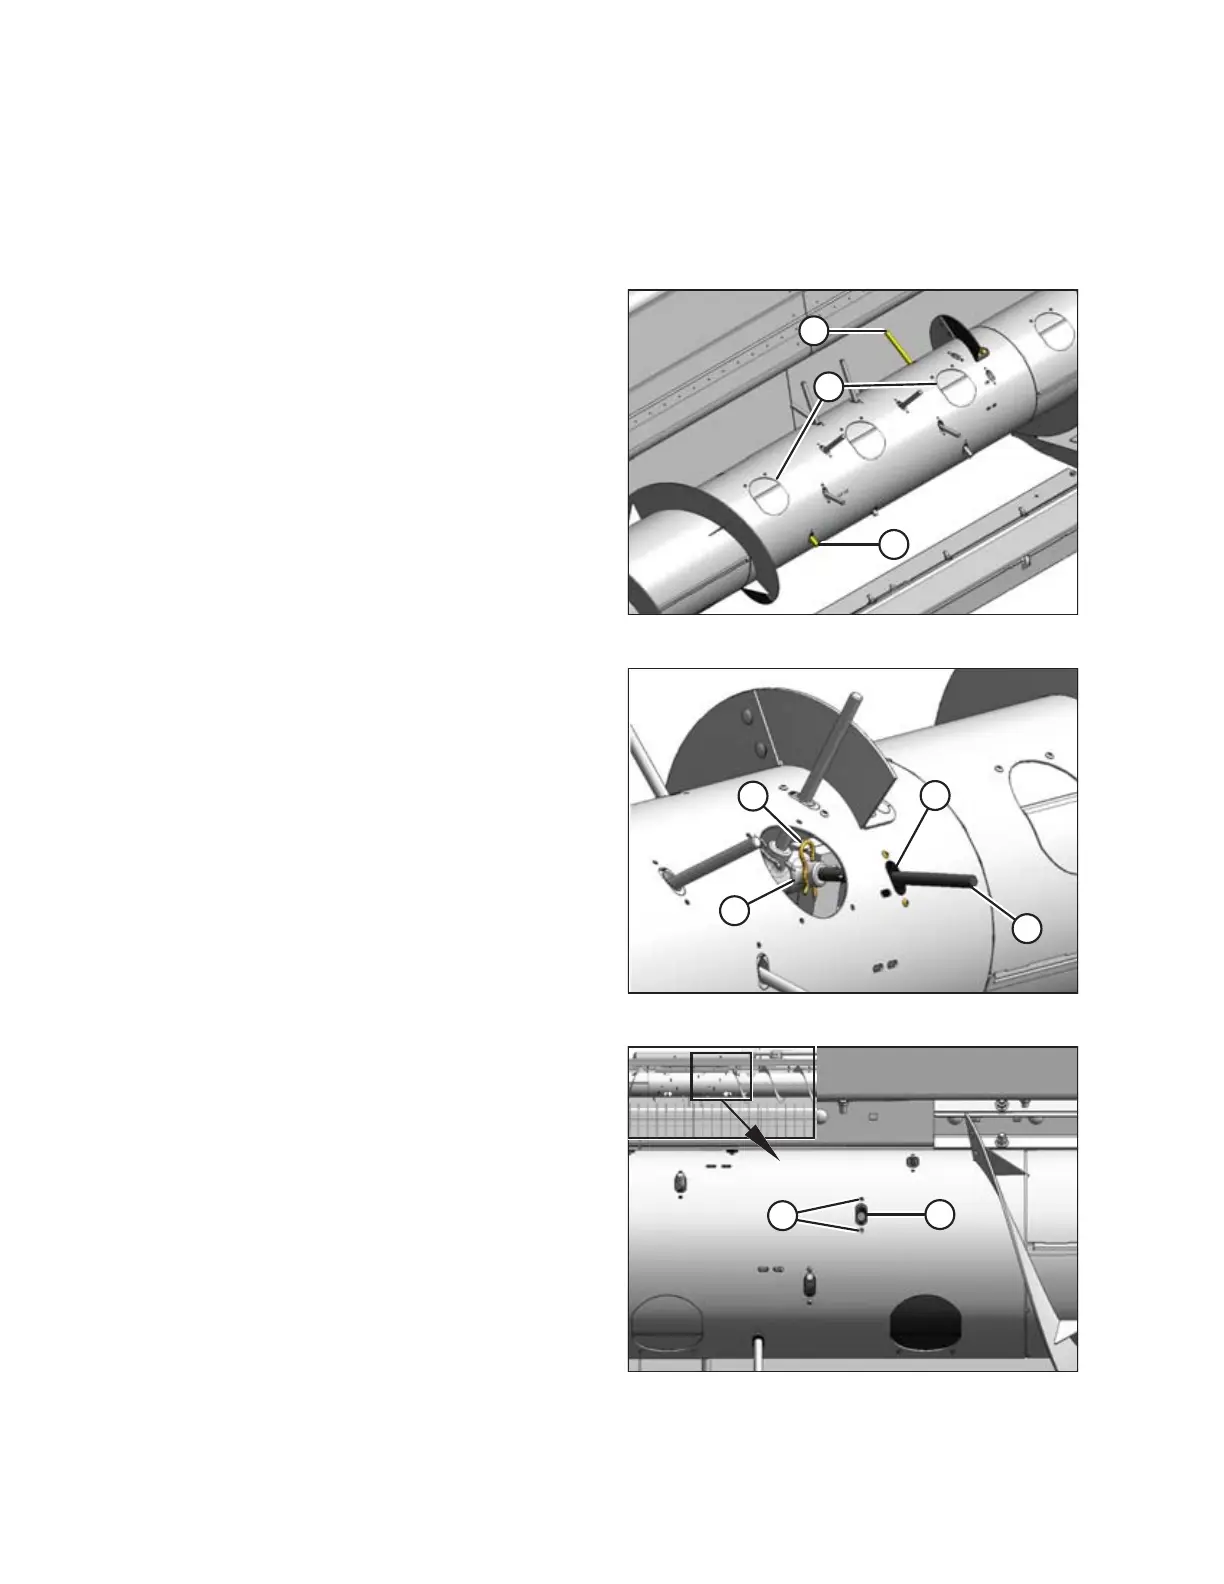
Figure 4.49: Access Holes in Auger
1. Remove the two covers (A) on each side of the auger to
access the auger fingers (B).
Figure 4.50: Auger Fingers
2. From inside the auger, remove hairpin (A) and pull
finger (B) out of bushing (C).
3. From inside the auger, swivel finger away from bushing,
pull from plastic guide (D), and remove from auger.
4. Assemble hairpin to finger and store in the
manual case.
5. Repeat Step 2, page 52 to Step 4, page 52 for the
other finger.
Figure 4.51: Finger Guide Plugs
6. Remove screws (A) securing plastic guide (B) where
the extra finger was located.
7. Remove plastic guide from inside the auger.
8. Retrieve plugs and hardware from bag provided.
RECONFIGURING HEADERS
 Loading...


