3-35
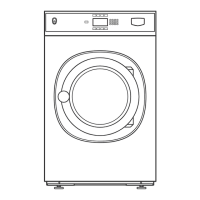
4. Remove handle by sliding it off the shaft.
NOTE: The handle has set screws that
press on springs inside the four channels.
Below the flat washer, in the center of the
handle, are four ball bearings. The springs
in the channels press the ball bearings into
notches in the center collar. The set screws
can be adjusted to provide proper tension
to latch and unlatch the door, but allow
the handle to ratchet around in the same
direction after it is latched or unlatched.
5. Pull the door handle shaft and spring out,
from of the inside of the door. The spring
has a hook on one end. The other end of
the spring is bent at a right angle.
6. To reinstall the spring place the hooked end
onto the shaft. The hook catches on a post
on the shaft.
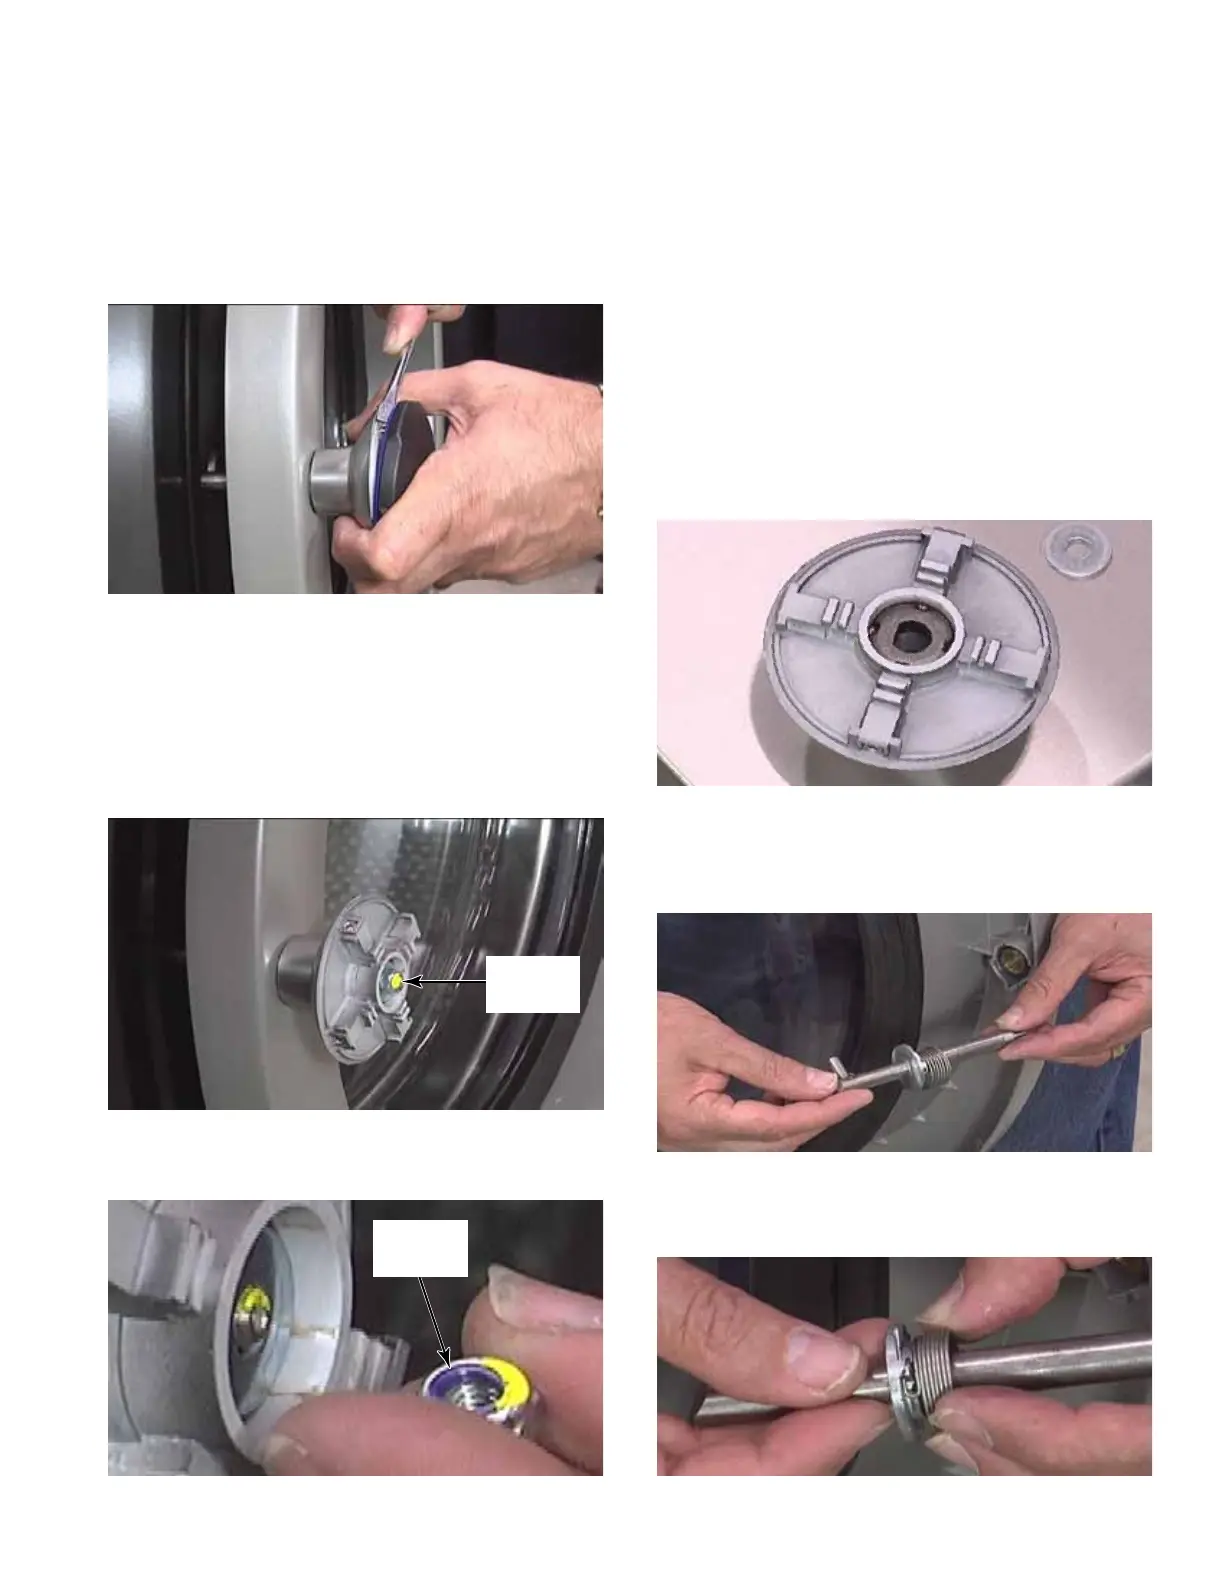
DOOR HANDLE
1. To access and service the door handle, use
a small flat blade screwdriver to pry the front
cover away from the handle.
2. The blue ring behind the cover has a ridge
on one side that sets into the ridge inside
the cover.
NOTE: There is a dab of thread lock on the
nut and bolt that secure the handle to the
door. Use non-permanent thread lock on
this bolt when reinstalling the nut.
3. Remove the 10mm nut from the center of
the handle. The nut has a nylon insert.
Thread
Lock
Nylon
Insert