3-47
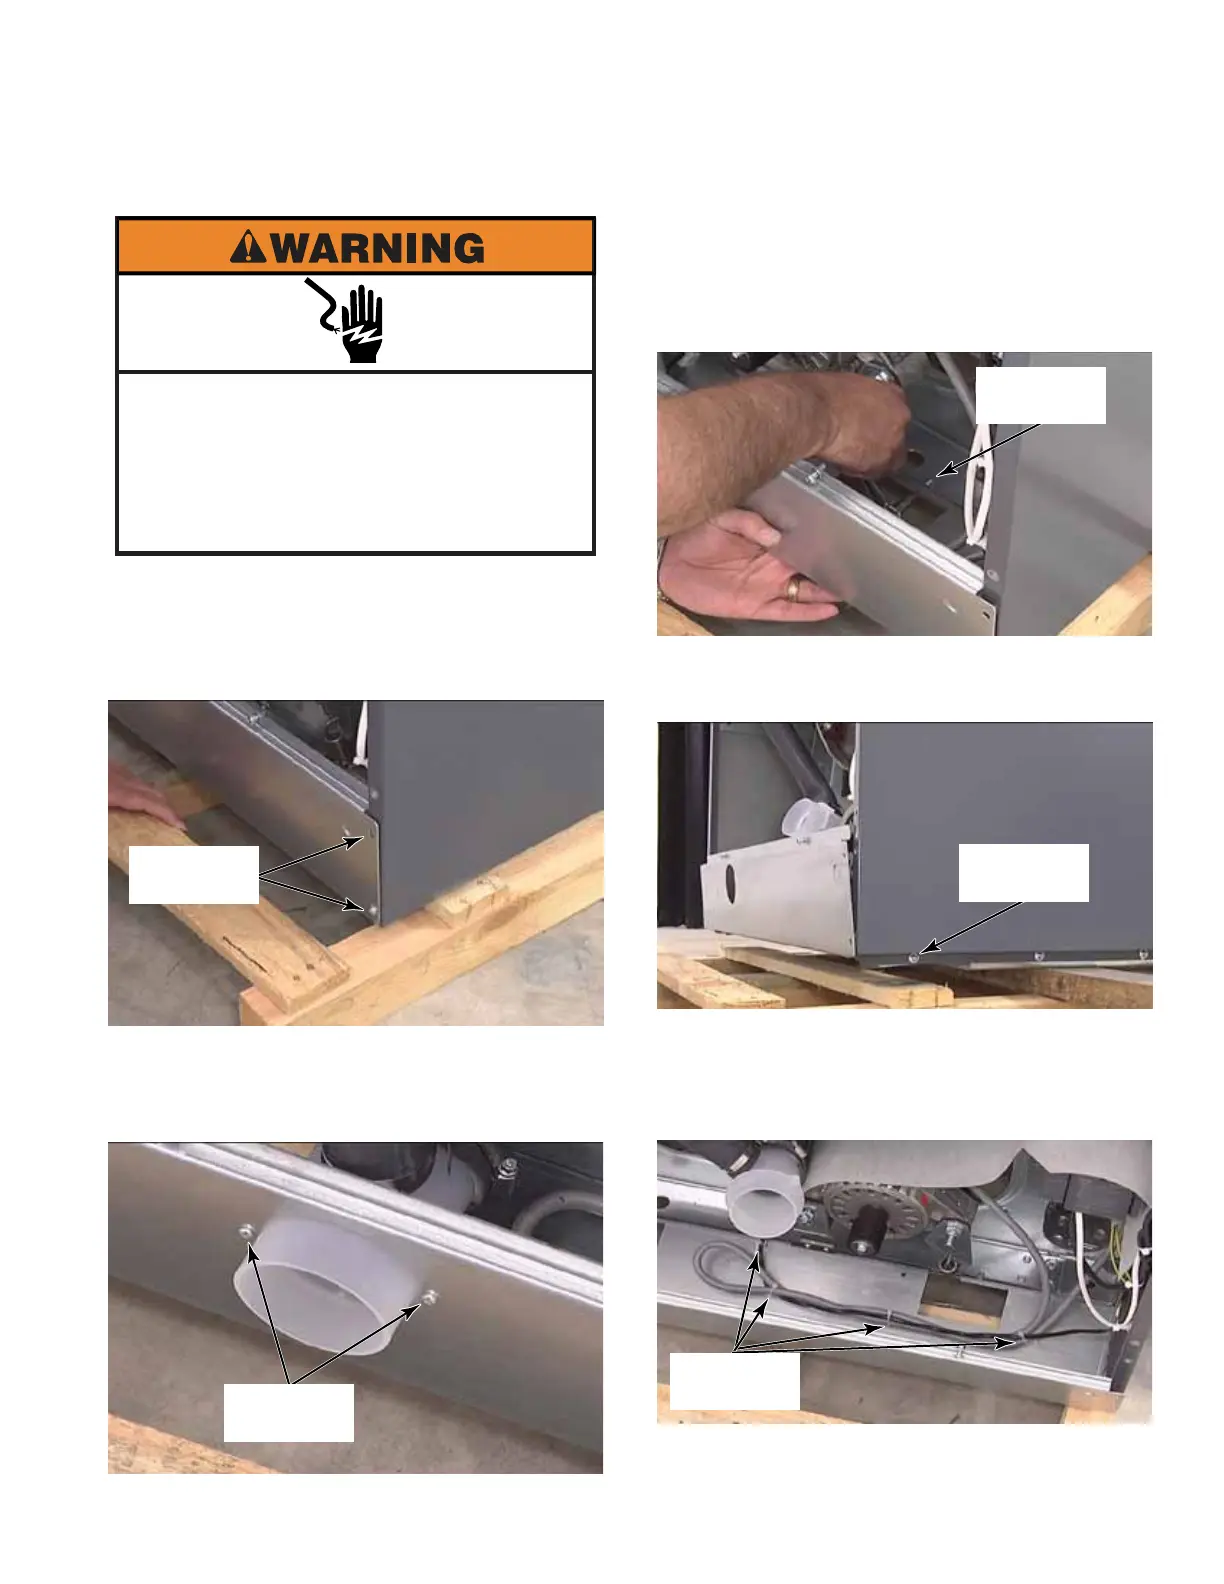
4. Remove two T-30 screws from the bottom
back edge of the panel. These screws may
need to be accessed from inside the back of
the washer. The bottom edge is inset under
the back edge of the washer.
5. Remove two T-30 screws from the back
side bottom edge of the washer.
6. Clip four wire ties that secure drive motor
cable to lower back panel. Do not clip the
standoffs, just the wire ties, or there will be
nothing to reinstall replacement wire ties to.
7. Remove lower back panel from washer.
1. Remove the back panel. (See page 3-46)
2. Remove two T-30 screws from each end of
the lower back panel.
3. Remove two T-20 screws that secure the
drain valve T fitting to the lower back panel.
Push the T fitting inside the washer.
Electrical Shock Hazard
Disconnect power before servicing.
Failure to do so can result in death or
electrical shock.
Replace all parts and panels before
operating.
LOWER BACK PANEL
Two T-30
Screws
Two T-20
Screws
T-30 Screw
Each Side
T-30 Screw
Each Side
Four Wire
Ties