Chapter 8 Dealing with Problems
165
7
Use to select [SENSOR OFS], then press the [ENTER/HOLD] key.
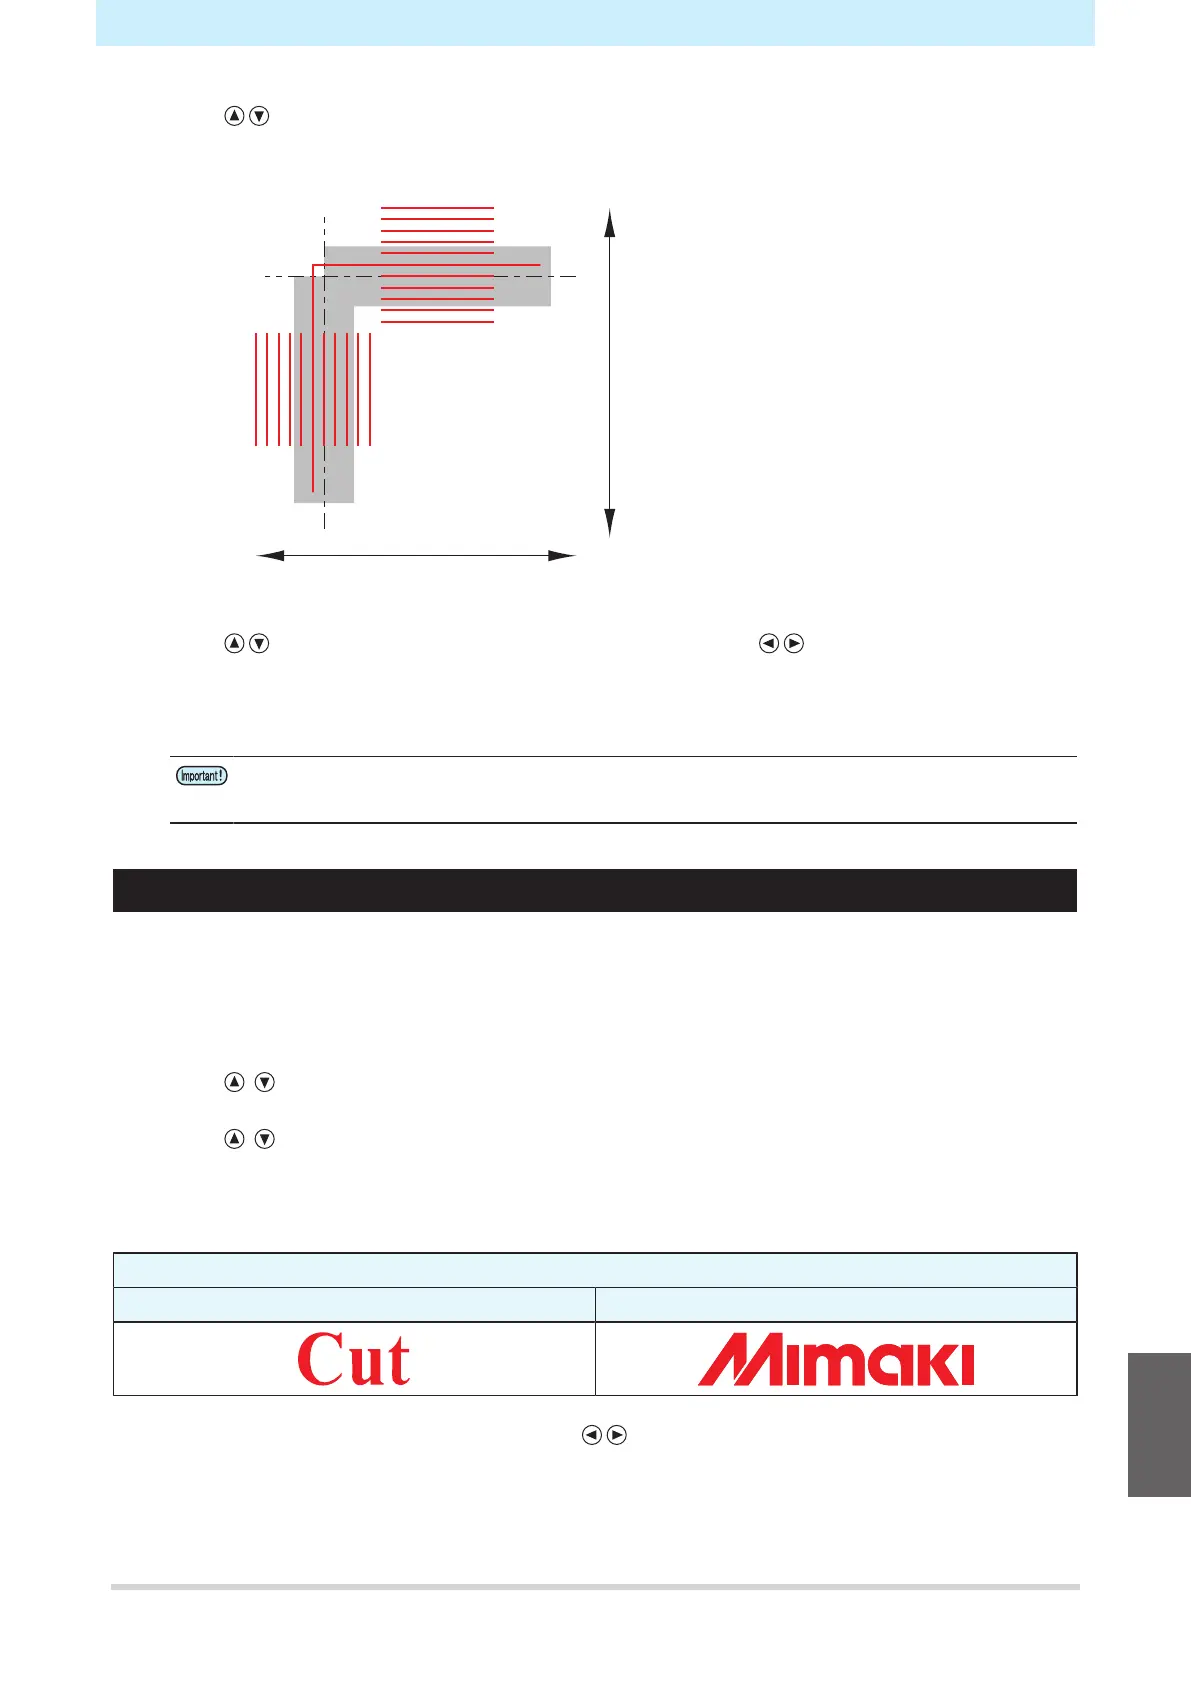
• After (one) register mark has been detected, auxiliary lines are cut for the register mark center
lines together with five auxiliary lines at 0.2 mm intervals on either side of the center lines.
B direction
A direction
+0.2 mm offset from register mark center
lines in both A and B directions
8
Use to enter the A direction correction value (mm) and to enter the B direction
correction value (mm), then press the [ENTER/HOLD] key.
• If the offset is +0.2 mm, enter "-0.2".
• The correction amount is saved and the system returns to local mode.
• The settings are retained even when the power is turned off.
• The sensor offset set using this operation will not be reset by [SETUP RESET].
Investigating the Cause of Cutting Failures
The machine cuts a sample stored in the unit to troubleshoot problems when data cannot be cut properly.
Executing a sample cut will clear any data saved in the receive buffer.
1
Press the [FUNCTION] key in local mode.
2
Use to select [SAMPLE CUT], then press the [ENTER/HOLD] key.
3
Use to select the sample data.
• There are two sample types: "Cut" and "Logo".
• If "Cut" is selected, proceed to Step 5.
Sample
Cut Logo
4
When cutting with "Logo" selected, press to specify the scaling factor (1 to 999 %).
5
Press the [ENTER/HOLD] key to start cutting.
• Cutting starts.
8

 Loading...