EasyManuals Logo

NEC Express5800 Series User Manual

NEC Express5800 Series
358 pages
To Next Page IconTo Next Page
To Previous Page IconTo Previous Page
Page #319 background imageLoading...
Page #319 background image
System Upgrade 8-7
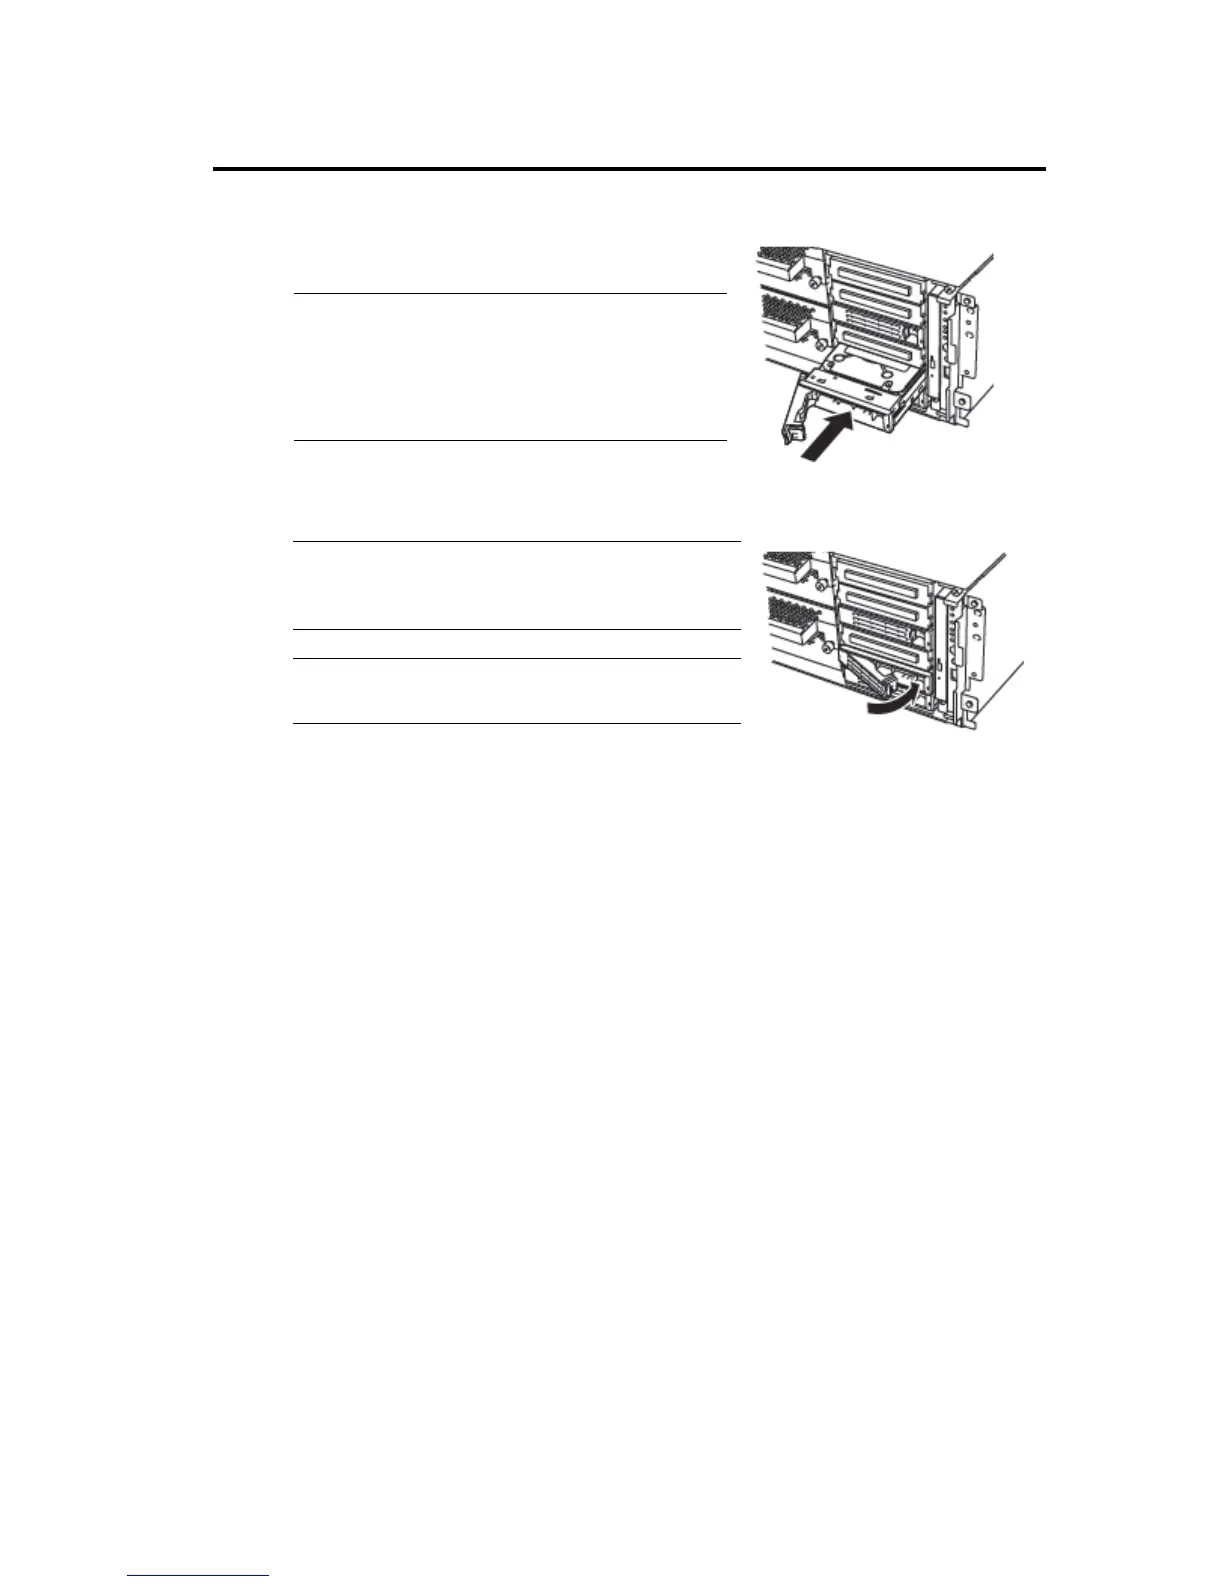
7. Firmly hold the handle of the hard disk to install and
insert the hard disk into the slot.
TIPS:
Insert the disk until the lever hook touches the
server frame.
Check the orientation of lever. Insert the hard
disk with the lever unlocked.
8. Slowly close the lever.
When the lever is locked, you will hear a click sound.
IMPORTANT:
Be careful not to pinch your finger(s) between the
lever and handle.
TIPS:
Check the hook of the lever is engaged with the frame.
9. Connect the power cord.
10. Press the POWER switch to power on.
11. <If you are using the tower model>
Close the front door and lock it with the security key.
<If you are using the rack model>
Install the front bezel and lock it with the security key.
12. See “RAID CONFIGURATION WHEN DISKS ARE ADDED” on page 8-10 to configure
RAID.

Table of Contents

Other manuals for NEC Express5800 Series

Questions and Answers:

Question and Answer IconNeed help?

Do you have a question about the NEC Express5800 Series and is the answer not in the manual?

NEC Express5800 Series Specifications

General IconGeneral
SeriesExpress5800
CategoryServer
ProcessorIntel Xeon processors
NetworkGigabit Ethernet, 10 Gigabit Ethernet (Varies by model)
Operating System SupportWindows Server, Linux variants
Form FactorTower, Rackmount (1U, 2U, etc. - varies by model)
MemoryDDR4 ECC DIMM (Capacity varies by model)
StorageSAS/SATA HDD/SSD, NVMe SSD (Configuration varies by model)

Related product manuals