8-6 System Upgrade
Installing 3.5-inch Hard Disk Drive
Follow the procedure below to install the hard disk. A hard disk may be installed in another slot in the
same procedure.
IMPORTANT:
Make sure to read "ANTI-STATIC MEASURES" and "PREPARING YOUR SYSTEM FOR
UPGRADE" before starting installing or removing options.
1. Click [Start] - [Administrative Tools] - [Computer Management]. The [Computer Management]
window appears.
2. Click [Disk Management] under [Storage] in the console tree.
3. <If you are using the tower model>
Unlock the front door lock with the security key and open the front door.
<If you are using the rack model>
Unlock the front bezel with the security key and detach it.
4. Identify the slot to which you want to install the hard disk.
Install a hard disk in an empty slot in the group, starting from the lower slot. (In the order of slot
0, slot 3, slot 1, slot 4, slot 2, and slot 5)
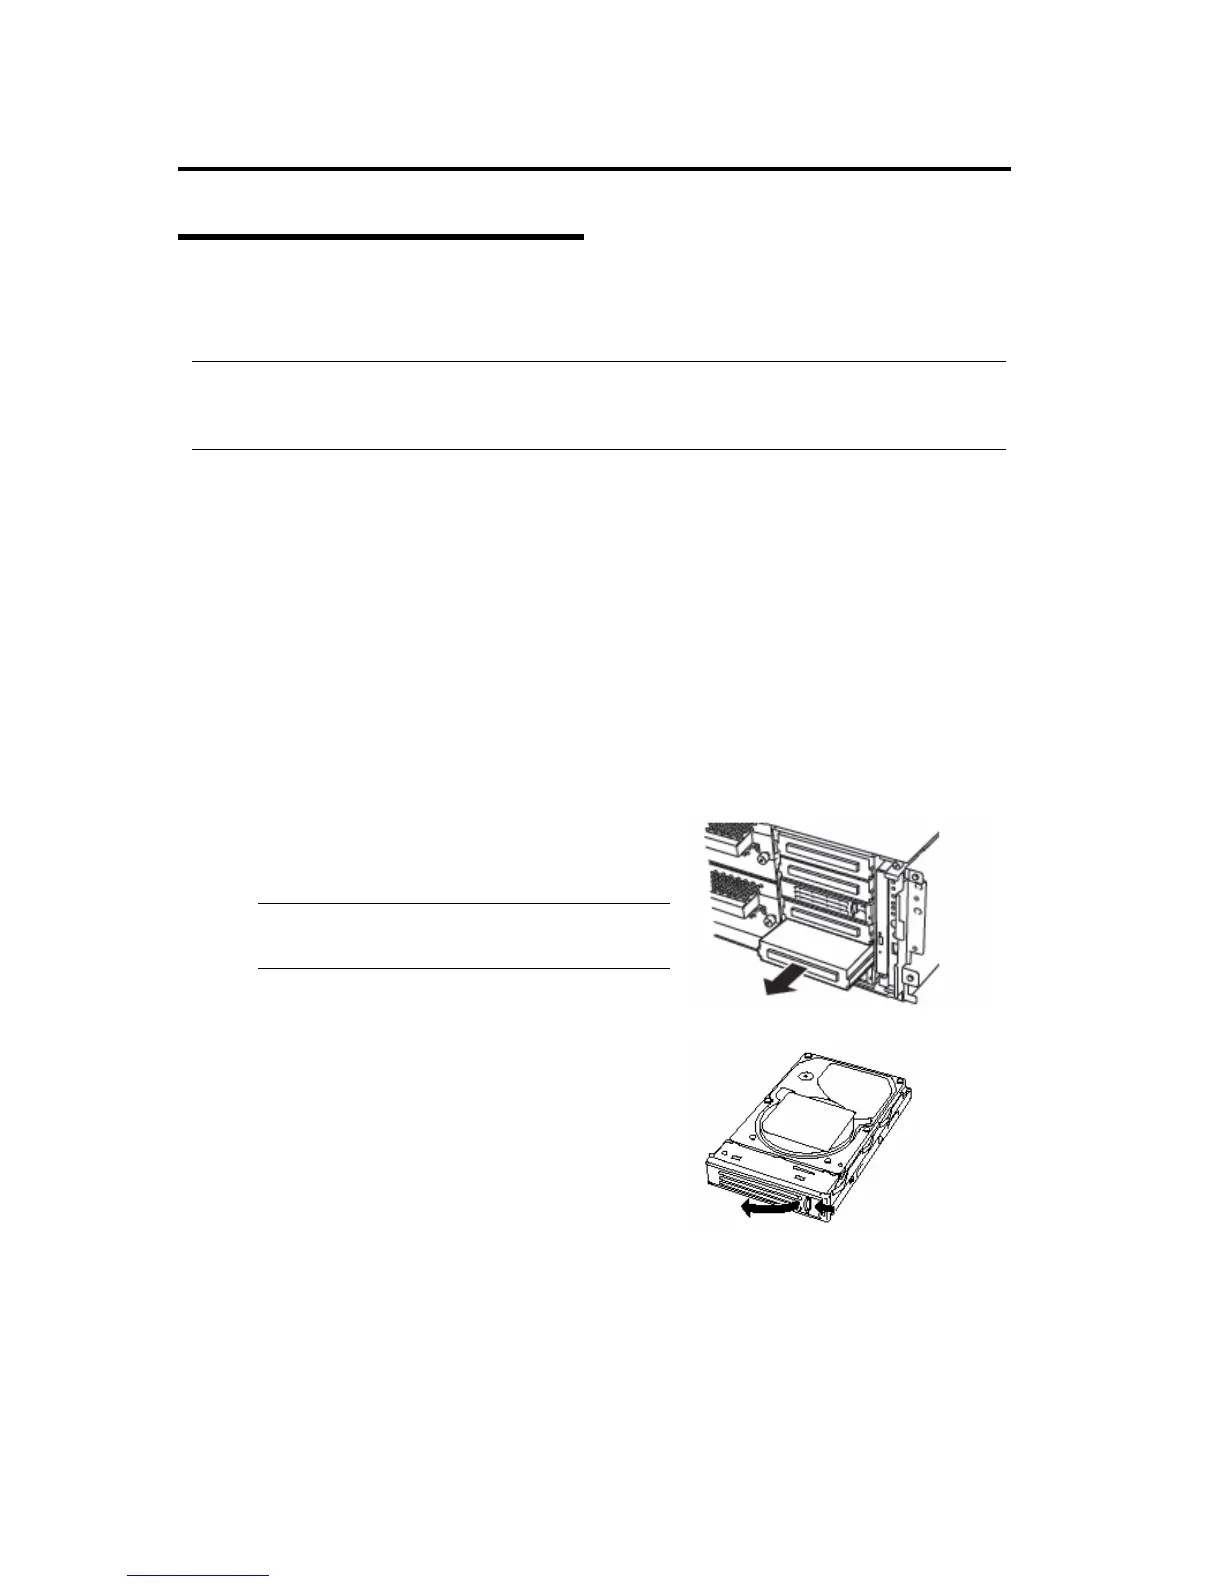
5. Hold the handle of the dummy tray to remove the
tray. 㩷
IMPORTANT:
Keep and store the dummy tray with care.
6. Unlock the hard disk to be added.
 Loading...