the priority for an attached device so that it receives a different treatment in the AP
network.
To change the priority for an attached device:
1.
Connect your computer or mobile device to the AP in one of the following ways
•
Connect directly to the AP’s WiFi network or LAN. (Applies to the AP in either
operation mode.)
•
Connect to the same network that the AP is connected to. (Applies only if the AP
is operating in AP mode.)
2.
Launch a web browser and enter http://www.routerlogin.net in the address field.
Instead, if you are connected to same network as the AP, enter the LAN IP address
that is assigned to the AP. For information about finding the IP address, see Find the
IP address of the AP when you cannot use routerlogin.net on page 32.
A login window displays.
If your browser displays a security warning, dismiss the warning. For more information,
see Dismiss a browser security warning on page 38.
3. Enter the AP local device password.
The local device password is the one that you specified. The local device password
is case-sensitive.
The BASIC Home page displays.
4. Select BASIC > Attached Devices.
The Attached Devices page displays.
5.
Select the radio button for the device for which you want to change the priority.
6. Click the Edit button.
The Edit Device page displays.
7.
Select one of the following Device Priority buttons: Highest, High, Medium, or Low.
Note: For information about changing display settings for the device, see Display
the devices currently on the AP network and change device information on page
158.
8. Click the Apply button.
Your settings are saved.
User Manual112Optimize Performance
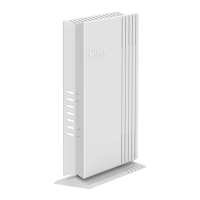
WiFi 6 AX1800 Dual Band Wireless Access Point WAX204
 Loading...