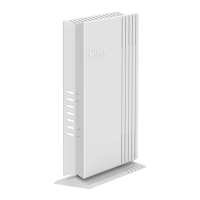
Wall-mount the AP
Wall-mounting holes are on the bottom of the AP. The distance between the holes is
4.125 in. (105 mm), center-to-center.
We recommend that you use M3 type screws, with a length of 0.75 inch (U.S.) or 20 mm
(European).
To wall-mount the AP:
1. As an option, create a template:
a.
Place a piece of white paper on the bottom of the AP, covering the wall-mounting
holes.
b. Use a pencil to gently scratch around the mounting hole areas.
c. Tape the paper onto the wall where you want to mount the AP.
2. Drill holes in the wall where you want to mount the AP.
If you created a template, drill the mounting holes at the center of the template
circles.
The distance between the holes in the wall must be 4.125 in. (105 mm).
3. Insert wall anchors in the holes.
4.
Insert screws into the wall anchors, leaving 3/16 in (0.5 cm) of each screw exposed.
5. Align the AP’s wall-mounting holes with the screws and mount the AP so that the
antennas are at the top.
6. Slide down the AP into lock position.
User Manual249Wall-Mounting
WiFi 6 AX1800 Dual Band Wireless Access Point WAX204
 Loading...